Using an Immediate Function to Create a Global JavaScript Variable That Has Private Scope

JavaScript

JavaScript LogoKeeping the global namespace clean is a good idea. Immediate functions allow the JavaScript programmer to do so with a great deal of power.

In a previous post, we discussed the topic of the JavaScript Immediate Function. Now let’s re-visit this topic with a focus on creating a private scope with which we can interact.

Most JavaScript programmers know that you can create an object, and then extend that object by simply assigning a new property to it. In fact, you can even do so at run time. Well, this is all very nice, but as you do so, these new properties are public. Which means, of course, that they are accessible to anyone and mutable at any time. So, while this can have it’s uses, there is a downside, because any line of code has access to these properties and can change them. Sometimes, that can get messy.

Example # 1

In Example # 1, we created a global variable named “foo”. We then added two properties to it: “name” and “say”. There is no reason why at a later point in our code, we couldn’t intentionally (or even worse, accidentally) do the following:  foo.name = “marge”. If this is intentional, no problem, but if it is done by accident, it creates cases that become frustrating to debug and manage. So, obviously, what we need is a way to store values inside of foo that have a clearly defined interface for retrieval and mutation.

Example # 2

{ var _name = “bart”; var MyConstructor = function(){ this.getName = function(){ return _name; }; this.setName = function(newName){ _name = newName; }; } return new MyConstructor(); })(); console.log( foo.getName() ); console.log( foo.setName( “simpson” ) ); console.log( foo.getName() );

In Example # 2, we have drastically altered our global variable so that it is an immediate function. Inside of that immediate function, we have a private variable called “_name”. We return an instance of our constructor function, which allows us to use the “this” keyword to create privileged members. These two functions allow us to set, and get the value of name. If you paste Example # 2 in your JavaScript console, and run it, you will see that the value of our private variable “_name” changes over the course of the two “get” statements. This is because in between these two get statements, we use the “setName” method to change the value of that private variable.

Summary

The JavaScript immediate function can be used to create a global variable that has its own private scope. This is useful when creating functionality that requires storing data for the life of the page and managing access to that data.

Helpful links for Immediate Functions in JavaScript

http://dreaminginjavascript.wordpress.com/2008/07/03/immediate-execution/

http://lostechies.com/derickbailey/2011/12/04/achieving-block-scope-with-immediate-functions-in-javascript/

http://www.jameswiseman.com/blog/2011/02/17/jslint-messages-wrap-an-immediate-function-invocation-in-parentheses/

http://www.jspatterns.com/self-executing-functions/


Understanding the difference between null and undefined in JavaScript

JavaScript

JavaScript LogoIt is quite common to confuse null and undefined, but there is an important difference between them.

null

Simply put, null is a JavaScript keyword that indicates the absence of a value. Surprisingly, if you run the following in your firebug console:  console.log( typeof null ), you will see “object”. Don’t be fooled though. This object is not mutable, has no properties, and there is at all times only one instance of it. It simply evaluates to “no value”. Although, this is a perfectly valid value in JavaScript. If you want to strip a variable of any value, assign it to “null”.

Example # 1

In Example # 1,  we created an object called “foo”. The console.log statements demonstrate the odd, yet perfectly valid behavior of “null”. At first, the type of foo is “object”. After we assign foo to null, it is still an “object” type, yet when we console.log the value of foo, it is simply “null”.

undefined

In JavaScript, “undefined” is a global variable (a property of the global object), that is created at run time. This global variable represents something  that has not been initialized. It also represents an object property or array index that does not exist. Also, when you do not supply an argument for a function parameter, it will have the value of “undefined”. Furthermore, when a function does not return a value, it returns “undefined”. Have you ever wondered why sometimes when you execute a function in the FireBug console, you see “undefined” in the console? That is because while your function may actually do something wonderful, if it does not explicitly return a value, then it returns “undefined”.

Example # 2

In Example # 2, when we attempt to determine what type “undefined” is, we are told that it is of the type “undefined”.  Hence, there is only one instance of the “undefined” value, and it has the value of “undefined” (do you have a headache yet?). In the second line, we attempt to output the value of foo to the console, but we get a “ReferenceError”. This is because while asking what the type of an undeclared variable is does not harm anyone (it is the type “undefined”), attempting to access that variable causes an error because it essentially does not exist. But, if we assigned foo to “null”, and then tried to access it, no problem. This is because if we assign foo to “null”, it has a value, and that value is “null” (i.e. “no value”). But when something evaluates to “undefined”, it does not exist.

Summary

In JavaScript, “null” and “undefined” have different meanings. While “null” is a special keyword that indicates an absence of value, “undefined” means “it does not exist”.

Helpful links for JavaScript “null” and “undefined”

http://saladwithsteve.com/2008/02/javascript-undefined-vs-null.html

http://weblogs.asp.net/bleroy/archive/2005/02/15/Three-common-mistakes-in-JavaScript-_2F00_-EcmaScript.aspx

http://sharkysoft.com/tutorials/jsa/content/045.html


Executing an Array of JavaScript Functions Using the shift() method

JavaScript

JavaScript Logo

Sometimes you have multiple JavaScript functions that you need to execute in a specific order, but do not know the details ahead of time

Both jQuery and Dojo offer their own flavor of “Deferred” functionality. This is a pretty deep topic that, while a bit challenging, offers tremendous power with respect to queuing up an invocation of multiple functions in an orderly manner. One concept that plays into this way of thinking is using the JavaScript array object’s shift() method. It easily fires off some functions in order, even when you don’t know ahead of time how many there will be.

Example # 1

var b = function(){ console.log(“this is function: b”) } var c = function(){ console.log(“this is function: c”) } var foo = [a,b,c]; while (foo.length){ foo.shift().call(); }

In example # 1, we define three functions. Then, we build an array with each element being a reference to one of our functions.  Now, using a while loop, we call each function. There is a cool interplay going on here. For the while loop, as long as foo has length (that is as long as the length of foo does not return a “falsy” value, such as zero), the loop will run. Inside the loop, the JavaScript shift() method not only removes the first element from the array, it also returns that element. So, we chain onto that return value, which is the function itself, and use the JavaScript .call() method, to actually invoke the function. With each iteration of the while loop, the array looses an element. It therefore becomes smaller and smaller until finally,  “foo.length” returns zero, which is “falsy,” and the loop no longer runs.

The end result here is that you can have a list of functions that you can execute, one at a time, in a specified order, and each function runs only once.  A much more practical use for this technique is when you are adding methods to the array (i.e. our “queue”), at run time. You don’t know how many you might add, or what they might do, but you know that you can line ’em up, and fire ’em off!

Summary

Because so much of what the Front End Web Developer deals with happens in the life of a page, there are many circumstances in which you are not sure how many of something will come along. But if you are able to get your hands around such dynamic events, you can handle some pretty cools scenarios. Invoking an unknown number of functions at runtime is such a case. This technique provides a fairly simple way to implement this approach.

Helpful links for the JavaScript Array Object’s shift() Method

http://www.w3schools.com/js/js_obj_array.asp

https://developer.mozilla.org/en/JavaScript/Reference/Global_Objects/Array/shift

http://www.bennadel.com/blog/1796-Javascript-Array-Methods-Unshift-Shift-Push-And-Pop-.htm

http://freewebdesigntutorials.com/javaScriptTutorials/jsArrayObject/shiftMethod.htm


Building Dynamic HTML Markup with JavaScript – the Basics

JavaScript

JavaScript LogoWhen you need to iterate over a data set, and build markup using its elements, there are a few techniques that make this a snap

Sometimes you may need to build markup and insert it into the page, but perhaps you do not know what that markup will be. Actually, you would probably know most of what will happen: you have some markup that needs to be repeated one or more times, and in each iteration, the text in certain elements will change. A typical scenario is one in which you have multiple records in a data set, and you need to create a series of elements that will be similar, but each row in the data set will have it’s own copy of the markup and display its values. Same markup, but unique values with each iteration.

Example # 1


In Example # 1, we first created our data set (the variable “arr”), which is a JavaScript array. Each element of the array is an object literal, containing three fields. We then proceed to loop through all the elements of the array and for each one, we create a form. In each form, we mix the markup (which is the same with each iteration), but mix in the values from the data set so that when finished, each element in our data set has its own HTML form (think of it as rows in a table or records in a database). When we are finished creating the markup, we simply use the jQuery .html() method to insert our markup into the DOM, using the ID of a specific HTML element.

Two Quick Notes:

Variable Declarations – When declaring multiple variables, keep in mind that you can do so with one “var” statement, and separate each variable name with a comma. This makes things a bit easier to read and some argue that it is faster.

String Concatenation – Instead of one insanely long string, you can use the “+” operator, and break your assignments into multiple lines. Although this is JavaScript, it makes it look a bit more like actual markup.

Summary

There are, of course, much more elegant ways to do this; John Resig’s JavaScript Micro-Templating technique is a cool example. And there are plenty of others out there.  Here, I’ve simply covered the basic concept of working with data, and creating HTML on the fly to present that data in the page, regardless of the amount of data, or values it contains.

Helpful links for building dynamic HTML markup with JavaScript

http://markalexanderbain.suite101.com/an-introduction-to-dynamic-html-with-javascript-a74777

http://www.scriptingmaster.com/javascript/outputting-dynamic-HTML.asp

http://stackoverflow.com/questions/6106402/php-vs-javascript-for-dynamic-html-pages

Super Easy HTML Video Support with LongTail Video’s JW Player and JavaScript

JavaScript

JavaScript LogoThis video player makes it simple to present video in your HTML page, and configure a wide array of options

While the new HTML5 video element brings much promise to the concept of full native browser support, it can still be a bit of an effort to provide cross-browser consistency. LongTail Video’s JW Player offers a way to implement some fall-back support and very cool customization. This little puppy does a great job of auto-detecting which method of playback is supported by the user’s device, and presents accordingly. There is support for both Flash and HTML5, skinning, plugins and a very robust API. At the bottom of this post are a few links that will more than get you started. I’ll simply highlight how easy it is to get JW Player up-and-running in your web page.

Example # 1

In example # 1, just to demonstrate that the most current version of JW Player works with a two-year-old version of jQuery, we pull in jQuery 1.4, and what would be a local copy of the jwplayer.js. With that done, we simply call the jwplayer() method, passing in the ID of the element within which we’d like the video player to run, and chain the return value to the JW Player .setup() method. We pass a configuration object to that method, and away we go! The only two requirements here are the jwplayer.js file and the player.swf file.

Example # 2

In example # 2, we added an “events” property to the configuration object, and to that property, we added an onReady method, which starts the video once the player is ready.

Example # 3

In example # 3 there is a code snippet that demonstrates the ability to remove a video from the page. JW Player takes care of all the DOM cleanup, including removing any bound events. You can add the video back in real-time by simply running the original function that appeared in the document.ready() method.

Summary

There is plenty (and I do mean plenty) to sink your teeth into here. I’ve only scratched the surface of the surface. If you are looking for a plugin that makes video support easy and offers tons of options, JW Player is a serious contender. Non-commercial use requires no payment and the commercial licence is very reasonable.

Helpful links forJW Player

http://www.longtailvideo.com/players/

http://www.longtailvideo.com/support/jw-player/jw-player-for-flash-v5/12540/javascript-api-reference

http://wordpress.org/extend/plugins/jw-player-plugin-for-wordpress/

jQuery Under the Hood with Paul Irish

jQuery

jQuery Logo

If you’ve never poked around inside of jQuery, you should. Paul’s videos are a great way to get started

I decided to ring in the new year with two of Paul Irish’s videos that I had book-marked, but had not gotten around to viewing: 10 Things I Learned from the jQuery Source and 11 More Things I Learned from the jQuery Source.

In these two videos, you have Paul’s screen, so that you can follow his code, and a small sub-screen of his head while he talks, so that you can follow his hilarious commentary and thought pattern. My only complaint: there is so much good stuff here to dive into that it takes an hour to watch a 30 minute video because of the constant temptation to hit “pause” and then fire up JSFiddle and play around with the concepts that he discusses.

10 Things I Learned from the jQuery Source – YouTube

In general, exploring the un-minified version of jQuery is just plain ol’ good sense. There is a tendency to simply use jQuery and treat it as some magic black box that “just works, and works great…” But the fact of the matter is, there is only one thing going on inside of that giant self-executing function: JavaScript. That is it.

Everything that jQuery does for you, you could have done for yourself… but, jQuery is better, stronger and faster than the average bear. Fair enough. But, that does not mean that we should not lift up the hood, poke around and learn from the code inside… because what is going on in there is pretty dammed cool. The jQuery folks do things in some very interesting ways and there are tons (and I do mean tons) of neat stuff to learn from.

11 More Things I Learned from the jQuery Source – YouTube

Highlights of Paul’s videos include a brief discussion of jQuery’s “no conflict” feature,  his decision to hijack the .ready() method, and a hilarious discussion of how jQuery detects the presence of Internet Explorer (and the technique used is just so brilliantly creative that I had to once again pause the video, copy the code while squinting at the YouTube page, and try it in notepad myself… it just works).

If you are a JavaScript developer, you owe it to yourself to check out these videos. Paul Irish is pretty funny, and he is one of the top web developers out there. This combination makes all of his videos a pleasure to watch (and most importantly, to learn from).

Writing Argument-Agnostic JavaScript Functions

JavaScript

JavaScript LogoThere is no need to tightly couple a function and the other function that might call it, by sweating the details of the arguments passed in. You can access the local “arguments” variable, examine it, and decide how to handle the situation

Somewhere, I still have the code from my first fairly serious JavaScript project. From time to time, I like to take it out and look it over. It’s riddled with functions that, while written in good spirit, clearly reveal my level of inexperience at the time. This is not something I am proud to discuss publicly, but it is the truth. And, I always tell myself that everything is relative; some day I will look back on code I wrote last week and recoil with the same horror. Programming is a never-ending learning process and while the initial learning curve is steep, the process never ends; we always strive to improve our skill set.

One of the things that really stood out in my mind was how many functions I wrote that looked something like this:

While I don’t think it’s completely insane that I would write a function that takes so many specific arguments, I’ve come to realize that this approach tightly couples the function with the other function that might call it. The reason I keep mentioning “…might” is that in many cases, we write functions that are probably called in the lifetime of the program, but as many JavaScript apps are event-driven, it is not unusual for events to sometimes not happen, which means that functions are sometimes not called.

The point here is that tightly-coupled functions are, of course, sometimes unavoidable, but to me, it always seems a shame to have to write a function that is tightly coupled to its caller, but may never be called. So, I started to think about decoupling these functions from each other as much as possible. Granted, a function like “updateRecord()” will likely only be called to… well… update a record, but we can make it a bit more generic so that we don’t have to worry so much about what arguments were passed in when we write our code. We can simply write the function as if all the arguments we need have been passed in, and then “handle” the corner cases where some arguments are missing. This also frees up the caller in that there is reduced stress, as well, from that end; the caller can pass-in all the expected arguments, some of them, or none of them. What happens in these cases is, of course, up to us, but it does not always have to be an “all or nothing” scenario.

 Example # 1

In Example # 1, we don’t assume any arguments are passed in. We first test to see if the local “arguments” variable has a length that is greater than 0. If it does, great; we can then do something with the arguments. Most likely, we will want to examine them and see if the ones we need are available.

It is important to note that the “arguments” variable is not a true JavaScript array. The subtle details of this are worthy of another post. But keep in mind, it is simply a local variable that is array-like, in that it is an indexed list that can be iterated over and it does have a “length” property.

 Example # 2

In Example # 2, we loop through all of the arguments. Inside the loop, we could examine each argument and see if it meets the needs of the function.

Example # 3

In Example # 3, we pass an object in as the argument to our “updateRecord()” function. What is helpful about this approach is that the “updateRecord()” function does not break or throw an un-handled exception if we pass in too many arguments, not enough arguments, or no arguments. The function simply covers the following:

  1. Were any arguments passed in?
  2. If more than zero arguments were passed in, let’s loop through each one
  3. On each loop, if the argument being examined is an object, let’s loop through its properties
  4. On each sub-loop, we can do something with each property

Granted, your function may be a bit useless unless the exact number of arguments are passed-in and they are named in some exact way. But, your function does not have to be completely useless. It can handle corner cases gracefully, return a useful error, or maybe even partially carry out its intended task. The assumption here is that you or someone on your team will write this function and the one that calls it, so in the end, you can implement your own logic to make this function useful, yet unbreakable.

Summary

This topic is more of a pattern than a specific implementation. I like to use it because I prefer to keep my functions as loosely coupled as possible. It may not always be possible to keep them 100% uncoupled, but I prefer a pattern in which I can pass a function the right, wrong, or partially right number of arguments, and that function can inspect what it gets and handle the situation gracefully. A big plus when passing in an object, is that you can at least not worry about the order of the arguments; you simply grab the passed-in object, and enumerate the properties. What you do with what you find is up to you.

Helpful links for the JavaScript arguments property

https://developer.mozilla.org/en/JavaScript/Reference/Functions_and_function_scope/arguments

http://javascript.info/tutorial/arguments

 http://stackoverflow.com/questions/5303003/best-use-of-the-arguments-property-in-javascript

Writing More Expressive and Readable jQuery Code with Method Chaining

jQuery

jQuery LogoYou can chain jQuery methods in a way that makes your code more readable, and allows you to be more expressive in the way that you traverse and manipulate DOM elements
Most of us are introduced to jQuery via the following scenario: when the user clicks an element, you want something to happen to that element. You Google the code, you copy the code, you edit the code so that it matches your DOM elements, it works, you are hooked, you add “jQuery” to your resume. An oft-told tale.

But, what about when the user clicks an element, and we want numerous thing to happen to elements that are in the neighborhood? Perhaps we want the parent element to turn blue, and then we want the <a> inside of the <span> that is a sibling to change it’s href attribute….etc. Sure, we can do all this using jQuery methods such as parent(), find() and end(). But the code starts to get a little verbose. One way in which we can write this kind of code in a slightly more elegant manner is by chaining method calls together. It makes the code more expressive and a little easier to read.

Example # 1

In example # 1, we query a specific selector, change its background color, use the parent() method to find the element’s parent, and then change the parent element’s background color to red. Pretty simple stuff. But, this code can be written better.

Example # 2 A

Example # 2 B

In example # 2 A, because $(this) returns a jQuery object, we can avoid further queries by simply “chaining” subsequent method calls. Chaining refers to using the return value of one method to kick off another method call, and so on. The concept is like that of a “chain reaction” in that one return value drives the call to the next method, and so on. In example # 2 B, we have the exact same code, but we break each of the “chained” methods calls to a new line, which makes the code even more expressive and easier to follow (comments have been added as well). JavaScript does not care about this white space, so you are free to organize your code in any way you like, which allows you to “express” your thoughts, or “logic” in a way that you feel works best.

This next example is a bit long, but what I wanted to accomplish was:

  • Provide full page markup so that you can copy the entire code, paste it into notepad and run the file, or use jsfiddle.net
  • Create an example where we chain methods together that walk up and then down the DOM, mutating multiple elements, without ever having to create another query

Example # 3


In example # 3, we use the jQuery parent(), find(), and end() methods to move up and then back down the DOM, mutating elements along the way, without ever having to write a second query. The next example is the exact same code, but heavily commented, to make it easier to follow-along.

Example # 4


In example # 4, we have the exact same code as example # 3, with comments added.

Summary

When a jQuery method returns a jQuery object, you can take advantage of that behavior by “chaning” subsequent method calls to the return value of the previous method. When using this approach, you can execute multiple DOM statements from the result of one query. The end result is code that is more expressive and easier to read.

Helpful links for chaining jQuery methods

http://ejohn.org/blog/ultra-chaining-with-jquery/

http://paulirish.com/2008/sequentially-chain-your-callbacks-in-jquery-two-ways/

http://forum.jquery.com/topic/jquery-method-chaining-returned-object-something-i-don-t-get

http://www.jquery-tutorial.net/introduction/method-chaining/


Book Review: Professional JavaScript for Web Developers 2nd Edition

JavaScript

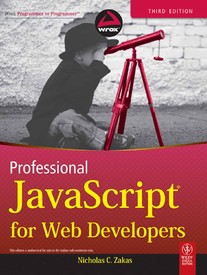
Professional JavaScript for Web Developers 2nd Edition CoverEven at nearly 3 years old, this book is surprisingly relevant and more importantly, it is an excellent resource for Front-End Web Developers

I came across Nicholas C. Zakas’ Professional JavaScript for Web Developers, 2nd Edition recently. As usual, my first instinct was to check the publication date; “hmmmm 2009… I was looking for something a little more current..” I flipped through a few pages, and the next thing I knew, a half-hour had flown by.

This title is an excellent resource for any front-end web developer who is new to JavaScript. While it does cover a few advanced topics such as Object-Oriented JavaScript, it does  a very nice job of discussing the language from the absolute basics, assuming no prior knowledge. Even if you are fairly familiar and comfortable with JavaScript, this book is time well spent. I particularly recommend it for those of you who feel a little out of place without the magic wand that is the jQuery dollar sign ($). Zakas leaves no stone un-turned with regards to native JavaScript DOM traversal and manipulation.

References to “….the new Internet Explorer ver 8…”” and a discussion of up-coming HTML5 features will feel a little out of date, but at the time of publication, the content was more than spot-on.

  • Title: Professional JavaScript for Web Developers, 2nd Edition
  • Author: Nicholas C. Zakas
  • Number of pages: 840
  • Publisher: Wrox
  • Published Date: January 14, 2009(2 edition)
  • Language: English
  • ISBN-10: 047022780X
  • ISBN-13: 978-0470227800

Summary

Professional JavaScript for Web Developers 2nd Edition by Nicholas C. Zakas is an exhaustive and comprehensive education in native JavaScript that is highly recommended. The writing style is easy-going and up-beat, and there is nothing left to the imagination.

Helpful links for Professional JavaScript for Web Developers 2nd Edition

http://www.amazon.com/Professional-JavaScript-Developers-Wrox-Programmer/dp/047022780X

http://www.wrox.com/WileyCDA/WroxTitle/Professional-JavaScript-for-Web-Developers.productCd-047022780X.html

http://www.wiley.com/WileyCDA/WileyTitle/productCd-1118026691.html


Lynda.com – An Excellent Resource for Online Web-Development Tutorials

JavaScript

Finally, an affordable and high-quality online training web site that allows Web Developers to learn at their own pace

In the past, whenever I have done a search for online video tutorials, I’ve usually been disappointed by what I found. Microsoft has some pretty good free tutorials, but of course, that covers only Microsoft Technologies, and mostly Microsoft Office, or their software development products. On a number of occasions, I was more than willing to spend money for a web site with tutorials that were well-produced and offered an acceptable menu of topics. Amazingly, I cannot remember too many sites I found that matched this kind of search.

And then, I somehow stumbled across lynda.com.

While I cannot remember how I came across lynda.com, I do remember my reaction after browsing the site for about an hour: I was impressed. The tutorials on lynda.com are well-produced and cover an excellent range of software-related topics.  Unlike some other software-education-related web sites, there are few tutorials that I found to be more than a few years old, and there is a strong focus on providing updated versions of topics that detail the most recent version of a software application.

For front-end web developers, this site is a particularly helpful resource. They offer a solid range of topics from core concepts such as HTML, CSS and JavaScript, to more advanced areas like Photoshp and jQyuery. There is also plenty of back-end web-development technologies covered such as PHP, MySQL and ASP.NET.

Cost: At $37.50 per month, their “Monthly Premium Subscription” is worth its weight in gold. I do not think you can find a more reasonable price for this kind of content.

Recommended Lynda.com tutorials:

HTML

XHTML and HTML Essential Training

Web Accessibility Principles

CSS

CSS Fundamentals

CSS for Developers

JavaScript

JavaScript Essential Training (2011)

Practical and Effective JavaScript

jQuery

jQuery Essential Training

Create an Interactive Photo Gallery with jQuery and Dreamweaver

PHP / MySQL

PHP with MySQL Essential Training

Installing Apache, MySQL, and PHP

PHP with MySQL Beyond the Basics

WordPress

WordPress 3 Essential Training

WordPress 3: Developing Secure Sites

WordPress: Creating Custom Widgets and Plugins with PHP

ASP.NET

ASP.NET Essential Training

Visual Studio 2010 Essential Training

Summary

lynda.com is a web site that has well-produced video tutorials, covering an impressive range of software technologies. While a number of technology profiles are serviced (i.e. designers, coders, business analysts, etc..), both front-end web development and back-end web development technologies are covered well. With regards to the bottom line, the cost of their membership is very reasonable. I am a customer and cannot recommend this product enough. If you are looking to improve your skill set in a software-based technology, there is a good chance that the topic you are looking for is included. You can browse the site and sample all of the videos for free before signing up. This is a no-brainer; lynda.com is an excellent resource for self-managed software training.

The JavaScript “for…in” Statement – Don’t Leave Home Without It

JavaScript

JavaScript LogoObjects in JavaScript are first class types that have become a critical component to modern front-end web development. The “for…in” statement allows you to fully examine any object at run-time<

Making objects, instantiating objects, and enjoying all the wonderful properties and methods that we baked into our objects is what advanced JavaScript is all about these days. Let’s face it… it’s hard to imagine a useful JavaScript-based application that does not, in some way, implement object oriented technology. The “for…in” statement is one of the most essential tools in our belt when it comes to introspection in JavaScript.

“Introspection” in JavaScript is the act of “looking into” an object, to discover what it has inside. The answer is: “properties and methods.” But, the thing is, you don’t always know the name of the object that you will want to “look into” or exactly when you will have to do it. Also, as we know, an object member can itself be an object, which has properties and methods, and one or more of those properties might be another object with its own properties and methods… or a method might return an object, that has properties and methods…. and so on.

So, add this all up and what you get is the need to “look into” an object without knowing anything about it. It may be an object that you did not create, so our introspection tool cannot look for a specific set of named members; it just has to be able to say:  “the object that you told me to look into contains the following properties and methods,” and based on the object that we fed to that tool, the answer can vary.

The JavaScript “for…in” loop is incredibly simple and equally powerful. With its basic syntax, we can easily say: “for each X in Y… do this…”. X is the object’s property and Y is the object. So, if I had an object named “foo”, I could say “for X in foo”. If foo had 5 properties, then the loop would run 5 times. In each iteration of the loop, “X” will represent the current property that is being “looked at”. To access the property name, simply refer to X (i.e. alert(x) ), and to access the property value, refer to object[x] (i.e. alert(foo[x]) ). The reason that we use the bracket notation, and not dot notation, is that dot notation requires a string literal (i.e. foo.name), whereas with bracket notation, we can place any valid expression inside the brackets, such as a variable (e.g. foo[X] ).

Now what follows this is the “loop”, which is a set of curly brackets. So, our syntax looks as follows:

Inside “the loop”, we can do whatever we like. Typical scenarios are to do something with either the property name (i.e. X) or the property value (i.e, foo[X]). Let’s look at an example of a JavaScript “for in” loop that does something.

Example # 1

The output for Example # 1 would be:

the value of color, is: blue
the value of name, is: fred
the value of say, is: function (){ return “this is the say function” }

In Example # 1, the object “foo” has three members: two properties and one method. So, the “loop” executes three times. In each case, we output the name of the member “prop” and the value of the member “foo[prop]”.

Hmmm… ok, but what if one of the members is a function? Can’t we do more than just output what the name of the function is?

Sure! Functions are meant to be executed, so let’s execute a function if we find one!

Example # 2

In Example # 2, we examine each property courtesy of the “typeof” operator. If the property currently being “looked at” is a function, we assign the value of the property (the actual function code) to a variable, and then execute that variable. The output of Exmple # 2 is:

the value of color, is: blue
the value of name, is: fred
we found a function, and here it comes: hello from is the say function

Summary

So, as you can see, the sky is pretty much the limit with regard to the JavaScript for…in statement. It’s a very powerful introspection tool, i.e., one that gives us the ability to examine the properties and methods that an object contains. The reason that this statement is so important is that you may not always know the name of the object that you want to “look into” or much about it at all. This means that the JavaScript for…in statement allows you to abstract away the details of the future object that you will want to examine, and just say: “whatever object I reference, find out what is inside that object and tell me all  about it!”

Helpful links for the JavaScript “for…in” statement

 http://www.w3schools.com/js/js_loop_for_in.asp

http://javascriptweblog.wordpress.com/2011/01/04/exploring-javascript-for-in-loops/

http://msdn.microsoft.com/en-us/library/55wb2d34(v=vs.94).aspx

How to return an object literal from a JavaScript constructor

JavaScript

JavaScript object LogoWhile it is easy enough to create an object literal, there are cases in which you may want to return one from a constructor. When doing so, you return an object literal that has added value.

Everyone knows that creating a JavaScript object literal is as simple as: var foo = {}. No problem at all. In fact, we can even add properties and methods to this object with such expressions as:

or…

While these approaches are both simple, there is a difference between an object literal and an instance of a class. For example, var foo = new Foo() is not quite the same thing as our previous var foo = {}. The question is, can we have it both ways? On the whole, the answer is: “Yes!

Because of the very expressive nature of JavaScript, what we return from a function is really up to us. So, if we want to have a constructor function that returns an object literal, we can literally (sorry : – ) just use the “return” statement, and put an object on the other side of that.

Example # 1 – Return a simple object

In example # 1, the bar variable becomes an instance of our Foo() constructor. As a result, bar is an object literal. When we run its say() method we get the expected output, and if we were to run the following command: console.log(bar.color), we would get “blue“. But there is really not much added value here. Of course we could have accomplished the same end result by simply saying var bar = {} and including the same exact properties and methods.

But there is, in-fact, great potential for some pretty serious added value here. For example, the difference between simply assigning an object literal to bar and returning an object literal from our Foo() class is that when we instantiate Foo(), we sill have access to the outer function. This closure provides a scope in which we can store private members, to be accessed later if we wish, which is very important.

Example # 2 – Return an object with a privileged method

In example # 2, we still return an object literal, and as a result, the resulting instance is just an object literal. The added value is that we also defined one private variable:  _acctNum. In fact, translates to a new level of functionality: the _acctNum variable is not available to the outside world. Therefore, we have complete control over how it is mutated. Here we have defined two methods _getAcctNum and _SetAcctNum. Therefore, these privileged members have access to our private variable _acctNum. So, most importantly, we can change or retrieve the value of _acctNum using these two privileged methods.

Finally, we can do the following:

Summary

The added value of returning an object literal from a constructor is that while you have a very simple hash table to work with as your instance, you also have access to private variables that were defined within the constructor. As a result, in this case, you can think of the returned value as bar = {}, but with added value.

Helpful Links about JavaScript Objects

http://www.w3schools.com/js/js_objects.asp

http://www.quirksmode.org/js/associative.html

http://www.javascriptkit.com/javatutors/oopjs.shtml

How to Show the Source Code of Another Web Page, in Your Page, using JavaScript

JavaScript

JavaScript LogoEveryone knows you can view the source code of any web page. But you can also use JavaScript to grab the source code of a different page, and show it in yours

If for some odd reason, you wanted to view the source code of another page without having to actually browse to that page and click “page view source,” you can use JavaScript to do so. In the example below, I use the “window.prompt()” function, to prompt the user for a web page whose source code they would like to see. That function returns the value of the input. We then use the “window.location” method to open up that URL in the browser, but we pre-pend the URL with ‘view-source:’, which achieves the same result as manually browsing to that page, and clicking:  “page view source”.

(Note: As of this writing, this only works in Chrome and FireFox)

As  you can see, the second argument to the window.prompt() method is the default text that we want to appear in the text box. But what if the user accidentally deletes “http://” or simply ignores it, entering something like “google.com”? No problem. We first use the JavaScript  “substring()” method to check to see if the first seven characters of the return value are:  “http://”. If so, great; we just use the return value as is. If it is not, we pre-pend that value with “http://”, and we are all set.

Example # 1:


Summary

There may not be too many scenarios in which you need to do this, but it is handy to know now. You never know if, down the road, you might need some kind of variation on this functionality.

Helpful Links

http://www.w3schools.com/jsref/obj_location.asp

http://www.w3schools.com/jsref/met_win_prompt.asp

http://www.w3schools.com/jsref/jsref_substring.asp

How to Include a Function as a JavaScript Object Literal Member

JavaScript

JavaScript LogoJavaScript object literals can contain not only properties, but methods too

Some may automatically think of a JavaScript object as a name / value pair scheme with flat members that are essentially just scalar values. Fortunately, this is not quite the case. An object literal can also include functions among its members. Those functions can do everything that any function would otherwise do; it just happens to be a member of an object. You define a function as an object member simply by assigning an anonymous function to the key, instead of the usual scalar value.

Example # 1:

The output for Example # 1 would be: “Hi, my name is: Don Draper, my address is: 123 E. Maple Ave., and I am 36, years old” The reason for this is that in addition to the properties we have defined, we define a member that is a reference to an anonymous function. That function takes two arguments: the current year and the year Don was born. It calculates Don’s age, and then returns the result.

Some might say: “Why not just declare a function and use it?” You can certainly do that, but as I have covered in previous posts, it is usually best practice to create name-spaced objects in order to keep the global space clutter free. When doing so, you can define your members within your object. And, one or more of those members can be a function. I can think of few circumstances when this is not a good idea. It makes your code more readable and easy to manage.

Summary

There are many useful things you can do when making a function a member of an object literal. This post simply covers the basics.

Helpful Links about JavaScript Objects

http://www.w3schools.com/js/js_objects.asp

http://www.quirksmode.org/js/associative.html

http://www.javascriptkit.com/javatutors/oopjs.shtml

Immediate Functions in JavaScript – The Basics

JavaScript

JavaScript LogoFunctions are a very powerful feature in JavaScript; they provide modularity and scope. The immediate function, WHICH offers a heightened level of functionality, is an often overlooked feature of JavaScript

An immediate function is one that executes as soon as it is defined. Creating an immediate function is simple: you add the open/close parentheses after the closing curly bracket, and then wrap the entire function in parentheses. That’s it!

Example # 1:

In Example # 1, we have a very simple function. If you were to paste this function into your code and run it, nothing would happen. This is because the function is assigned to a variable, and that is it. We have only the function declaration here, but we never call the function. But if you were to add the line “myFunc();” to this code and run it, the output would be: “I am a simple function”.

Example # 2:

In order to turn this function into an immediate function, we add the open/close parentheses after the closing curly bracket and then wrap the entire function in parentheses. After we do this, we run the code and whatever happens in that function is executed immediately after the function declaration is complete.

So the output for Example # 2 would be: hello, I am an immediate function

Example # 3:

In Example # 3, we first declare a variable called “myName” before declaring our function. When declaring our immediate function, we take one argument: “thisName”. At the end of the immediate function declaration, the open/close parentheses pass the variable “myName” to our immediate function. So, not only does this set of open/close parentheses execute the function, it also allows you to pass an argument to that function.

The output for Example # 3 would be: “hello, my name is: bart Simpson”

Summary:

In this article, we touched on what immediate functions in JavaScript are, how to construct one, and how to pass parameters into them. But immediate functions in JavaScript can get very deep, very quickly. There is a world of power and subtlety that is available to you via immediate functions. Since that is out of the scope of this post, however, it will be covered in more detail in later posts.

Helpful Links for JavaScript Immediate Functions

http://nandokakimoto.wordpress.com/2011/05/17/javascript-immetiate-object-initialization/

http://stackoverflow.com/questions/939386/javascript-immediate-function-invocation-syntax

http://dreaminginjavascript.wordpress.com/2008/07/03/immediate-execution/


How to Create a Custom Object with Public and Private Members

JavaScript

JavaScript LogoBy making a distinction between what members of your object will be accessible to the  outside world, you can enforce a much higher degree of control and avoid unpredictable behavior

In a previous post, I discussed how to create your own name-spaced JavaScript object. This is a highly recommended approach that keeps the global name space free of clutter and helps make your code easier to read and manage. When you create your own custom JavaScript object, by default, all members are public. This is generally not to your advantage. While wrapping all of your functionality in a custom object is a smart move, because all of its members are public, other code in the page that might be out of your control has full access to your object, which cold lead to problems.

Best practice is to make a clear distinction between which members of your object are public, and which members are private. The goal is to provide the absolute minimum access possible in order to allow your code to work as intended.  This is known as “Principle of least privilege” or “Principle of least authority” (POLA).

In some programming languages, there are reserved words that easily provide scope for object or class members, such as “private”, “public”, “static” or “protected”.  There is no built-in syntax that provides scope in JavaScript. Functions are the tool you use to provide scope and they do so very well. But because there is only one tool we have in-hand to create the desired scope for object members (or variables in general), there are a few techniques you need to use that allow you to use functions to create scope.

Example # 1:

The output for Example # 1 would be:  “My name is: Foo, My address is: 123 E. Bar St.”

This is not an optimal situation because all the members of our object are public. In order to create the desired scope, we can wrap all of the objects members in a function.

Example # 2:

The output for Example # 2 would be: “undefined, undefined”

While we have made progress by wrapping the members in a function to provide scope, we have created another problem because these members are no longer publicly accessible. By using “var” when declaring the variables, they remain local to the function (good), but un-available to the outside world. The way to correct this is to create a public member that has privileged access to these private members.

Example # 3:

The output for Example # 3 would be: “Foo, 123 E. Bar St.”

In Example # 3, the variable “obj” is set to the data member, inside of our object: “myObj”.  By using the “this” keyword, we expose the members “getMyName” and “getMyAddress” publicly. While “getMyName” and “getMyAddress” are public methods, the variables “myName” and “myAddress” are still local, which means that they are private and not available outside of the member “data”. But, and here is the part that makes all work, “getMyName” and “getMyAddress” have complete access to all the private members of “data”. So “getMyName” and “getMyAddress” can  return these private members, while they and anything else we want to protect, remain privately scoped.

Summary:

This is a very basic example, but the building blocks you need are all there. Creating a name-spaced global variable is a great approach that keeps the global name space clutter free. But, it is generally good practice to keep your object’s properties and methods private to whatever degree makes sense. Exposing the minimal number of members publicly is known as “Principle of  least privilege” or “Principle of least authority”. By taking this approach, you keep your code safe from harm, easier to manage and also keep a tight leash on the behavior of your application.

Helpful Links regarding public and private Object members in JavaScript

http://javascript.crockford.com/private.html

http://stackoverflow.com/questions/55611/javascript-private-methods

http://stackoverflow.com/questions/483213/javascript-private-member-on-prototype

http://en.wikipedia.org/wiki/Principle_of_least_privilege

What is the difference between GET and POST?

JavaScript

Depending on what you are trying to accomplish, GET and POST are used in different ways.

What is a GET?

In short, a GET is appended to the URL while a POST is embedded in the body of the request. Maybe from time to time, you have noticed something similar to this in your address bar: ?name=something&choice=something-else&category=something-more. This is a GET. Everything after the question mark is a query string. The page that processes this request strips out these values, parses them and acts upon them. The most notable thing here is that your request is public: it appears in the address bar of the browser.

A GET is very simple and easy to implement and parse, but it is 100% not secure. Also, each browser imposes its own limit on the length of an URL. There is no limit specified by a W3C RFC, but it is best to avoid depending on URLs that exceed 255 characters. So, there is a limit to how much data you can pass using a GET. Also you must take care in how you handle special characters. One advantage of a GET is that you could actually save the complete URL, including query string for later retrieval, or you could send that URL to a friend. At times, this can be useful.

What is a POST?

A POST is embedded in the actual body of the message. While not 100% secure, this is more secure than using a GET because the data passed does not appear in the address bar. Also, there is no limit to the amount of data passed. One downside to a POST request is that a page refresh looses the POST data and you cannot save or send a saved URL to a friend.

How to Create a Name-Spaced Object to Avoid Using Global Variables in JavaScript

JavaScript

JavaScript LogoThere are two ways to dynamically add an element to the end of a JavaScript array

Sometimes you may need variables that are available to every function in your script. While it is tempting to use global variables to achieve this kind of scope, doing so can cause unpredictable results and spaghetti code. If you create your own object, define your properties and methods, and then access them via a clean, name-spaced syntax, you control the scope as well as the code’s behavior.

Example # 1:

Here are a few examples of using global variables. In each case, it is very easy to lose track of the value of these variables throughout your script, as well as which functions have access to them.

You may want to access these variables from multiple functions in your code, and in various scenarios, change the value of those functions. This is certainly possible, but there are better ways to achieve the same functionality.

Example # 2:

In this example, we create a custom object called “bankClient”. We then define the properties of this object.

In this example, there are two ways that we could access these variables:

Example # 2A

  • object.property
  • object[‘property’]

Example # 2B

Either one of the above approaches will work just fine.

Example # 3:

You can also define a method for your object.  A method would be a function that you define within the object, and then call by using the same name-spaced syntax.  In the example below, we expand our object by adding a method. This method returns the value of the client account number.  You may notice the use of the “this” keyword. In such a case, “this” refers to the object who’s context we are currently in, which would be “bankClient”. This is something you’ll see often when working with objects in JavaScript.

That value is hard-coded in the object definition, but then  notice how we change the value of the property, and then retrieve it. In the same manner, the property “name” is at first empty, but we assign a value to it, and then grab that value (i.e. “Roger Sterling”).

The output for Example # 3 would be:

123456
Account # changed to: 111-222-333
Client Name: Roger Sterling

Summary:

Creating your own custom object is a good way to avoid cluttering up the global namespace. It is also an improved method of keeping tabs on your variables as they become properties of the object. You can define methods for your object and access them the same way. In doing this, you create organized code that’s easier to read, maintain, and extend.

Helpful Links about JavaScript Objects

http://www.w3schools.com/js/js_objects.asp

http://www.quirksmode.org/js/associative.html

http://www.javascriptkit.com/javatutors/oopjs.shtml

AJAX Can Have a Negative Impact on your SEO

JavaScript

You heard the term, you asked your front-end web developer to implement it on your site, and then you bragged to your peers at cocktail parties about it: AJAX. While the upside is in many cases, a more pleasant UX, there could be a negative impact on your SEO.

There are many different scenarios where one might implement AJAX, but one to watch out for is when you are delivering content that is pertinent to your page. Imagine this scenario:

  • You have a page that offers a brief yet useful description about each of the 50 US states
  • Instead of making users wait for a full page refresh, you have your front-end developer implement AJAX so that when the user selects a state, the brief description is fetched from the server and displayed. No page refresh, just a quick GET that returns the information.

The good news is: Your user has a better experience than one that would have to wait for 50 page refreshes if they wanted to know about every state.

The bad news is: Your content is not being indexed but any search engines.

If you are scratching your head, think about the scenario we described above. Each time the user selects a state, the data is fetched from the server via AJAX. This means that the requested content is not part of the page. Search bots do not understand or interact with AJAX, they simply scrape the page and index the content that is contained in the markup at their discretion.  This means that when a search bot arrives at your page, it never sees the 50 descriptions about the various states.  So, while you have created a richer UX, you are doing so at the price of your SEO, which has in theory, diminished.

Summary:

This is not the end of the world. It is simply a good dynamic to be aware of. There is a way to work around this. Inside of a set of <NOSCRIPT> tags, you could have the content that includes the brief descriptions on all 50 states. This way the search bots will see the content when indexing your page. Also, visitors who use screen readers will have access to that content as well. It’s a “best of both worlds” approach that allows you to continue creating a richer browsing experience for your visitors who have JavaScript enabled, but also cater to those who do not have JavaScript enabled, or use a screen reader, and also keep your SEO… well… “Optimized” !

Kevin Chisholm


High Performance Web Sites: Essential Knowledge for Front-End Engineers

JavaScript

High Performance Web Sites Essential Knowledge for Front-End Engineers By Steve Souders

This is a short book with a long title, but don’t let the number of pages fool you. This title packs a ton of useful information for font end web developers.

Steve Souders lays out his rules for high-performance websites and not a character is wasted. Inside these 14 rules are the street-smarts from which any front end developer can seriously benefit.  Some of these rules may be less newsworthy than others. For example, using CSS Sprites and making fewer HTTP GET requests may not be a complete revelation to some. But there are more high-performance techniques that you may not be aware of. There is particularly detailed coverage of Expires Headers and ETags, the surprising subtleties of which can greatly affect performance. Other notable areas of interest are reducing DNS lookups, minifying javascript and the advantages of CDNs.

An impressive aspect of this book is the use of graphic performance reports, with detailed explanations. Steve Souders does not just spew theory. In most cases, he uses the top 10 websites and performs speed tests using recent tools of the trade. In each case, there is an easy-to-understand graphic that makes it very simple to see how a particular website performs, with respect to component downloads and page rendering. With every graphic report there is a full play-by-play that leaves nothing to the imagination.

Summary: For even the most casual web developer, this knowledge truly is essential.

  • Title: High Performance Web Sites: Essential Knowledge for Front-End Engineers
  • Author: Steve Souders
  • Number of pages: 176
  • Publisher: O’Reilly Media
  • Published Date: September 18, 2007 (1st edition)
  • Language: English
  • ISBN-10: 9780596529307
  • ISBN-13: 978-0596529307