jQuery getScript Alternatives

JavaScript

jQuery getScript alternativesjQuery is aweseome, and the getScript even more so. But, consider some jQuery getScript alternatives in case you have to load a script file asynchronously without any help.

Today we’re going to talk about some jQuery getScript alternatives that you can use in your code. The jQuery getScript() allows you to get and execute external JavaScripts utilizing a type of AJAX HTTP GET request. Get requests can get any response, including JavaScripts, XML, and HTML, while getScript is limited to JavaScripts. The getScript method dynamically executes external JavaScript while Get receives data according to parameters.

The jQuery getScript Good

The Jquery getScript alternatives method is an extremely efficient way to load external code into your program at runtime. It allows us to write a piece of code once and use it in an unlimited amount of applications. We can also use code written by others in this way, and there is a vast amount of code snippets already available for you to use. If you are doing something common, like working with a form, you may not need to write any new code at all.

The jQuery getScript Bad

Unfortunately, any time you use external scripts, you will experience a slowdown as the program waits for the information to fetch. If you are using a code with a lot of external scripts, you will experience a reduced execution speed, especially if there are a lot of images loading as well.

You also need to load the jQuery library before you can access the getScript method. This extensive library will also slow down your code slightly, as it requires a download of a little under 250kb, depending on which version you are using.

The jQuery getScript Alternatives

Sometimes the code we are working on is not significant enough to warrant loading the entire jQuery library to access one or two external files, and in that case, we will need an alternative.

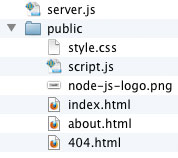
Let’s go step-by-step to arrive at a few Javascript getScript alternatives. We have created an object called myData, which has three properties. The properties of myData are FOO, BAR, and BAZ. We have placed this object in an external file at https://bit.ly/get-script-example, along with a console warning that tells us if we have successfully loaded the script. Let’s try to access this object from our code.

Example 1

In Example 1, we are asking the console to print out the properties of the object myData, but since we never tell the console where to find the object, the process fails and returns the error myData is not defined.

Example 2

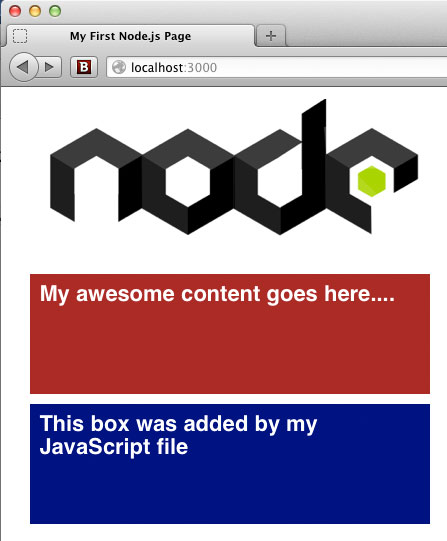
In Example 2, we show you how we would typically access the myData object in the external file by using a jQuery getScript. You can see in this example that we first tell the code where to find the file.

As the file is downloading, it will come across the javaScript console warning and immediately print it to the screen. When it’s done loading, we use console.log to output the message that it has finished, and we use console.dir to display the properties of the object myData to the screen.

Example 3

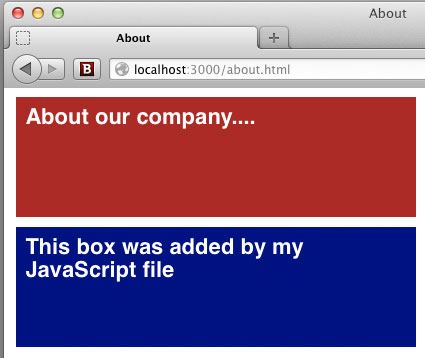
In Example 3, we can see how to create a getScript function from scratch and eliminate the need for jQuery. The getScript function that we are creating takes two parameters, scriptUrl and callback.

We enter the scriptUrl directly as https://bit.ly/get-script-example, but our callback is going to be another function called onScriptLoad. The onScriptLoad function takes care of using the console to let us know that the script has loaded and to show us the properties of the myData object we saw in the last example.

Here’s what’s happening:

  • The getScript function creates a new script document element.
  • It assigns scriptUrl https://bit.ly/get-script-example as the source of the script and downloads the contents into the constant named script.
  • When the script named script finishes loading it calls the callback function onScriptLoad.
  • The onScriptLoad function uses console.log to tell us the script is loaded.
  • The onScriptLoad function uses console.dir to tell us the properties of myData.

Example 4

In Example 4, we show you two more ways to do pretty much the same thing we do in Example 3, but in a more precise way.

Example 4a

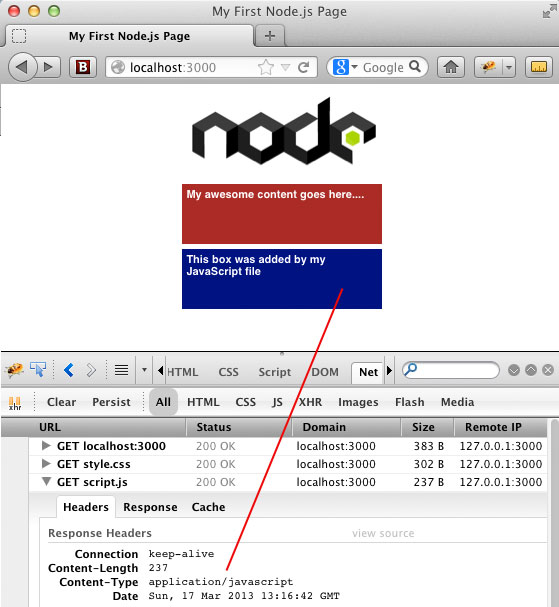
In the first part of this example, we show we can use an anonymous function as our call back instead of creating a separate named function for the task. This method allows us to embed the anonymous function in the calling statement and use one function and the calling statement instead of two functions and a calling statement. Fewer functions save us a bit of typing, and your code will be a little bit easier to read and follow.

Example 4b

In the second part of the example, we use an arrow function to take the place of the anonymous function and reduce the amount of typing necessary even further. This method is the preferred way to accomplish loading external scripts in most cases that do not use jQuery.

Conclusion

As you can see, you are not limited to using jQuery for loading external scripts into your program. In most cases, jQuery will be the answer because there is so much more you can do with it, and you are likely to take advantage of the library in many ways if you are developing a website or application. If you are doing something small, though, and there is no reason to load the library, you can take advantage of these examples to avoid using the library.

We hope that you have enjoyed reading over these examples and have learned something new. If these examples have improved your understanding and your coding skills, please share these jQuery getScript alternatives on Facebook and Twitter.

How to test HTTP POST with the Node.js request Module

Node.js

Node.js Logo - test HTTP POSTTesting HTTP POST requests is usually tedious. Bit with a few lines of JavaScript, you can spin-up your own HTTP POST testing tool.

In web development, GET and POST requests are quite common. GET requests are the ones more frequently seen, and in fact, when you load most web pages, the majority of the requests that make up what you see in the page are GET requests. For example, you request the initial HTML file, CSS files, JavaScript files and images. But sometimes, you need to make a POST request.

Making a GET request is easy, as is testing one. Testing a POST request is not always so simple, though, because the HTTP request body must include the data you want to send. One approach is to create a simple HTML page with a form. The problem here is that you need to create an input element for each data property that you want to send in the POST request, which can be tedious for a simple test. But then there’s Node.js, which can be leveraged to solve this problem.

In this article, we will see how a small JavaScript file can make an HTTP POST request. Now this approach may not be appropriate for use in a production application, but the idea behind this article is to point out that any time you need to test a POST endpoint, you can set up a quick test using Node.js.

Get the example code from GitHub

If you clone this repo: github.com/kevinchisholm/video-code-examples/tree/master/node/testing-http-post-with-request-module, you can clone the example code locally and edit the code yourself.

package.json

The package.json for this project contains references to the modules needed. We’re using the request module, the body-parser module, and the express module.

Example # 1 – The Web Server

In Example # 1, we have the server code. (Creating the server code is not the focus of this article, but it’s still good to review.) We need the express module and the body-parser module, and once we’ve set the references to those, we set up the POST route. So, when the user sends an HTTP POST request to /form, our code will handle this request. The requestAsJson variable allows us to set up the round-trip – that is, the exact same data from the POST request that we return to the user as JSON. We then set the Content-Type header to be application/json so that the HTTP header will be correct. Note the “log the output” comment; this is just for demonstration purposes. We then send the response using the res.end method.

Example # 2 – Testing the POST Request

In Example # 2, we have the test client, which is the focus of the article. We want an easy way to test POST requests, so instead of mocking up an HTML page with a form, we can use the file test-post.js to test an HTTP POST request. We set a reference to the request module, and no other module is needed in this file.

The postData variable is an object containing the data for the HTTP POST request. The postConfig variable contains the URL for the HTTP POST request, and a reference to the postData variable. The postSuccessHandler variable is a success handler for the HTTP POST request. Inside of that success handler, you can see a console.log statement, which completes the proof of concept. Whatever data sent for the HTTP POST request should be output in that console.log statement.

<h2>How to test the example code</h2>

Open two terminal windows (terminal A and terminal B), and make sure that you are in the root of the repository folder. In terminal A, execute this command: node post-server.js. In terminal B, execute this command: node test-post.js. In terminal A, you should see the message: The POST data received was XXX. In terminal A, you should see the message: JSON response from the server: XXX. (In each case, XXX represents the data from the HTTP POST request).

NOTE: Go ahead and change the properties of the postData object. You can create more properties if you wish. No matter what you do, you can see the data that you set in that object in the two console.log statements.

Node.js – What is the Difference Between response.send(), response.end() and response.write() ?

Express JS

JavaScript Logoresponse.send() sends the response and closes the connection, whereas with response.write() you can send multiple responses.

In this article, I will explain the difference between response.send(), response.end() and response.write(), and when to use each one. When you’re working with the Express.js framework, you’ll probably most frequently be sending a response to a user. This means that regardless of which HTTP verb you’re handling, you’ll pass a function as the handler for that endpoint. This function will receive two arguments: the request object and the response object. The response object has a send() method, an end() method and a write() method, and in this article we’ll get to know the differences between them.

So, let’s start with the main issue, which is that the response.send() method is used to send the response to the server. Now this makes sense and in some cases, it’s actually the perfect tool. Problems can arise, though, if you’re not entirely sure what the response.send() method actually does. Well, in a nutshell, it does two things; it writes the response and also closes the connection. So, this seems like a win-win, right? Well, in some cases it is, but if you don’t want to close the connection on your first write, then the response.send() method may not be the right tool. When this happens, you’ll need to use a combination of response.write() and response.close(). So, let’s take a look at a few examples, to see just how this works.

Get the example code from GitHub

If you clone this repo: github.com/kevinchisholm/video-code-examples/tree/master/node-express/response-send-end-write-difference, you can clone the example code locally and edit the code yourself.

Trying to use the response.send method more than once per request – Example # 1

Run Example # 1 in your terminal with the following command: node example-1.js, then point your browser to: http://localhost:5000/. Now you’ll see this: “This is the response #: 1“. There are two problems here, however, the first of which is that any responses after the first one are never sent. This is because the send method of the Express.js response object ends the response process. As a result, the user never sees the messages “This is the response #: 2” or “This is the response #: 3”, and so forth.

The second problem is that the send method of the Express response object sets the Content-Type header, which is an automatic action. So, on the first iteration of the for-loop, the Content-Type header is set (i.e. “This is the response #: 1”). Then on the next iteration of the for-loop, the Content-Type header is set again because once more, we are using the response.send() method (i.e. “This is the response #: 2). But, we have already set the Content-Type header in the first iteration of the for-loop.
Because of this, the send method will throw this error: “Error: Can’t set headers after they are sent”. So, our application is essentially broken, but we don’t want users to have an error in their consoles. And more importantly; our back-end logic is not working correctly.

Using the result.write method – Example # 2

So, using the result.write method run Example # 2 in your terminal with the following command: node example-2.js. Now point your browser to: http://localhost:5000/. As you can see, there is still a problem with our code. Depending on your browser, either you will see only the first message or you will see none of them. This is because the response has not been completed. So, I’ll just mention here, that not every browser handles this case the same, which is the reason why you may see one message, all of the messages or none of them. But you should see that the request is “hanging” as your browser will stay in that “loading” state.

So, open your developer tools (e.g. FireBug or Chrome Dev Tools), and then look at the network tab. You’ll see that all five responses did, in fact, come back to the client. The problem is, the browser is waiting for more responses.
At some point, the request should time out and you can see all messages in the browser. This behavior can vary between browsers, but it is not the correct experience.

result.end fixes the problem – Example # 3

Run Example # 3 in your terminal with the following command: node example-3.js, then point your browser to: http://localhost:5000/. You will now see all of the messages in the browser, which means that here, in Example # 3, the problem has been fixed. We see all of the messages generated by the for-loop and the response completes successfully with no console errors. So, we’ve solved the problem by using a combination of of response.write() and response.close().

First we set the Content-Type header, just to get that task out of the way. Then, in each iteration of the for-loop, we used response.write() to send a message back to the client. But since response.write() does not set any headers or close the connection, so we were free to call response.write(), to send another response to the client. And once the for-loop was completed, we used the result.end() method to end the response process (i.e. we closed the connection). This said to the browser: “we’re done; go ahead and render the response now and don’t expect anything more from me.”

Summary

In this article, we learned about the difference between response.send(), response.end() and response.write(). During this discussion, we found that response.send() is quite helpful in that it sends the response and closes the connection. We saw that this becomes problematic, however, when we want to send more than one response to the client. But, fortunately, we discovered that this is easily solved by using a combination of response.write() and response.close(). We used response.write() to send more than one response, and then used response.end() to manually end the response process and close the HTTP connection. So, useful steps and easily solved problems.!

Handling HTTP POST Requests with Express.js

Express JS

Node.js LogoLearn how to access the body of an HTTP POST request using the Express.js framework and body-parser module.

Forms are a common component in web applications. When a user submits a form, that data is sent to the back-end for processing. To process that data, the web server must understand how to access it. Popular web server languages include Java, .NET, PHP, Python and Node.js. In this article, we’ll learn how to access the POST data sent to a Node.js web server using the Express.js framework. To get started, you can go ahead and clone the following github repository: Handling POST requests with Express and Node.js.

And you’ll find instructions on how to run the code in the Github page.

package.json

The package.json for this project is pretty straightforward, and we’ll only need the body-parser and express Node.js modules. We also create a scripts property so that running the example code requires a simple command: npm start.

Requiring the modules we need – Example # 1:

In Example # 1, we’ve imported the Node.js modules that we need. The Express module takes care of the heavy lifting with regard to fulfilling web requests. NOTE: If you’re not familiar with the Express Node.js module, please see my earlier blog post on this subject:  Set up a Node / Express Static Web Server in Five Minutes.

We also import the body-parser Node.js module, which has the critical role of parsing the body of an HTTP request. When it comes to processing a POST request, this is important. And the path Node.js module helps express to construct a file path.

bodyParser.json and bodyParser.urlencoded – Example # 2:

Now, here in Example # 2, we tell express to use the bodyParser.json middleware, which provides support for parsing of application/json type post data. We also tell express to use the bodyParser.urlencoded middleware, which provides support for the parsing of application/x-www-form-urlencoded type post data.

Creating the node.js web server – Example # 3:

In Example # 3, we use express.static to set up the static assets folder, the main purpose of which is to help the working example function in a browser, with minimal effort. For more information on express.static, please see my earlier blog post in Express mentioned above. In this example, we use the app.post method, which tells the Express module to wait for an HTTP request at the /form route that leverages the POST HTTP verb. So, when the user sends a POST request to the /form route, Node.js executes the provided callback, which is the second argument passed to the app.post method.

The app.post callback takes two arguments, the first of which is the request object (i.e. “req”). The second is the result argument (i.e. “res”). We use the res.setHeader method to set the Content-Type header to application/json, which tells the user’s browser how to properly handle the returned data from the request.

NOTE: We wrap the rest of the callback code in a setTimeout, the purpose of which is to mimic a slow internet connection. Otherwise, the working example will move too fast for most to comfortably follow.

Inside the setTimeout, we use the res.send method to send the result body back to the user, and here we’re sending a serialized JSON object. To construct this object, we access the body property of the req object (i.e. the request object), which is why we have implemented the bodyParser.json middleware. And this is what allows us to parse the properties of the request body. In this example, we are expecting firstName and lastName POST parameters, which will allow us to access the req.body.firstName and req.body.lastName properties, to build the JSON for our result object.

To see this code in action, just follow these steps :

  1. Clone the git hub repository: https://github.com/kevinchisholm/video-code-examples/tree/master/node-express/handling-POST-requests-with-express
  2. Follow the instructions in the readme to set up the code
  3. Point your browser to: http://localhost:3000
  4. In the web page, enter some text into the two input boxes, and then click the “Submit” button
  5. Notice the logging statement in your node.js terminal
  6. Notice that the text you entered displayed in a browser message

You might also want to take a look at the Network tab in your Web Developer Tools, which allows you to see the actual network request that goes to the web server. You’ll be able to inspect the POST data sent, and the JSON data returned.

Viewing the working code example

Here’s what happens when you submit the data in the browser:

  1. The JavaScript in www/js/form-handler.js makes an AJAX POST call to the route: /form.
  2. The object sent in the POST request is: {firstName: XXX. lastName: XXX}. (NOTE: “XXX” is whatever value entered into the form’s text inputs.)
  3. Our Node.js web server intercepts the HTTP request to /form.
  4. Our Node.js web server parses the body of the HTTP request and constructs a JSON object.
  5. The XMLHttpRequest for the AJAX call is this JSON object.
  6. The browser displays the data from this JSON object in the browser.

Nothing too fancy here, just illustrating the “round trip” of our HTTP POST request.

Summary

In this article, we learned how to handle POST requests with the Express node.js module, and we talked about the need for bodyParser.json and bodyParser.urlencoded. We also learned how to listen for a POST request to a specific route, and how to access the POST parameters in the HTTP request body. Now, while the working example is simple, it does allow you to inspect every step of the process. If you look at your browser’s network tab, you can see the HTTP POST request go out, and then return. What happens during the server-side processing of that request is what you see in our Node.js code: server.js.

So, a lot to digest at first, but I’m hoping that this it will get you started with your next form-based Node.js application!

Angular HTTP get basics

Angular

Angular logo - httpMaking an HTTP get request with Angular is fairly simple. What may seem a bit different is the way that you handle the request. Instead of nested callbacks, you set up a subscription that can handle a stream of data.

It’s difficult to imagine an Angular application that does not make HTTP GET requests, because making network requests is at the very heart of any Angular application. It’s one of the basics. And for any front-end web developer, an HTTP GET request should be nothing new; it’s a simple one-way transaction. You simply request a remote resource such as a HTML file, CSS file or JavaScript file, and that resource is returned to you. Most front-end web developers will leverage a JavaScript library such as jQuery to make HTTP GET requests, rather than piecing together vanilla JavaScript which has to instantiate the XMLHttpRequest object. But while there is nothing wrong with this approach, it can result in boilerplate code and much of that code will become difficult to manage as it scales. So, most would agree that this should really be avoided.

Angular’s HTTP module provides a get method, and on a very high level, it provides similar functionality to the jQuery.get() method. The biggest difference between the jQuery.get() method and the Angular HTTP.get method, is in what each returns. While the jQuery.get() method returns a promise, the Angular HTTP.get method returns an observable. Important to note that this observable is markedly more sophisticated than a JavaScript promise. You subscribe to this observable, rather than passing a callback to it (as is the case with a promise). Significantly, as a subscriber of this observable, you are notified any time the data stream changes. For a closer look, take check out the examples that follow.

Example # 1

In Example # 1, we have our home component. We have imported RXJS components because we will need those in order to handle the HTTP get request. In this case, the real action happens in the ngOnInit method. This method is executed when the component is initialized, so we know that our code will be executed each time the user navigates to this route. Inside the ngOnInit method, we get ahold of the http service (i.e. this.http), and execute the get method, passing it the URL of the HTTP request we need to make. We then chain the map method to the result of this get request, returning JSON.

Next, we chain the subscribe method. Here we are setting up a subscription to this data. What this means is: whenever there is new data, we want to “know about it”. We pass an anonymous function to the subscribe method, and inside of that function, we can handle the new data. In this case, what we do is set this.destinations to the new data.  The reference: this.destinations  is the destinations property of our component. We use the “this” keyword because we are inside of a method, and the “this” keyword gives us access to the component. Setting this.destinations  to the streamed data will update the UI, which we will look at next.

Example # 2

In Example # 2, we have our Angular template. This is an unordered list. There are numerous destinations in our streamed JSON data, but we only create one list item. The reason for this is: we use the ngFor attribute to create a list item for every destination in the destinations array. In each iteration of this array, we reference the destination variable, and display the various properties of that object such as countryCode, nameduration and price. These values appear in the UI.

Video Example Code

If you want to download the example code, visit this Github page, and then follow the instructions: bit.ly/kcv-angular-http-get

Summary

Unlike the jQuery.get() method, Angular’s HTTP.get() method returns an observable (rather than a promise), and observables are more sophisticated than promises. We also know that when you subscribe to an observable, you are notified each time the data stream is updated. Another strength of the observable design pattern is that it allows for more than one party to subscribe to it, and these subscriptions can be cancelled at any time. Now while the syntax needed to set up an HTTP GET request in Angular is fairly simple, consuming observables might take a little getting used to. But it’s every bit worth the effort: observables are powerful.

Angular2 HTTP Observables in Five Minutes

Angular 2

rxis angular2 observablesObservables are the way to stream data in Angular2. Here’s how to get it working.

Managing asynchronous activities in any JavaScript-driven application can be tricky. Every framework / library has an approach, and there are proven design patterns that are worth considering. In Angular 1.x, $q is the engine that drives this. In Angular 2, it’s RxJS. This technology is not for the faint at heart. It’s very cool, and works well, but does take some getting used to.

This article has one focus: providing example code that demonstrates how to create an observable, and then consume it. So you can start out by cloning the Github repository below. Once you’ve done that, you can run the example code locally and see it in action.

https://github.com/kevinchisholm/angular2-http-observables-in-five-minutes


Making the HTTP request

In the following example, we will make an HTTP request, and then stream the return data to anyone who has subscribed to it.

Example # 1

In Example # 1, we have the code for the PackageService service. This service makes the HTTP request for the JSON data. I’m using myjson.com so that we don’t have to spend time with implementation details about serving up the JSON. We just want to make the request and then talk about how we can share that data across our application via an RXJS stream.

So let’s talk about this line:

Here we create the packageData property.  Although it will be an array, it will be a BehaviorSubject instance. So when we define the property, we specify that it is of type: Subject. Then we instantiate the BehaviorSubject class, passing it an empty array. The reason for the empty array is that we don’t want to stream “undefined. Somewhere else in our code, there is a consumer who will want to subscribe to this stream. That consumer expects an array. It’s fine if the array is empty at first. We just don’t want the consumer to get “undefined“.

Later in Example # 1, we call the http.get method. We map that result to JSON, and then we subscribe to that JSON. I don’t want to get into too many implementation details about the last sentence, as I promised that this would take “five minutes.” So let’s focus on the next line: subscribe. By subscribing to this JSON, we are saying “Hey, any time there is  a change in this JSON, I want to know about it.” And when that change occurs, then the function you see passed to the subscribe method is executed.

That function will receive the updated JSON data as its first argument. The very next line is critical: this.packageData.next(data). What’s happening here is: the packageData object that we created earlier has a “next” method. That method takes an argument, which can be anything. In our case, it is the JSON data. So, anyone who has subscribed to our packageData property will receive a notification that there is new data and will be passed that data.

Example # 2

In Example # 2, we have our PackagesComponent component. So let’s zero-in on the critical part: the ngOnInit method. Well, as you probably guessed by the name, this method is executed when our component is initialized. Take a look at this line: this.packageService .packageData .subscribe. There we are subscribing to the packageData property that we created in the packageService service. Because that is an instance of BehaviorSubject, subscribing to it gives us a live connection to anything it streams out. In our case, the http.get request fetched some JSON data. And in that service, the JSON data is streamed out via the  line: this.packageData.next(data). The JSON data comes to the subscribe callback via the variable: “packages.” So we set this.destinations = packages. Therefore, at that point, the UI is updated and we see the list of travel packages in the page.

Summary

I promised that this would take less than five minutes. Hopefully, it did. RXJS is a deep subject that takes some time to get familiar with. I wrote this article because the first time I needed to stream the result of an HTTP request in an Angular2 application, it was a giant pain in the rump.  But here, I have tried to provide an easy example of how to sketch out this scenario and get it working quickly. I hope it was helpful!

Angular2 Http double subscribe

Angular

stack overflow logoI working on a new Angular 2 service today that wraps the HTTP class. The purpose of this service is to intercept errors, and log the user out when the HTTP status code of the error object is 401.
Everything seemed fine until I realized that each GET and POST was firing twice. After a lovely hair-pulling session, I realized that it was the 2nd observable subscription that was causing the double network calls. Messy stuff.

If you find yourself wresting with the same problem, this Stack Overflow answer nails it. Cheers to dfsq for his great answer:

http://stackoverflow.com/questions/35397710/angular2-http-double-subscribe

Making a Simple HTTP Server with Node.js – Part IV

Node.js

Node.js Logo

Setting the right value for the “Content-Type” header is a critical task for any web server

In Part III of this series, we built out our Node.js server to serve up any file that is requested, or gracefully return a 404 / “Not Found” header, as well as a custom HTML page informing the user that the requested file was not found. But the only problem is that we are not setting headers for each request. So, it’s important that HTML, CSS, JavaScript and image file, have the appropriate “Content-Type” header set.

In order to demonstrate all of this, we will include a CSS file and a JavaScript file in our web page. I won’t bother including the CSS file in an example; it’s just some silly CSS… nothing too interesting. But I will include the source of our JavaScript file in Example # 1, just so we can see that the second blue box in the web page is created via JavaScript.

TO SAVE TIME, THE FULL WORKING VERSION OF THE CODE EXAMPLES CAN BE CLONED HERE: HTTPS://GITHUB.COM/KEVINCHISHOLM/SIMPLE-HTTP-SERVER-WITH-NODE-PART-IV

Example # 1

Example # 1 simply shows the contents of the JavaScript file: “script.js” that we will request in our pages.

Example # 2

Example # 2 is the source code for index.html.

Example # 3

Example # 3 is the source code for about.html, a second web page that we can request from our Node.js web server.

Before we go any further, let’s take a  moment to discuss the folder structure. Just as in Part III of this series, the folder that our server.js file sits in has a sub-folder named “public”. This is where our assets will go. It is this “public” folder that the world will have access to and all requested files will be in there. See Figure # 1.

Folder structure
Figiure 1: The folder structure for this article’s example.

Example # 4

In Example # 4, we have a JavaScript object that contains a list of mime-types that we will support. Each of the object’s properties represents a file extension that we plan to support, and the corresponding value is the mime-type string that will be used for the “Content-Type” header.

Example # 5

In Example # 5, we have added a new line to the variable declarations for the requestHandler() function. The variable “ext” contains a string copy of the requested file’s extension (e.g. “.html” for a web page, “.js” for a JavaScript file, and so on). So we will use that string to check all properties of the “extensions” object from Example # 4. Don’t worry if you feel like you are getting lost; we’ll piece everything together nicely at the end. For now, just know that we have so far provided a hard-coded list of file extensions that we will allow, and the mime-type string values for each one, and we have the variable: “ext” that tells us what the file type is.

Example # 6

In Example # 6, we see if the extensions object has a property that matches the value of the “ext” variable. If not, we write a 404 header, and return a simple HTML page, informing the user that the requested file type is not supported.

Example # 7

In Example # 7, we add a new argument to the getFile() function call. We pass-in the value of the property in the extensions object that matches the file extension of the user’s request. In a nutshell, we are telling the getFile() function what type of mime-type to set in the response header.

Example # 8

In Example # 8, we have expanded the res.writeHead() function call. Where previously we only set the 200 / “OK” response code, we now set the “Content-Type” and “Content-Length” headers. The “Content-Type” property is mapped to the value of the mimeType variable, which was passed-in as an argument to the function. So the fruits of our labor in this article all become apparent in this example. The value of the mimeType variable will be set accordingly, for the file type.

Example # 9

Example # 9 is a complete code-listing for this article. In Figure # 2, we see the results of http://localhost:3000/index.html. So, as you can see, we are serving not only HTML, but also an image file, a CSS file and a JavaScript file. The JavaScript file dynamically creates the blue box you see on page load (simply to demonstrate that our JavaScript file is served correctly from our Node.js web server, and works).

index.html page
Figure # 2: Our index.html page.

In Figure # 3, we see that our “about.html” page works, and also pulls in the CSS and JavaScript files with no problems.

about.html
Figure # 3: about.html

In Figure # 4, we inspect the JavaScript file call in the “net” tab of FireBug and can see that the “Content-Type” header is set accordingly.

The FireBug
Figure # 4: Inspecting the call to script.js in FireBug’s “net” panel

Summary

In this article we learned how to set the appropriate “Content-Type” header for each request, based on the file extension of the requested file. We demonstrated how to use the extname() method of the path module, to return the extension of the requested file. We also applied some logic, to handle scenarios in which the requested file-type is not supported.

Helpful Links for the Node.js path module

http://nodejs.org/api/path.html

http://docs.nodejitsu.com/articles/file-system/how-to-use-the-path-module

Helpful Links for HTTP header fields

http://en.wikipedia.org/wiki/List_of_HTTP_header_fields

http://www.w3.org/Protocols/rfc2616/rfc2616-sec14.html

Helpful Links for mime-types

http://en.wikipedia.org/wiki/MIME_type

http://en.wikipedia.org/wiki/MIME

Making a Simple HTTP Server with Node.js – Part III

Node.js

Node.js LogoIn Part II of this series: Making a Simple HTTP Server with Node.js – Part II we learned how to use the “path” and “file system” modules. By leveraging these Node.js modules, we were able to read the path of the HTTP request that our server received, and read from the file system of the web server. We also learned about the “__dirname” keyword, which provides an abstract reference to the folder in which the currently executing JavaScript file exists.

That version of our HTTP server simply checked to see if the request was for the file “index.html”, and if so, served it up. That was progress over Part I, but still not robust enough.

In this article, we will expand our Node.js HTTP server so that the following services are provided:

  • If an asset is requested, and it exists, it will be returned
  • If an asset is not specified, then “index.html” will be returned
  • If an asset is requested, and it does not exist, our custom 404.html page will be returned

We will make every effort to keep our three-step paradigm, which will, we hope, continue to illustrate that creating an HTTP web server with Node.js is at its core, quite simple. What we have to take a closer look at, is the fact that, as we ask more of our little web server, we have to roll up our sleeves and write the code that provides that very functionality.

So the good news is: It’s just more JavaScript. Yay!

Example # 1

In Example #1, we have the three-step core of our HTTP web server. We have already discussed each step in detail, so let’s just quickly re-cap:

Step # 1: Use the require() method to gain access to the Node.js modules that we need
Step # 2: Use the createServer() method of the HTTP module, and pass it a reference to our “requestHandler” function
Step # 3: Listen for a request on port # 3000

Simple, simple, simple.

Next, let’s look at two functions: our updated requestHandler() function, and then our new getFile() function.

Example # 2

In Example # 2, we first look at the request, and if no file was requested (i.e. the user simply typed http://somedomain.com into their browser), then we prepare to serve up “index.html”.

As we learned in Part II, the __dirname keyword provides an abstract reference to the folder in which the currently executing JavaScript file resides. We then create a variable named “page404”, which will provide a reference to our custom “404 / Not Found” page, should we need it.

Now we have everything we need, so we call the getFile() function, passing it the path and name of the asset we want (i.d. index.html), the response object, and then the reference to our custom 404 page.

Example # 3

In Example # 3, there are some new things happening. First, we use the exists() method of the file system object that was returned by the “fs” module, and assigned to our variable: “fs”. This method takes two arguments: a path to the file, and an anonymous function. That anonymous function takes one argument: “exists” (call it whatever you like). That single argument provides a helpful “truthy/falsy” flag against which we can test.

Folder Structure
The folder structure of this article’s example code

So if you take a moment to think about this, you’ll find that it’s quite cool: baked into the Node.js “fs” module is a method that simply tells us whether or not a named file exists. This is a perfect example of the brilliance of Node.js modules. Imagine how much heavy lifting you’d have to do if you needed to provide this kind of implementation yourself. Fortunately, someone did it for you. And that module can be used over and over again… a zillion more times if you like.

So moving along, if the “exists” argument returns a “truthy” value, we use the fs.readFile() method to literally read the physical file from the local file system. We have a little error checking to make sure that the file read operation did not fail, and if it did not fail, we send the contents of that file back to the user.

If the requested file was not found (i.e. the “exists()” method told us that the named file does not exist), then we serve up the custom 404.html file that we still have a reference to.

Example # 4

Example # 4 simply puts all our code examples together, to provide some context.

Summary

In this article we expanded our simple Node.js HTTP web server. We leveraged the exists() method of the “fs” (file system) object, to determine if the requested file actually exists, and provided logic that handles cases in which the requested file does not exist.

Helpful Links for the Node.js path and fs Modules

http://nodejs.org/api/fs.html

https://github.com/jprichardson/node-fs-extra

http://docs.nodejitsu.com/articles/file-system/how-to-write-files-in-nodejs

Making a Simple HTTP Server with Node.js – Part II

Node.js

Node.js Logo

OK, enough “Hello World!” Let’s serve up an HTML file, dagnabbit.

In Part I of this series: “Making a Simple HTTP Server with Node.js – Part I“, we learned the bare-bones steps needed to create an HTTP server with Node.js. While it was fun to see our text message make its way from our server-side JavaScript file, at the end of the day we sent a hard-coded text message. Not too sexy.

In this article, we will invite the user to type “index.html” into their browser window and prepare to be amazed. Ok, the user has to be on your local DEV machine, and type “http://localhost:3000/index.html”, but we have to start somewhere, right?

Example # 1

There are a few new things happening in Example # 1, when compared to the examples from Part I of this series. The biggest change is that we’ve expanded “Step # 1” and are requiring two new Node.js modules: “path” and “fs”.

The “path” module provides a number of methods that help you to examine and parse file paths. The “fs” module is short for “File System”. This module provides access to the file system. So here is where the fun stuff starts: Writing JavaScript that has access to the local file system? Yep. You bet. We have not even begun to scratch the surface of what is possible.

Next, our helper function has grown a bit as well. We use the basename() method of the path module to return the name of the file that was requested by the user (i.e. index.html). We then leverage the “__dirname” keyword, which provides a quick and easy handle to the folder that your server-side JavaScript file resides in.

After that, we check to see if the user has requested “index.html”, and if so we will return it. The fs.fileRead() method takes two arguments: a path to the physical file that we want to return to the user, and an anonymous function. That anonymous function takes two arguments: an error object, and the content of the file that is to be returned. So just to play it safe, we check to see if there is an error: if ( !err ). If there is none, then we use the res.end() method to return the contents of index.html and then close the request. If there was an error, for now we are piping it to the console for our own troubleshooting.

If none of that worked out, then we set a “404 / Not Found” header, and send some markup back, letting the user know. Step # 2 and Step # 3 haven’t changed since our last article: Create the server, and then listen for a request.

Phew!

That was a lot, but our Node.js HTTP server has grown up quite a bit. Instead of just sending back a plain text message or some hard-coded HTML, we are now serving up an actual HTML file. We could change that file any time, which would change what the user sees in the browser. It’s not exactly Facebook, but hey, we are creating an HTTP web server using nothing but JavaScript!

For Part III, we will smarten things up and enhance our server so that it will serve up any static content that is requested.

Summary

In this article we learned how to use the “path” and “file system” Node.js modules. By leveraging the modules, we were able to read the path of the HTTP request, and read from the file system. We also learned about the “__dirname” keyword.

Helpful Links for the Node.js path and fs Modules

http://nodejs.org/api/path.html

http://docs.nodejitsu.com/articles/file-system/how-to-use-the-path-module

http://nodejs.org/api/fs.html

http://jspro.com/nodejs/accessing-the-file-system-in-node-js/

http://docs.nodejitsu.com/articles/file-system/how-to-read-files-in-nodejs

Making a Simple HTTP Server with Node.js – Part I

Node.js

Node.js LogoThe beauty of creating an HTTP server with Node.js is that you are doing so using a language that you already know: JavaScript.

If you work with JavaScript, then you’ve probably heard about Node.js. What makes Node.js such an amazing technology is that it turns web-development on its head: a historically client-side language is now being used as a server-side language. I’m sure I don’t have to tell you how insanely cool this is.

When I first started looking at Node.js, my first question was: “Ok, server-side JavaScript. Got it. So what the heck can I do with it?”

Short answer: A lot.

Probably the most obvious and easiest to comprehend application for Node.js is to make a web server. Node handles all the low-level ugliness and let’s you just write code. The code you write is not too much different than the client-side JavaScript that you are used to. The biggest differences come in when you start to realize that you have access to the file system. You can do things with Node that are completely off-limits on the client side. When it comes to creating a simple HTTP server, the amount of code you need to write for proof of concept is amazingly minimal. The examples that follow are very basic. They don’t offer any real-world usefulness, but they do illustrate the small amount of effort needed to get up and running. In Part II of this series, we will look at more realistic HTTP server code for Node.js.

Example # 1 A

In Example # 1, we have the absolute bare minimum needed to set up an HTTP web server using Node.js. The very first line tells Node.js that we need to use the “http” module. Using Node’s “require” method, we assign the return value of the “HTTP” module to the variable “http”. This was Step # 1.

(A detailed discussion of the require() method is beyond the scope of this article, but a topic that plays an important role in Node.js. If you are not familiar with the Modules/AsynchronousDefinition proposal from Common.js, I highly recommend reading up on that topic. For any client or server-side JavaScript developer, it’s a biggie.)

The only part that might seem a bit confusing to some is the callback that is passed into the createServer() method. This callback is executed each time the server receives an HTTP request.

For Step # 2, we call the createServer() method of the http object. We pass that method an anonymous function which takes two arguments: the request object and the response object. Inside of that anonymous function, we use the writeHead() method of the response object, to set the server’s response of “200 ok” to the client’s browser, and set the header of “Content-type” to “text/plain”. Next, we call the end() method of the response object. The end() method closes the response to the client. It can also send output to the client. We pass in a string as an argument in this example, and that string is sent to the client’s browser.

For Step # 3, we call the listen() method on the return value of the createServer() method. We pass in “3000”, which tells Node.js to listen on port # 3000.

If you run this code in Node.js, and then in your browser, “type localhost:3000”, you will see the following in your browser: “Your node.js server is running on localhost:3000.”

Whew! The explanation for Example # 1A took much longer to write than the actual code!

As you can see, it’s pretty easy to create an HTTP server with Node.js. In my opinion, the only part that might seem a bit confusing to some is the callback that is passed into the createServer() method. This callback is executed each time the server receives an HTTP request. It might make things easier to understand if we move the guts of that callback to its own function, and then pass that function declaration as the callback to the createServer() method.

Example # 1 B

In Example # 1B, we create a function declaration named requestHandler. Then we pass that function as the sole argument to the createServer() method. I believe that if you are new to Node.js, you’ll find it is easier to see what is going on, because the createServer() method is all on one line.

Example # 1 C

In Example # 1C, we’ve refactored our code to make things even simpler. First, our helper function processes the HTTP request, then Step 1, Step 2 and Step 3. Bing, Bang, Boom. Simple stuff.

Example # 2 A


In Example # 2A, we’ve upgraded our message to the client’s browser to include some HTML. After all, HTML is what we will really want to serve, right? The only problem is that Node is not parsing the HTML. When you run this example in your browser, you see the HTML tags in the response. That is not what we want. What is happening?

The problem is in the header that we are setting with the res.writeHead() method call. The value of the “Content-Type” header is “text/plain”. So, Node just passes all the text along as… well, plain old text.

Example # 2 B

In Example # 2B, we have changed the value of the “Content-Type” header to “text/html”. If you run this example in your browser, you will see that Node sends the string as HTML, so our H1 and UL elements are rendering as they should in the browser.

Example # 3

In Example # 3, we take things a bit further. Up until now, we have been using the res.end() method to do two things: send some text or HTML to the client’s browser, and then close the response. In this example, we use the res.write() method to send our HTML to the client’s browser, and the end() method is used only to close the request.

We’ve also introduced some logic into our code. While what this example accomplishes is very little, and has virtually no real-world value, it demonstrates that while we have created an HTTP server, we have done so with JavaScript, and we already know the JavaScript language. So, we can do something like create a for/loop block, and use that loop to provide some dynamic HTML output. Again, this “dynamic” aspect of our code is not very impressive, but I think you get the point: it’s just JavaScript, so the sky’s the limit.

Summary

In this article, we learned how to create a simple HTTP server using Node.JS. We covered the three most basic steps needed, which include requiring the HTTP module, calling the createServer() method, and then telling the server to listen for an HTTP request. Finally, we learned how the server executes a callback function for each HTTP request it receives, and the most basic things that need to happen inside of that callback.

Helpful Links for creating a simple Node.js HTTP Server

http://nodejs.org/

http://docs.nodejitsu.com/articles/HTTP/servers/how-to-create-a-HTTP-server

http://www.youtube.com/watch?v=jo_B4LTHi3I

http://stackoverflow.com/questions/6084360/node-js-as-a-simple-web-server

http://www.nodebeginner.org/