An Introduction to NPM Scripts

NPM

Node.js LogoLearn how to leverage npm scripts to create commands that, in turn, execute more than one other npm script command, allowing you to simplify your builds.

As the default package manager for Node.js, npm has seen a rise in popularity because JavaScript’s is just everywhere! This certainly makes sense – npm is well-designed, well documented, and makes Node.js development more seamless. I think most web developers would have a hard time imagining using Node.js without npm, but they often have to turn to technologies such as grunt and gulp to simplify local development and front-end tooling. But with npm scripts, you have an opportunity to move some of your front-end tooling and local development tasks away from third party tools. The beauty of this approach is that it allows you to simplify your setup.

In order to explain npm scripts, I have created a simple project that leverages Gulp. So, to run the code locally, clone the following git hub repository: Getting started with npm scripts.

Instructions on how to run the code are available in the Git hub page.

This project has four features:

  1. It compiles a coffeescript file to JavaScript.
  2. It compiles a SASS file to CSS.
  3. It uglifies a JavaScript file.
  4. It starts a Node.js web server.

This is a very simple example and it’s mostly Gulp compiling and minifying files. I chose this project because it requires some manual steps. Now, it’s possible to automate these tasks using Gulp, but what if you needed to switch to tools such as Grunt, or Broccoli.js? In such a case, your commands would change. For example, “gulp coffee” would become “grunt coffee”. While this is not fatal, it be nice if we could have a consistent set of commands. So the question is, how can we build our local development assets and start the Node.js server with one command? Also, how can we ensure that this one command never changes? Well, this is where npm scripts come in!

Project Folder Structure – Example # 1

In Example # 1, we have the folder structure for our project. There is an src folder that contains three sub folders:

  • The coffee folder has a coffeescript file.
  • The js folder has a JavaScript file.
  • The sass folder has a SASS file.

These three files are used by our build. The built versions of these files are placed in the build/css and build/js folders accordingly.

package.json (no npm scripts) – Example # 2

The package.json so far allows us to use Gulp. We’re using the gulp-coffee module to compile coffeescript, the gulp-sass module to compile SASS, and the gulp-uglify module to uglify JavaScript. So, we have the following commands available to us:

  • gulp sass: This command will compile the file src/sass/main.scss and create build/css/main.css
  • gulp coffee: This command will compile the file src/coffee/global.coffee and create build/js/global.js
  • gulp uglify: This command will uglify the file src/js/main.js and create build/js/main.js
  • node index.js: This command will start the Node.js web server on port # 3000.

You can run each command and it will work just fine, but the problem is that each time you change any of the files, you will want to build them again, and then restart the web server.

Adding npm scripts to package.json – Example # 3

In Example # 3, we have added a scripts object to package.json. Here is a breakdown of the script commands:

  • build:sass : This command is a shortcut to: gulp sass.
  • build:coffee : This command is a shortcut to: gulp coffee.
    build:js : This command is a shortcut to: gulp uglify.
    build : This command will execute the previous three commands. It executes three steps in one command.
    serve : This command is a shortcut to: node ./index.js (it starts the Node.js web server).
    start : This command builds all three files, and then starts the web server
    clean : This command will delete every the built file (these are files created by all previous commands).

What to expect when you run the example code locally

  • npm start – The build places the three built files in the build/css and build/js folders accordingly. And then, it starts the Node.js web server. You will see messages in your terminal that indicating these outcomes.
    npm run clean – npm deletes the three built files in the build/css and build/js folders. (This is helpful if you want to “start from scratch” when running the npm start command. This way you see the built files created each time.

Summary

This article is a basic introduction to, and high-level overview of npm scripts and its ability to create commands that, in turn, execute more than one other npm script command. As you can see, there’s a great deal of power here, and depending on your needs, they can streamline your front-end tooling process significantly. There’s much more detail available about npm scripts, and a great place to start is: https://docs.npmjs.com/misc/scripts. In the meantime, I hope that this article has provided you with enough information to get you up and running.

Getting started with the filepath Node.js module

Node.js

Node.js LogoWhen you need to reference and work with the local file system in your Node.js program, the filepath module is quite a handy tool.

Even if your Node.js program is a web-server of some sort, working with the local file system is somewhat inevitable. While Node.js does provide low-level file system access (see the Node.js fs module), abstraction is always helpful, particularly when dealing with absolute paths.

The filepath Node.js module is a very helpful utility for simple access to file paths. You’ll need only a package.json file with this module as a dependency, an “npm install” command, and then you are up and running. This article provides a quick introduction to a few of the most common methods.

Example # 1A

Example # 1B:

In Example # 1, we first create the FP variable, which references the filepath module. Then we create the path variable, which holds the return value of the FP object’s newPath method. And finally, we output the path in the console. Example # 1B shows the terminal output when we use console.log to view the path variable. This path will vary for each user so I simply put “[YOUR LOCAL PATH TO]” for the folder structure that leads up to that file in the github repo that you cloned (see “How to Demo” below).

How to Demo:

  1. Clone this github repo: https://github.com/kevinchisholm/video-code-examples
  2. Navigate to: JavaScript/node-js/filepath
  3. Execute the following command in a terminal prompt: node filepath-1.js

Example # 2

Example # 2 demonstrates the list method. The only real difference between this code and Example # 1, is the new variable “files”, which receives the value of the list method, when called on our path variable. The files variable ends up as an array. Each element in the array is an object whose “path” property is a string that points to a file in the current directory.

How to Demo:

  1. Clone this github repo: https://github.com/kevinchisholm/video-code-examples
  2. Navigate to: JavaScript/node-js/filepath
  3. Execute the following command in a terminal prompt: node filepath-2.js

Example # 3A

Example # 3B

Example # 3C

Example # 3D

In Example # 3A, we see the recurse method in action. Just as the name implies, the recurse method will recursively list all of the files in the current directory. As a result, if one of those files is a folder, then it will list all of the files in that folder, and so on. This method differs from the previous two examples in that it takes a callback. The callback is a bit like a forEach call; it iterates over all of the files or folders in the path, and calls the callback for each one. Inside of the callback, the path variable is the current path being iterated over.

Example # 3C is the output from the code in Example # 3A.

In Example # 3C, we use the toString() method of the path object so that instead of a bunch of objects that we would need to handle, we just get the values we are after; the string representation of the path to that file or folder.

Example # 3D is the output from the code in Example # 3C.

How to Demo:

  1. Clone this github repo: https://github.com/kevinchisholm/video-code-examples
  2. Navigate to: JavaScript/node-js/filepath
  3. Execute the following command in a terminal prompt: node filepath-3.js

Summary

The filepath Node.js module has much more to offer than was demonstrated here. Hopefully, this article has demonstrated how easy it is to get started with filepath.

Helpful Links for the filepath Node.js module

https://www.npmjs.com/package/filepath

http://nodejs.org/api/fs.html

Getting started with the uglify-js Node.js module

Node.js

Node.js LogoLearn how to easily implement minification and file concatenation right in your Node.js program.

There is no doubt that tools such as grunt and gulp provide powerful front-end tooling, particularly for large-scale applications. But in some cases, you may want to “roll your own”. If you want to minify and / or concatenate files from your Node.js application, the uglify-js module offers a simple syntax yet plenty of muscle-power.

So, if you want to get serious, a quick package.json file and “npm install” command are all you need to get started. Once these two tasks are taken care of, you can minify one or more files, and concatenate the output to a new file. In this article, I will show you how to do just that in less than 20 lines of code.

Example # 1A

Example # 1B

Example # 1C

 Example # 1D

In Example # 1A we have the contents of the file: package.json. This tells npm that our program depends on the “uglify-js” module. Examples # 1B, 1C and 1D are the contents of the files we will “uglify”. The actual code has no significance. We just want to have a reference so that once we have uglified the files, we can see the difference in the output.

Example # 2A

 Example # 2B

In Example # 2A, we minify the file: file-1.js. In this case, the minified code is simply shown in the console. Example # 2B shows the minified code. It’s hard to imagine a case where we would want to minify code, but only show the result in a terminal window. Realistically, we need to write the output of the minified file to a new file.

How to Demo:

  1. Clone this github repo: https://github.com/kevinchisholm/video-code-examples
  2. Navigate to: JavaScript/node-js/uglify-js
  3. Execute the following command in a terminal prompt: npm install
  4. Execute the following command in a terminal prompt: node uglify-1.js

Example # 3


In Example # 3, we have the content of uglify-2.js. Here, we’ve moved things into a more real-world context; we save the result of the minification to a physical file. Now notice that after you execute node uglify-2.js in your terminal, there is a new file named: output.min.js, which is a minified version of file-1.js.

The first change we made was to add a reference to the “fs” module, which provides access to the file system in Node.js. The console.log statement was left in, just so you can still see the output in the console. Below that, we call the writeFile method of the fs object. We pass it three arguments:

  1. the name of the file that will contain the result of the minification process (i.e. the minified code)
  2. the content for that file (i.e. the minified code), and
  3. a callback. The callback takes one argument: an error object. In the callback, we check to see if there was an error, and if not, we send a success message to the console.

In this Example, the callback is optional as it has nothing to do with the minification process and only provides messaging as to the status of the minification attempt.

Although Example # 3 is more of a real-world context than Example # 2, it is still a bit unrealistic as we only minify one file. In a typical production workflow, one would likely want to minify and concatenate more than one file.

How to Demo:

  1. Clone this github repo: https://github.com/kevinchisholm/video-code-examples
  2. Navigate to: JavaScript/node-js/uglify-js
  3. Execute the following command in a terminal prompt: npm install
  4. Execute the following command in a terminal prompt: node uglify-2.js

Example # 4

Example # 4 shows the contents of uglify-3.js. The only change we have made is in the call to UglifyJS.minify. Instead of passing it a string, we pass an array. Each element in the array is a path to a file we want to minimize and the concatenate to the output file. In this case all of the files are in the same folder as our program, so there is no folder structure (i.e. just the file names). You can take the same exact steps to demo this example, and when you do, you will see that the file output.min.js contains the minified code of file-1.js, file-2.js and file-3.js.

Summary

The uglify-js offers a ton of options, parameters and features. For this article, I wanted to demonstrate how easy it is to set up and use this Node,js module. But if you want to understand the true power of uglify-js, there is a ton of documentation available online. Hopefully this article got you to first base!

Helpful Links for the uglify-js Node.js module

https://www.npmjs.com/package/uglify-js

https://www.npmjs.com/package/uglify-js#api-reference

http://lisperator.net/uglifyjs/

JavaScript Concatenation and Minification with the Grunt.js Task Runer

Node.js

Grunt.js LogoCombine multiple JS files into one using JavaScript, Node.js and Grunt.

In the article: “Getting Started with Grunt: The JavaScript Task Runner,” we covered the bare-bones basics of how to set up and use Grunt, to automate and manage your JavaScript build task. In that article, we used a Grunt plugin called “grunt-contrib-uglify” to minify and obfuscate our JS code. But while minification is a common task for any build system, file concatenation is also a technique used to minimize the number of http requests. This helps to improve web page performance. In this article, we will look at the Grunt plugin: grunt-contrib-concat. It exposes a number of very useful methods for simple, to advanced file concatenation.

Example # 1

In Example # 1, we have the contents of “package.json“. Naturally, Grunt is listed as a dependency, but there is a reference to the “grunt-contrib-concat” plugin as well.

The Project File Structure – And Files to be Concatenated


The Empty Distribution Folder


Example # 2

In Example # 2, we have the JavaScript code that will set up and run the Grunt tasks. There are two sections to this code: the call to the grunt.initConfig() method, and the two commands that load the plugin and register the task.

Grunt Init configuration

The method: initConfig belongs to the grunt object. For this article, we are concatenating three JavaScript files. As you can see, the sole property to the object-literal passed to the initConfig method is concat. Its value is another object with two properties: “options” and “dist“. The “dist” property provides an object with critical details for this operation: the location of the source files (“src“). It also provides the location of the file to be created that contains all of the source files (“dist“). Note that the value of the “src” property is an array. This ensures that any number of files can be specified. The path is relative to the Gruntfile. In this example, the “options” property specifies the string that will be used to separate each concatenated file.

Loading the Grunt Plugin and Registering the task

Under the call to the grunt.initConfig() method, we load the “grunt-contrib-concat” plugin by passing it as a string to the grunt.loadNpmTasks method. This makes the plugin available to the rest of our code. Next, we register the “default” task with a call to the grunt.registerTask() method. The first argument is the name of the task (in this case it is “default“). The second argument is an array containing one or more named tasks.

That is all we need to run our tasks. So now, in the terminal, we simply type: “grunt“. After grunt has completed running, you should see a new file in the “dist” folder named: “allScripts.js.

The Built File
The Built File

Summary

In this article, we talked about JavaScript minification using Grunt. We discussed configuring the project dependencies in the file: package.json, which is needed in order for our application to work properly. We also reviewed the file: Gruntfile.js, which is where we did set configuration properties for the build, and then run the tasks. There is plenty to dive into on the subject of minification with Grunt. This article provided the most basic elements of how to set, configure and run a task that combines multiple JavaScript files into one.

Helpful Links for: Grunt.js file concatenation

http://stackoverflow.com/questions/16377674/using-grunt-to-concatenate-all-vendor-javascript-files

https://github.com/gruntjs/grunt-contrib-concat

http://stackoverflow.com/questions/12722855/using-grunt-concat-how-would-i-automate-the-concatenation-of-the-same-file-to-m

Getting Started with Grunt: The JavaScript Task Runner

Node.js

Grunt.js LogoAutomate and manage your JavaScript build tasks with JavaScript, Node.js and Grunt.

Today, even the most straightforward web-based application will involve JavaScript, and chances are that JS code will not be too simple. In-fact, it is often inevitable that your JavaScript could start to grow over time and / or span multiple files. When these dynamics are in-play you’ll find yourself spending more and more time having to organize and test your code. Regardless of the details, this kind of maintenance quickly becomes tedious. I think many will agree that when humans have to perform repetitive / tedious tasks, the chance of error increases. Fortunately, this is the exact kind of work that a computer is thrilled to do, and do well. Using a built tool to manage your JavaScript build tasks is not only efficient, but also a smart way to go.

Grunt is promoted as a “Task Runner.” Semantics aside, it is an aptly named tool that provides a significant level of flexibility and power, when it comes to managing and automating your build tasks.

In this article, I will intentionally “scratch the surface.” While there is a great deal of depth to Grunt, getting started is a critical first step. My focus here is to provide you with information that simply enables you to set the minimum configuration required for your first (albeit simple) automated task with Grunt.

Prerequisites

In order to use Grunt, you’ll need Node.js and the The Grunt CLI (Command-Line Interface). Installing Node is beyond the scope of this article. If you have not installed Node yet, you can start here: http://nodejs.org/

The Grunt Command-Line Interface

The Grunt CLI is used to launch Grunt. While this may sound a bit confusing, installing the Grunt CLI does not actually install the Grunt task runner. The CLI is used to launch whatever version of Grunt is defined in your package.json file (more on that file later). The advantage of this is that your projects can all use different versions of Grunt without concern for conflicts. The CLI does not care, it simply launches whatever version your project uses.

(You might need to use the sudo command when executing npm install, depending on your account priviliges.)

Note that in the example above the “-g” flag is used. This is recommended. It installs the module globally so that it can be executed from any folder on your machine, and need not ever be installed again.

package.json

Once you have installed the grunt-cli globally, you can put your project together. The first step is to create a package.json file. The package.json file is a feature of node.js. You can learn more about it here: https://npmjs.org/doc/json.html

In this example, we have named this project: “Grunt-Test-1”, and given it a version #. Both of these values are arbitrary, and completely up to you. But keep in mind that the “name” property is potentially used by Grunt in some cases, so choose a name that makes sense. The “devDependencies” property is an object that whos whose keys contain node modules that your project depends on. The value for each key is the exact (or minimum) version number required for that module.

The Project File Structure

Image # 1: The project’s file structure

Once your package.json file is ready, simply run the following command: “npm install”. Node will refer to your package.json file in order to understand what it needs to install so that your project works correctly. Keep in mind that the “installation” is simply a download that is local to this folder. Its is not “installed” on your computer, like a native / compiled application.

Example # 1

For this example, we have only two dependencies: grunt, and grunt-contrib-uglify. The “grunt” requirement is critical because we want to use Grunt. Everything else is optional. But if grunt is the only dependency, then there won’t be too much we can do. Grunt plugins allow us to define tasks that can be managed by Grunt. The “grunt-contrib-uglify” plugin provides JavaScript minification and obfuscation. For this article, we will simply minify a JavaScript file and save it with a new name.

Once you have created your package.json file, you can install all required modules with two easy words: “npm install”. Entering that command in your terminal will allow you to leverage the Node Package Manager, otherwise known as: “npm” (make sure you are in the root folder of your project). The Node Package Manager will look for a file named package.json in the current folder, and read the devDependencies object. For each property of the “devDependencies” object, npm will download whatever file is specified by the version # you have provided as a value for that property.

One of the ways in which this approach is so helpful is that it negates the need to commit large files to your version control. Node modules are often a combination of text files (e.g. “.js”, “package.json”, “README”, “Rakefile”, etc.) and executables. Sometimes a combination of just a few dependencies can add several megabytes to your project, if not more. Adding this kind of weight to your code repository not only eats up disk space, but it is somewhat unintuitive because version control systems are really meant to store and manage text files that you (or your teammates) will change over time. Node.js modules are managed by the contributors of those modules, and you probably won’t need (or want) to change their source code. So, as long as your project contains the package.json file, whenever you (or anyone on your team) check out that repo, you can run “npm install” to the exact versions of the modules you need.

The Gruntfile

The Gruntfile is the JavaScript code you create to leverage the power of Grunt. Grunt always looks for a file named: “Gruntfile.js” in the root of your project. If this file does not exist, then all bets are off.

Inside of Gruntfile.js, all of your code will be wrapped in one function: module.exports.

Example # 2

In Example # 2, we have defined the “exports” method of the “module” object. Right now it does nothing, but all of your grunt code will go inside of this function.

Example # 3

In Example # 3, we make a call to the grunt.initConfig method. This method takes an object as its sole argument. In this object, we set properties that provide the details Grunt needs in order to work the way we want. Here we set one property: “pkg”. In order to set the value for that property, we tell grunt to read the contents of our “package.json” file. The main reason for this is that we can use the metadata that is stored in package.json, and use it in our tasks. The two delimiters: <% %> can be used to reference any configuration properties. For example: <%= pkg.name %> would display the name that you have given your project. In this case it is: “Grunt-Test-1”, but we could also access the version number of our project in this manner: <%= pkg.version %>.

Since we will be using the “grunt-contrib-uglify” plugin, lets update Gruntfile.js so that it is configured to leverage this plugin.

The Empty Build Folder

Image # 2: The empty build folder

Example # 4:

In Example # 4, we have added a new property to the config object: “uglify”, which provides the detail that the “grunt-contrib-uglify” plugin needs. This property is an object which, in-turn, has two properties that are objects. As the name suggests, the “options” property contains options for the “grunt-contrib-uglify” plugin. The “build” property is an object that provides two properties that are critical to the “grunt-contrib-uglify” plugin:

  • src: The location of the file to “uglify”
  • dest: The location where the “uglified” file will be placed

While we have provided some important details, running Grunt at this point will produce no results because there are no tasks specified. Let’s take care of that next:

Example # 5:

In Example # 5, we have made two changes: We load the “grunt-contrib-uglify” plugin, and then we register the default task, which in this case is: “uglify”. Notice that the “uglify” task is passed to the registerTask() method, as the sole element of an array. This array can contain as many tasks as you like, always represented as a string. The purpose of the “default” task is to let Grunt know that outside of any other named tasks that are registered, this is the list of tasks that should be executed.

Now that we have provided the minimum details needed, we can run Grunt by simply typing “grunt” in the terminal. Once Grunt completes, you should see a new file in the “build” folder that is in the root of your project. That file should be named as per the details provided in the “uglify” section of the object passed to the grunt.initConfig() method. You’ll see that file has been “uglified,” meaning that it has been minified and obfuscated. The end result should be a significant reduction in file size.

The Built File
The Built File

Image # 3: The  built file

Summary

The example used in this article was very basic (about as basic as you can get!). My goal was to provide the critical base information needed in order to understand, setup and use Grunt for the first time. There is a great deal of power available from Grunt. While it may not fit everyone’s needs, it can, in many cases, provide a robust and actively maintained open-source framework with which to create simple or complex build processes.

Helpful Links for Getting Started with Grunt

http://gruntjs.com/

http://gruntjs.com/getting-started

http://net.tutsplus.com/tutorials/javascript-ajax/meeting-grunt-the-build-tool-for-javascript/

http://blog.mattbailey.co/post/45519082789/a-beginners-guide-to-grunt

Creating a Simple JSONP API with Node.js and MongoDB

Node.js

MongoDB LogoBy leveraging the Node.js middleware “express”, we can create functionality for viewing, adding or deleting JSON data.

In a previous article: “Using Mongoose ODM to Connect to MongoDB In Your Node.js Application,” we learned the basics about connecting to a MongoDB database in a Node.js application. Because that article barely skimmed the surface of what is possible, we’ll take a few more baby steps here with our data. And for the sake of brevity, I’ll skim over the Mongoose.js details. If needed, you can refer to the article mentioned above for more details on that.

The goals for this article are:

  • Allow the user to view all data in the database
  • Allow the user to make a JSONP call to get all data
  • Allow the user to add a new name to the Sales database
  • Allow the user to delete all data in the database

When completed, this will be far from a robust or production-ready application, but we will, at minimum, learn how to view / add / delete data in our MongoDB database, using clean URLs in the browser.

Dependencies

In order to use the code in this article, you’ll need the following installed on your computer:

Node.js
MongoDB

Installation of these components is beyond the scope of this article, but if you follow the provided links, you will be pointed in the right direction.

File Structure

  • app.js
  • package.json

For this article, we will need two files: app.js and package.json. So, in your project folder, create these two empty files. The following sections will explain what to put in them.

Example # 1A

In Example # 1A, we have the contents of package.json. Note that for a more detailed discussion about package.json files you can search this blog for helpful articles. The two dependencies declared are “mongoose” and “express”. When you use node package manager to install dependencies, npm will download and install mongoose and express for us.

Example # 1B

In Example # 1B we see the command needed to install the dependencies for our application. Once you run this command, you will have everything needed to start writing code.

Getting Started

Open app.js in your text editor. From this point on, you can copy / paste the code in each example into the app.js (or you can scroll to the bottom of this page and paste the entire code listing in one step).

Example #2

In Example #2, we declare all of the top-level variables we’ll need in our script. Take note of “app”, which will be used to leverage the express middleware that we listed as a dependency. Also, “initApp”, which is called from the very end of this script. It is used to start the HTTP server.

Example #3

In Example #3, we have our database implementation. The details are identical to those in the previously mentioned article, so we’ll skip over that.

Example #4

In Example #4, we get into something new. If you remember from Example #2, the variable: “app” is an instance of the Express middleware object. We use the .get() method of that object to define what will happen when certain requests are made. When users navigate to the root of our web application, they are presented with a simple message. We accomplish this by passing two arguments to the .get() method: a string representing the requests we want to respond to (i.e. “/”), and an anonymous function. That anonymous function takes two arguments: “req” and “res”, which represent the request that was made, and the response object that we will send back. We use the .end() method of the response object, and pass in the string we want to send to the browser.

The second call to the app.get() method responds to “/json/delete”. It, in turn, calls a function named: utils.deleteAllData(), which will be explained a bit later.

Example #5

In Example #5, we use the app.get() method to respond to the request: “/json”. For this request, we want to show all of the data in the database. We start off by requesting all of the data in the database: salesMember.find({}).exec(). The anonymous function that is passed to the exec() method provides access to an error object (if there is one), and the results of our search. In this case, the result object is JSON, which contains all the data in the database, which we then stringify.

We then use the utils.isJsonCallback() method to determine if the user added a callback function name to the query string. If so, we wrap our database JSON with the named callback. We then deliver the JSON by passing it to the res.end() method.

Example #6

In Example #6, we respond to a request to add a new user to the database (i.e. “/addUser”). If you remember from the top of the script, the variable “url” allows us to leverage the same-named Node.js module, which provides programmatic access to the URL. We then use the “url” object to access the query string for the new user parameters. Once we have that information, we can leverage code that is nearly identical to the previous article, to create a new document in the collection. So just think of this as adding a row to a database table).

Once the new data has been saved, we then end the response with some HTML, informing the user of the successful data addition, and add a link that allows them to view all data or go to the home page.

Example #7

Example #7 contains all of the utility functions used throughout our code:

utils.isJsonCallback : Returns true if a callback name was provided in the query string
utils.getJsonCallbackName : Returns the name of the callback provided in the query string
utils.wrapDataInCallback : Returns the JSON data, wrapped in the callback function
utils.deleteAllData : Deletes all of the data in the database

Note: At the end of Example #7 you will also see a call to initApp(). This simply starts the HTTP server.

Example #8

So finally, in Example #8 we have the complete code for our working example. You can start the application by navigating to the root of the folder that contains app.js and entering the following command in the terminal: node app.js.

NOTE: On line # 97 of Example #8, I escape the double quotes that are part of HTML element attributes. I did this only because the color-coding of the plugin used to make code more readable was being particularly difficult for some reason. You will likely need to surround that entire string in single quotes, and remove the escape characters: “\”.

Summary

In this article we leverage MongoDB, mongoose and express middleware to create a very basic JSONP API. By using the .get() method of the express object instance, we created functions that respond to specific requests. As a result, we were able to provide the user with functionality to view all data, retrieve all data as a JSONP call, add a user to the database, or delete all data.

Using Mongoose ODM to Connect to MongoDB In Your Node.js Application

Node.js

MongoDB LogoMongoose ODM simplifies the process of connecting to your MongoDB database in your Node.js application and working with the data.

If you are a JavaScript developer, using MongoDB as your backend database is a joy. If for no other reason, you get to think of and interact with data as JSON objects. This serves to solidify the case for Node.js: those of us who live and breathe JavaScript on the client side, can now extend our skill set to include server-side development using the language we love.

The quickest way to get up and running with MongoDB in your Node.js application is to leverage Mongoose ODM. The Mongoose website defines it as a : “…straightforward, schema-based solution to modeling your application data…”. That’s a little deep for me. Suffice it to say, it makes interacting with MongoDB incredibly simple.

In this article, our goal is extremely simple: connect to MongoDB, create a record and then show that record in a web page. While we will barely scratch the surface of what is possible, we will, at minimum, accomplish our modest goal. I’m sure that, as a programmer, you’ll get halfway through this code and realize how much more is possible. You can then take this very basic code, copy and paste it into your own application and then build a more robust solution.

Dependencies

In order to use the code in this article, you’ll need the following installed on your computer:

Installation of these components is beyond the scope of this article, but if you follow the provided links, they will point you in the right direction.
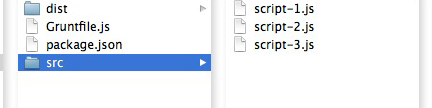
File Structure

  • app.js
  • package.json

For this article, we will need two files: app.js and package.json. In your project folder, create these two blank files. The following sections will explain what to put into them.

Example # 1A


In Example # 1A, we have the contents of package.json. I won’t spend too much time on this file. For a more detailed discussion about package.json files you can search this blog for helpful articles. I will point out that the single dependency declared is “mongoose”. When you use node package manager to install dependencies, npm will download version 3.5.7 of mongoose for us.

Example # 1B

In Example # 1B we see the command needed to install the dependencies for our application. In this case, the single dependency declared is “mongoose” version 3.5.7. Once you run this command, you will have everything needed to start writing code.

Getting Started

Open up app.js in your text editor. From this point on, you can copy / paste the code in each example into the app.js (or you can scroll to the bottom of this page and paste the entire code listing in one step).

Example # 2

In Example # 2 we have the variables that we need for our application. Here are the details:

http : a module built into node.js that provides http server methods
mongoose : will be an instance of mongoose, which we listed as a dependency
dbConnString : tells mongoose where the database is running
dbport : tells mongoose which port to use
salesSchema : will be explained a bit later
salesMember : will be explained a bit later

NOTE: I define salesSchema, salesMember and salesMemberDocument at the top of the script because it is a best practice to define all of your variables at the top of your script or function, even if you are not ready to initialize them.

Example # 3

Connecting to the MongoDB Database

In Example # 3, we start out by connecting to the database. The first argument is the connection string, which tells mongoose to find the database. The second argument is a function. Because this connection is an asynchronous event, the anonymous function that we pass as the second argument allows us to safely act upon the completed connection event. Like many Node.js callbacks, this anonymous function takes two arguments: “err” and “res” (which you can of course name anything you want). In the callback, we are interested in the error argument. If the error argument is “falsy”, then we can assume it’s safe to proceed. In this case, we simply log the appropriate console messages.

Defining a Schema

Next up, we define our database schema. Again, just to keep things simple, I won’t go into this in detail. Suffice it to say that we are telling mongoose how the data we will work with will be structured.

Defining a Data Model

Now that we have defined our schema, we call the “model” method of the mongoose object, assigning the resulting value to our variable “salesMember”. When calling mongoose.model, we pass the name of the collection as the first argument (i.e. “Sales”). If the collection does not exist, then it will be created. Simple, simple, simple. The second argument is the schema that will be used, which in this case is the variable “salesSchema”.

Finally, we call the “remove” method of our “salesMember” model, which empties out the collection. This will of course delete the data that we are about to create each time you reload the page. You can safely skip this code block so that each time you run the script and create a new entry in the collection, it persists.

Example # 4

Creating a Document in the MongoDB Collection

In Example # 4, we finally get down to business. Here we overwrite the “salesMemberDocument” variable with a new instance of the “salesMember” model. We pass it an object which represents the data for MongoDB document (you can think of this as a record in a database table and our “Sales” collection as the database table). We then call the “save” method of the salesMemberDocument object. This persists the data.

Example # 5

Starting the Server and Presenting the MongoDB Data

In Example # 5, we create an HTTP server and start it, and then immediately write a “200 ok” header, with the Content-Type of ‘application/json’ (we will present our data as JSON in the browser). Next, we call the find method of the “salesMember” model, passing it an empty object. This tells the “salesMember” model to return everything (i.e. all records in the database table). That method call takes an anonymous function as an argument. We check to see that there were no errors, and if not, we send the result of our find method call to the browser, courtesy of JSON.stringify().

Example # 6

In Example # 6, we have the complete code for our Node.js application. If you paste all of this code into app.js, and be sure that you have successfully executed that file in Node.js, open a browser, and then enter “localhost:5000” in the address bar, you will see the application in action.

Running the Application

In your terminal, navigate to the application folder, and then run the following command:

Example # 7

In Example # 7, we have the JSON data returned in the browser. If you followed the instructions in each step of this article, this is what you should see (although the value of “_id” will differ).

Summary

In this article we learned how to use Mongoose ODM to make a connection to a MongoDB database in a Node.js application. We learned how to define mongoose as a dependency and install it with npm (node package manager). We also covered how to connect to the database, instantiate the schema class, and define a model. In addition, we discussed how to create a new document, save it, and then retrieve it. While this article presented the most bare-bones information on the topic, I hope that it has provided the background you need to get started with MongoDB.

Helpful Links for Mongoose ODM and MogoDB

General

MONGOOSE BASICS: STORING DATA WITH NODE.JS AND MONGODB

Mongoose ODM

http://mongoosejs.com/

http://mongoosejs.com/docs/guide.html

https://devcenter.heroku.com/articles/nodejs-mongoose

MogoDB

http://www.mongodb.org/

http://docs.mongodb.org/manual/

http://en.wikipedia.org/wiki/MongoDB

http://mrbool.com/course/introduction-to-mongodb/323