Book Review: High Performance JavaScript by Nicholas C. Zakas

JavaScript

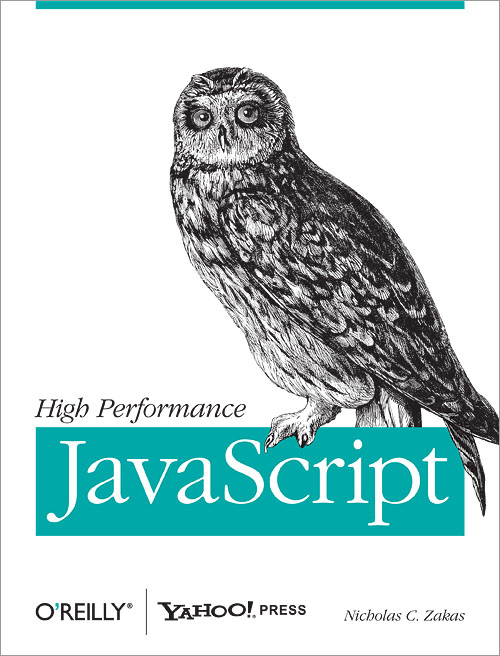
High Performance JavaScript by Nicholas C. Zakas Book Cover
High Performance JavaScript by Nicholas C. Zakas
While JavaScript engines are getting faster every day, complex logic or heavy DOM manipulation can still lead to sluggish browser performance. Nicholas C. Zakas takes you on a journey into the more subtle areas of JavaScript, providing a deeper understanding of how to create faster and more responsive user interfaces

For many front-end web developers, mastering concepts such as context, closures or callbacks is a major milestone in learning JavaScript. As you start to work with asynchronous events and complicated DOM manipulation, writing JavaScript code can become even more adventurous and quite rewarding. But it is right about this time that you may start to notice sluggish or even non-responsive pages. High Performance JavaScript (Build Faster Web Applications Interfaces), by Nicholas C. Zakas, provides numerous insights that will help you to understand why some of these issues arise and how to prevent them from happening.

With the help of Ross Harmes, Julien Lecomte, Steven Levithan, Stoyan Stefanov, and Matt Sweeney, Mr. Zakas leads the reader through a series of articles that detail advanced techniques for better JavaScript performance. In many cases, it comes down to programming patterns that are not unique to JavaScript, but lend themselves well to this context. But there is also JavaScript-specific advice with regard to cloning nodes, caching references to objects and optimizing expensive operations. Inside these 202 pages is expert advice on how to refactor loops, conditionals and recursion, as well as smarter regular expressions and AJAX. You’ll also find great coverage of the best tools available for improving JavaScript performance.

If you are an intermediate to advanced front-end web developer who is looking to gain a deeper understanding of the JavaScript language, this book is an invaluable resource.

  • Book Review: High Performance JavaScript by Nicholas C. Zakas
  • Length: 202 pages
  • Publisher: O’Reilly Media; 1st edition (March 30, 2010)
  • Language: English
  • ISBN-10: 059680279X
  • ASIN: B00CVDSYLG

Angular.js Basics: Routes Part III: Creating a Default Route (version 1.0.8)

Angular

Anuglar.js route

Learn how to create a default route in your Angular single-page app.

In Part II of this series: “Angular.js Basics: Routes Part II: Partials“, we learned how to leverage partials in order to decouple our HTML from the associated controllers. This not only proved to be fairly simple, but it also helps to keep our JavaScript code easier to manage and allows us to create HTML templates that can support a higher degree of complexity.

But in the previous example, when our page loaded, the element with the ngView directive was empty by default. So, the user was required to click a link in order for us to display any content provided by a partial.

In this article, we will learn about a new method of the $routeProvider object that allows us to tell Angular which partial to inject into the DOM when the base page loads.

Two things to note: 1) This article is specific to Angular 1.0.8.   2) The example code that follows leverages code from Part II of this series: “Angular.js Basics: Routes Part II: Partials“. For the sake of brevity, I won’t review much of what we learned in the previous article in great detail. If you are completely new to the idea of Angular Routes, I highly recommend you read Parts I and II of this series, and then return here.

You can download a working version of this code here: https://github.com/kevinchisholm/angular-1.0.8-default-route

The JavaScript file with the code samples you see below can be found in the file: www/js/myApp.js

Configuring your routes

Example # 1

In Example # 1, we re-visit the function expression: configFunction. You may recognize the two calls to $routeProvider.when(). These let angular know how we want it to handle requests to the routes “/hello” and “/goodbye”. In both cases, I’ve omitted the properties of the object that makes up the second argument to that method call, just to keep the example code to a minimum (these details were covered in Part I and Part II of this series).

The otherwise method

What follows those two calls is the .otherwise() method of the $routeProvider object. This method tells Angular what to do if the current request does not match any of the ones specified by the one or more calls we have made to the $routeProvider.when() method.

This is quite a useful feature. It allows us to continue to leverage an Angular partial that will be injected into the DOM by default. A typical scenario for this would be some kind of “home” page. Since the examples provided in this series are focused around the routes “/hello” and “/goodbye”, I decided that when neither route has been requested, I’d like to show the message “Hello!”. I’ve leveraged the same partial file: “message.html”, but the inline anonymous function that is assigned to the “controller” property sets the value of $scope.message” to “Welcome!”. The end result is that when you load the base page (i.e. part-3.html), the default message is “Welcome!”.

Example # 2

In Example # 2, we have added two hyperlinks to our navigation component: “Home” and “Bad Route”. The “Home” link simply requests an unspecified route: “#/”, which displays the default content “Welcome!”. We have specified this in the controller that is a property of the object passed to the $routeProvider.otherwise() method.


There is also a link named “Bad Route”, which requests the route: “/badroute”. Since we have not told Angular what to do when this route is requested, the details provided in our call to the $routeProvider.otherwise() method tells Angular to also display the default content: “Hello!”. But a subtle problem we have is the hash. In this case, the URL in the address bar will show: “#/badroute”, even though Angular does as we ask, and displays the default content. The problem here is that we are giving the user an opportunity to deep-link this URL, even though it is an un handled route. We need to fix this.

the redirect-to property

Example # 3

In Example # 3, we have added a new property to the object that is passed to the $routeProvider.otherwise() method: “redirectTo”. This tells Angular that when a route that we have not specified is requested, then in addition to using the specified partial and controller, it should re-direct the requested route to the “root” of our application. We could also specify another valid route, for example “/login”, etc. In this case, we simply want the address bar to show the root of the app. This way, when the user requests a route that is un handled, that request fails gracefully.

Example # 4

In Example # 4, we have the full code for our working example.

View and test the full working example code

HERE IS THE LINK FOR THE FULL WORKIG EXAMPLE: http://examples.kevinchisholm.com/javascript/angular/routes/part-3.html

How to Demo: In the blue box, you’ll notice two hyperlinks: “Hello” and “Goodbye”. Click either one of those links. When you click either link, you’ll notice that the appropriate HTML is injected into the DOM on the right side of the page. Note as well that in your browser’s address bar, “#hello” and “#goodbye” are appended to the URL. This is Angular’s way of providing support for deep-linking. The web page you are on never refreshes, but the hash portion of the URL changes.

Differences in the code

The main difference between this example and the same one from Part # 2 of our series is our use of a default route. When the page initially loads, the message “Welcome!” is displayed. The reason why this happens is: we have specified that message in our call to the $routeProvider.otherwise() method. Also, if you click the link: “Bad Route”, the default route is displayed as well. From Angular’s perspective, it is the exact same scenario: the user has requested a route that has not been specified, so our default route is used.

Summary

In this article, we learned how to create a default Angular.js route. While covering this topic, we focused on the the $routeProvider.otherwise method, which tells Angular how to handle a request for a route that has not been specified by a call to the $routeProvider.when() method. We also discussed the importance of the “redirectTo” property, which tells Angular to redirect to a route that has been properly configured, which makes for a better user experience.

here are some Helpful Links for the $routeProvider.otherwise method

http://docs.angularjs.org/api/ngRoute.$routeProvider

https://www.bitcast.io/b/getting-started-with-angularjs?v=angularjs-routeprovider-api

http://vxtindia.com/blog/8-tips-for-angular-js-beginners/

Angular.js Basics: Routes Part II: Partials

Angular

Angular.js LogoLearn how to use partial templates in your Angular single-page app.

In the first article of this series: “Angular.js Basics: Routes Part I,” we learned how Angular can intercept a hyperlink click, and inject HTML into the DOM. Accomplishing this is surprisingly straightforward because Angular provides a great deal of abstraction with regard to preventing a full-page refresh, DOM manipulation, and deep-linking via the hash.

In that previous post, the HTML that we injected into the DOM was a string that was assigned to the “template” property of the object passed to the $routeProvider.when() method. While this makes it easy to accomplish our task, it is not optimal because we are mixing with JavaScript. Also, a real-world scenario might require markup significantly more robust than the simple one-line string we use (i.e. <h1>{{message}}</h1>). What we need is the ability to leverage HTML that is separate from our JavaScript code, and could be hundreds, even thousands of lines of markup. Most importantly, our JS controller should have no concern for the markup we use; its only job is to be told where it is, and then inject it into the DOM.

An Angular partial is simply an HTML file. The main difference between this and a full-fledged web page is that the partial contains only the HTML we need. There is no need for a !DOCTYPE declaration, HTML, HEAD or BODY elements. The HTML in this file will be injected into the current web page, so only the markup that makes-up the actual component is needed.

Note: The example code that follows leverages code from Part I of this series: “Angular.js Basics: Routes Part I”. For the sake of brevity, I won’t review much of what we learned in the previous article in great detail. If you are completely new to the idea of Angular Routes, I highly recommend you read that article first, and then return here.

Example # 1

In Example # 1, we have the entire contents of the file message.html. This file sits in the same folder as our web page. As you can see, it contains only two lines of HTML: an H1 tag and a paragraph tag. There is also a set of double-curly-braces in the paragraph tag. As per our discussion in the last article, this is a placeholder for the “message” property of the $scope object to which this element is bound.

Example # 2

In Example # 2, we have our call to the $routeProvider.when() method. As per the previous article’s discussion, this method takes two arguments: the path that we want Angular to respond to, and an object that tells Angular how to handle this request.

The code in Example # 2 is virtually identical from that of the previous article with one exception: Instead of using a “template” property, we are now using a property named “templateUrl”. What this tells Angular is:

When the user requests “/hello”, do not actually direct the browser to that path.
Load the file “message.html” via ajax, and inject it into the DOM
In “message.html”, replace {{message}} with the value of $scope.message

While all of this occurs in virtually milliseconds, it is important to note that these steps are, in fact, executed by Angular.

Example # 3

In Example # 3, we have made the same change to the $routeProvider.when() method call for the path “/goodbye”.

Example # 4

HERE IS THE LINK FOR FULL WORKING EXAMPLE: http://examples.kevinchisholm.com/javascript/angular/routes/part-2.html

How to Demo: In the blue box, you’ll notice two hyperlinks: “Hello” and “Goodbye”. Click either one of those links. When you click either link, you’ll notice that the appropriate HTML is injected into the DOM on the right side of the page. Note as well that in your browser’s address bar, “#hello” and “#goodbye” are appended to the URL. This is Angular’s way of providing support for deep-linking. The web page you are on never refreshes, but the hash portion of the URL changes.

The main difference between this example and the same one from Part 1 of our series is our use of partials. Instead of hard-coding an HTML string in our JavaScript controller by assigning it to the ‘template” property, we specify a “templateUrl” property and assign a value that points to an HTML file containing only the markup we need.

Summary

In this article, we learned how to leverage Angular partials. Instead of hard-coding some HTML in our JavaScript file, we tell Angular where to find an HTML file that contains the markup we need. The main advantage here is the ability to decouple our JavaScript from the presentation code. And the HTML files that comprise our partials can be as large or complex as we like.

Helpful Links for Angular Partials

http://docs.angularjs.org/tutorial/step_07

http://onehungrymind.com/building-a-website-with-angularjs-routes-and-partials/

Angular.js Basics: Routes Part I

Angular

Learn how to spin-up an AJAX-driven single-page app by leveraging Angular.s Routes

Single-page applications have become a common project for many front-end web developers. The key components to any such endeavor is the ability to intercept hyperlinks, the updating of the DOM without actually refreshing the page, and support for deep-linking.

Anyone who has attempted even the most basic single-page application knows that managing this kind of interaction on the client-side can be tedious. Angular.js provides a significant level of abstraction when it comes to these kinds of tasks. In a few dozen lines of code, you can quite easily spin-up an AJAX-driven single-page app by leveraging Routes & Views.

Example # 1

In Example # 1, we have added the ng-app directive to the BODY tag. The value is “mainRouter”, which means there must be an Angular module by that name available. We will create this module shortly.

Example # 2

In Example # 2, we have two hyperlinks. Note that the values provided for each element’s HREF attribute are preceded by a hash. This allows Angular to intercept the hyperlink, process the request and prevent the page from following the URL (which would result in an error).

Example # 3

In Example # 3, we have an empty element with an ng-view directive. This is the element into which Angular will inject the HTML templates that we specify.

Example # 4

In Example # 4, we have created an Angular module. This is done by assigning a variable to the return value of a call to the angular.module() method. This method takes two arguments: the name of our module as a string (required), and an array of dependencies (optional). Although the second parameter is optional, because these dependencies are provided via an array, if you do not specify any dependencies, you must still include an empty array.

Example # 5

In Example # 5, we configure our router module by calling it the config() method. This method takes an array as an argument. The first element of the array is the $routeProvider object (which we will use shortly), and the name of a function that will execute our configuration code. It is perfectly acceptable (and quite common) to provide an inline anonymous function for the second parameter. I have specified a function expression instead, simply to keep the example code straightforward and easy to understand.

Example # 6

In Example # 6, we have a function named configFunction(). This function expression is passed to the config() method of our myRouter module. It takes the $routeProvider object as its sole argument. The real action takes place as we make a call to the $routeProvide’s when() method. This method expects two arguments: the URL to watch for, and an object. The properties of that object allow us to tell Angular a number of things about what should happen when the specified URL is requested by the user.

The specified URL is not a fully-qualified web address that starts with “http://”. Instead, we specify a path that is relative to the current page. The general approach is that this path should resemble a RESTful API address.

Examples:

  • http://www.some-domain.com/users (would return a list of users)
  • http://www.some-domain.com/users/1 (would return the user with the ID of “1”)
  • http://www.some-domain.com/users/add (would allow you to add a user)
  • http://www.some-domain.com/users/remove (would allow you to remove a user)
  • Etc…

A discussion of RESTful web services is out of the scope of this article. If you are not familiar with that topic, there are a few links at the bottom of this page that you might find helpful.

In the case of Example # 6, we have told Angular that when the user clicks a link that points to: “/hello”, two things should happen:

  1. The element with the ngView directive should have the HTML string assigned to the “template” property injected into it (i.e.<h1>{{message}}</h1>)
  2. The inline anonymous function that is assigned to the “controller” property should be executed.

A few things to note about these two actions that Angular takes:

In the HTML string that is injected into the element with the ngView directive, there is a set of double-curly-braces. This functions as a client-side template. When the specified HTML is injected into the DOM, the value of the “message” variable is inserted inside of that set of double-curly-braces. That value is provided by the function assigned to the “controller” property of this object passed to the $routeProvide’s when() method. That function takes the $scope object as an argument, and inside of the function, the string: “Hello!” is assigned to the “message” property of the $scope object.

Note: Once again, please note that this function expression could have been defined inline as an anonymous function when we made the call to myRouter.config() in Example # 5. The reason that I chose to break it out like that is because it made it easier to demonstrate the critical pieces of code, while keeping them fairly simple.

Example # 7

In Example # 7, we have added another route: “/goodbye”. So when the user requests that URL, the exact same actions taken in Example # 6 will be performed by Angular, with the only difference being the value of $scope.message: “GoodBye!”.

Example # 8

In Example # 8, we have the full code for our working example.

HERE IS THE LINK FOR OUR FULL WORKING EXAMPLE # 8: http://examples.kevinchisholm.com/javascript/angular/routes/part-1.html

How to Demo: In the blue box, you’ll notice two hyperlinks: “Hello” and “Goodbye”. Click either one of those links. When you click either link, you’ll notice that the appropriate HTML is injected into the DOM on the right side of the page. Note, as well, that in your browser’s address bar, “#hello” and “#goodbye” are appended to the URL. This is Angular’s way of providing support for deep-linking. The web page you are on never refreshes, but the hash portion of the URL changes. If you were to copy and paste http://examples.kevinchisholm.com/javascript/angular/routes/part-1.html#/hello or http://examples.kevinchisholm.com/javascript/angular/routes/part-1.html#/goodbye into another browser, your single-page app would “link” to that desired behavior. What is really happening is that Angular is intercepting any request that comes after the hash, and taking the actions that we specified in Examples # 6 and # 7. If you were to remove the hash from either URL, you would receive an error because the URL http://examples.kevinchisholm.com/javascript/angular/routes/part-1.html/goodbye is not valid.

Summary

In this article, we discussed Angular.js routes, a powerful feature that allows you to create fully-functioning single-page web apps with minimal effort. We talked about how to create an Angular module, configure that module, and call the $routeProvider.when() method in order to tell Angular how to intercept specific URL requests without refreshing the page, and inject the appropriate HTML into the DOM. We also discussed how this feature is based on RESTful URL syntax.

Helpful Links for Angular.js Routes and RESTful Web services

Angular.js Routes

http://docs.angularjs.org/api/ngRoute.$route

http://docs.angularjs.org/api/ngRoute

http://viralpatel.net/blogs/angularjs-routing-and-views-tutorial-with-example/

RESTful Web services


http://searchsoa.techtarget.com/definition/REST

http://www.ibm.com/developerworks/webservices/library/ws-restful/

Angular 1.x Data-Binding Basics: the ng-model Directive (Part III)

Angular

Although the Angular ng-model directive creates a privately-scoped object for an element, any descendants of that element also have access to that object.

In the previous article of this series: “Getting Started With Angular.js: Data-Binding Basics With the ng-model Directive (Part II)” we demonstrated how two HTML elements with their own unique ng-controller values can reference the same-named data value, yet access completely different data. The main purpose of that article was to demonstrate how each individual ng-controller directive creates a privately-scoped $scope object.

In this article, we will demonstrate how each privately-scoped $scope object inherits from the next ancestor with an ng-model directive, all the way up the DOM tree.

There are three very important native JavaScript concepts at play here:

  1. scope
  2. context
  3. object.prototype

Although a thorough discussion of any of these three topics is more than can adequately be covered here, it is important to note that they all come into play. I’ll point them where appropriate.

Example # 1

In Example # 1, we have an element with the class “parent”. It wraps the two “children” elements that we used in the previous article. Notice that the ng-model directive has a value of: “myData.parent”. This means that this element has a privately-scoped $scope object, with a property “myData”, which is an object, and that object has a property named “parent”. Note as well that the {{myData.parent}} placeholder is bound to the exact same data.

Example # 2

In Example # 2 we have a “child” element. Compared to the HTML from Part II of this article, there are a few changes:

The text box and span.val elements are bound to the data: “myData.left”
We have added two elements that are bound to “myData.parent”.

The reason for adding the second set of data-bound elements is to demonstrate that this “child” elements has access to not only its own privately-scoped data: “myData.left”, but also the “myData” property of the $scope object of it’s next descendant with an ng-model attribute. This is an example of leveraging JavaScript’s prototype object to create inheritance. While it may seem that JavaScript “scope” is driving this kind of parent -> child access to the Angular $scope object, it is, in fact, inheritance through the prototype object.

HERE IS THE JS-FIDDLE.NET LINK FOR EXAMPLE # 2: http://jsfiddle.net/Gfm7Q/

How to Demo: Type anything in the box. You’ll see that when you type in the “parent” text box, both “children” have access to its data, and that updated data is injected into the DOM of each “child” element in real-time. Yet each “child” element has access to its own privately-scoped $scope.myData object (i.e. myData.left and myData.right).

Example # 3 A

Example # 3 B

In Example # 3A, we have a new element: “grandParent”. The exact same concept as the “parent” element applies: this element has an Angular ng-model directive with a value of: “myData.grandParent”, yet its privately-scoped $scope object is inherited by the “parent” object and both “child” objects.

In Example # 3B, we see a snippet of HTML that has been added to the “parent” and “child” elements. The purpose of this HTML is to demonstrate that we can bind DOM elements to data that belongs to ancestor elements.

HERE IS THE JS-FIDDLE.NET LINK FOR EXAMPLE # 3: http://jsfiddle.net/Gfm7Q/1/

How to Demo: Type anything in the text box. You’ll see that when you type in the “Grand Parent” text-box, the “parent” element and both “children” have access to its data, and that updated data is injected into the DOM of each descendant element in real-time. The same goes for the “parent” element. Yet once again, each “child” element has access to its own privately-scoped $scope.myData object (i.e. myData.left and myData.right).

Example # 4

In Example # 4, we have the full HTML for this article’s working code.

Summary

Much like Part I and Part II of this series on Angular.js data-binding, the examples in this article are very simple. The goal was to provide a very basic demonstration of how DOM elements have access to the data that is bound to their ancestors via their ng-model directive. A key concept to focus on is the fact that Angular provides abstraction for this functionality which would require a great deal of code to replicate. Furthermore, this abstraction is application-agnostic, so you can leverage Angular for a wide range of projects. The features provided have no knowledge of how they will be employed. They “just work.”

Helpful Links for Angular $scope Inheritance

https://github.com/angular/angular.js/wiki/Understanding-Scopes

http://www.ramandv.com/blog/angular-js-sharing-data/

http://stackoverflow.com/questions/14232397/scope-inheritance-in-angularjs

http://www.cubicleman.com/2013/03/14/angularjs-and-a-js-prototypal-inheritance-gotcha/

Angular.js Data-Binding Basics: the ng-model Directive (Part II)

Angular

Learn how to use the exact same HTML, yet let Angular bind that markup to different pieces of data.

In Part I of this series: “Getting Started With Angular.js: Data-Binding Basics With the ng-model Directive (Part I),” we covered the absolute basics of data-binding with Angular.js. In that article, we discussed how multiple elements can be bound to the same piece of data, and when that data changes, any elements bound to it are updated.

While this kind of abstraction is incredibly useful and powerful, it is a simple scenario. Having multiple DOM elements that are bound to different pieces of data is probably a more real-world context for a front-end web developer.

In this article, we will learn how to use the exact same piece of HTML yet let Angular bind that markup to different pieces of data.

Example # 1

In Example # 1, we have some very simple HTML. There is an input element, and a paragraph. You will probably notice that this HTML looks a bit unusual. The input element has what looks like an HTML attribute named: “ng-model”. But this is not a standard HTML attribute, it is actually an Angular directive. It specifies the data that this element will be bound to.

The second area where you may notice something unusual is the text: {{myData}} that is inside of the SPAN element with the class: “val”. This functions as a placeholder for some data that is named: “myData”.

The HTML detailed above will be used numerous times in this article’s examples. The main point to stress here, is that this HTML is generic in nature; there are no HTML ID attributes in use, and no data is hard-coded. For this reason, it can be used more than once, exactly as-is, throughout our HTML.

Example # 2

In Example # 2, we have two “child” elements. These simply serve as containers for the code in Example # 1. These elements are almost completely generic. The only thing that differentiates them from each other is the Angular directive: “ng-controller”. They each reference a different controller. There is a reason for this, which will be addressed shortly. Other than the value of the “ng-controller” directive, the HTML of these two elements is identical.

NOTE: If you look at the BODY tag, you will see that this element also has an Angular directive: ng-app (<body ng-app>). This tells Angular that it should manage all elements contained inside of that element.

Example # 3

In Example # 3, we have two functions: “leftController” and “rightController”. You may recognize the names from the two Angular directives mentioned in Example # 2. Controllers allow you to provide private variable scope on a per-element basis. Each element in your application that has an “ng-controller” directive has its own $scope object, which is a variable in a function behind the scenes, which makes it private. Each instance of this object can be extended as-needed. Even though the two functions specified in Example # 3 do absolutely nothing at this point, they are required because the “ng-controller” directive tells Angular: “hey, use this function for this element, in order for it to have its own private $scope object.” So, even if it does nothing, the function must exist globally.

Note: it is highly recommended that you leverage best practices such as name-spacing in order to make your controllers accessible while keeping the global name-space clutter-free. This kind of design pattern is out of the scope of this article, but you can learn more about it in my article: “Using an Immediate Function to Create a Global JavaScript Variable That Has Private Scope.”

Example # 4

In Example # 4, we have placed the HTML from Example # 3 inside of a “child” element. This means that the data referenced by: “myData” is private to the element: div.child.left. When you look at the working code for this example, you’ll see that anything you type in the input field is injected into the DOM.

HERE IS THE JS-FIDDLE.NET LINK FOR EXAMPLE # 4: http://fiddle.jshell.net/Pnwz4/

How to Demo: Type anything in the text box. You’ll see that whatever you type is updated in the element below the text box. Both the text-box and the element that displays the text are bound to the “myData” property of the same object, which has been created by Angular. This object is a private variable, created by the controller: “leftController”.

Example # 5

In Example # 5, we have added a second copy of the input element HTML. Because they both reside within the element with the Angular directive: ng-controller=”leftController”, all references to “myData” point to the same object’s “myData” property.

HERE IS THE JS-FIDDLE.NET LINK FOR EXAMPLE # 5: http://fiddle.jshell.net/Pnwz4/1/

How to Demo: Type anything in either text box. You’ll see that anything you type in either input field is injected into the DOM. Once again, this is because all references to myData point to the same object.

Example # 6

In Example # 6, we have moved the second INPUT element (and associated elements) to a different “child” element, which has its own ng-controller directive. This means that although each INPUT element and client side template references data named: “myData”, they are referencing different data (in each case, “myData” is a property of the $scope object that is a private variable of a different function).

HERE IS THE JS-FIDDLE.NET LINK FOR EXAMPLE # 6: http://fiddle.jshell.net/Pnwz4/2/

How to Demo: Type anything in either text box. You’ll see that only the DOM element that resides in the associated “child” element is updated. This is because each “child” element references a different ng-controller directive, which provides a privately-scoped variable containing the object that holds the “myData” value.

Example # 7:

In Example # 7, we have the complete HTML for this article’s working example. When you type in the text-input of each child element, the text you type is injected into the DOM.

Summary

The purpose of this article was to demonstrate how the exact same HTML can easily be used in more than one place, but access completely different data by leveraging Agular.js. We were able to accomplish this by creating two different container (aka “child”) elements that had different ng-controller directives. Because each Angular controller creates its own privately-scoped $scope object, two pieces of HTML that are both bound to the same-named data actually reference completely different data. While the examples in this article were extremely simple, I hope they provided a way for you to gain a basic understanding of how Angular controllers provide private data scopes for HTML elements with minimal effort on the part of the developer.

The most important concepts discussed here are:

  • Angular.js directives are extensions of HTML, and look / function much like attributes.
  • The ng-controller directive provides a privately-scoped $scope object for an element.
  • When you specify an ng-controller directive for an element, you must be sure to make a function available that matches the value of the ng-controller directive (this can be a function declaration or a function expression).

Helpful Links for the Angular.js $scope object

http://docs.angularjs.org/api/ng.$rootScope.Scope

http://www.ng-newsletter.com/posts/beginner2expert-scopes.html

http://docs.angularjs.org/guide/directive

http://blog.kevinchisholm.com/angular/angular-js-data-binding-basics-the-ng-model-directive-part-i/

Angular 1.x Data-Binding Basics: the ng-model Directive (Part I)

Angular

Grunt.js Logo
Data-binding with Angular.js is surprisingly simple. To get started, you need only specify an ng-model directive.

One of the most common tasks for any JavaScript developer is to inject a value into the DOM. This value can be a variable or the property of an object. When doing so, you need to make a reference to the target element, and then use a native JavaScript or jQuery method to inject that value (e.g. [SOME_ELEMENT].innerHTML or $(SOME_ELEMENT).html() ). But if that value is injected into more than one element, your work grows exponentially. You now have to manage multiple DOM element references, write code that makes the injections, and also code that pays attention to the data you are working with, so that when that data changes, you can update the DOM element(s) that need to know about that update.

Angular.js provides jaw-dropping abstraction that not only takes care of your messy DOM injection & data-management tasks, but does so with a simplicity and elegance that is truly to be admired.

This scenario can quickly spiral into a frustrating mess of nested-callbacks, hard-coded DOM element references and data-handling functions.

One of the main features of Angular is “Directives.” Angular.js directives are extensions of HTML. They look / function much like HTML attributes; each directive is part of the element’s opening HTML tag, and requires a value, which is enclosed in double-quotes. The ng-model directive specifies the name of a piece of data, which one or more elements can be bound to.

Before we get started, we’ll need to let Angular.js know that we want it to manage our web page. We can do this by adding an ng-app directive to the markup that we want managed (or an element on the page that is a descendant of that markup, such as HTML or BODY).

Example # 1

In Example # 1, we see the ng-app directive. This simply tells Angular to manage everything inside of the BODY tag. We could have placed this close to the elements that we actually want Angular so manage, but it is most simple, and not uncommon, to place it in the BODY tag.

Example # 2

In Example # 2, we have a text box (an input that has a type attribute of “text”), and a paragraph. We have provided an ng-model attribute for the input element, and provided a value of “myData”. Behind the scenes, Angular has created an object that is a private variable of a function, given it a property named “myData”, and bound the value of it to this element. Anything that we type into this textbox will become the updated value of the “myData” property, and when that same “myData” property is changed elsewhere, this textbox will reflect that new value. This two-way data-binding is one of the most powerful features of Angular.js. You’ll also notice that in the HTML of Example # 2, there is a set of double-curly braces, with the text “myData” inside of it. This tells Angular that the value of myData should go inside of the double-curly braces, and be updated whenever the value of myData changes. If you click the link below, it will take you to the JsFiddle.net link for the fully working demo of Example # 1’s code.

HERE IS THE JS-FIDDLE.NET LINK FOR EXAMPLE # 2: http://jsfiddle.net/L69aq/

How to Demo: Type anything in the text box. You’ll see that whatever you type is updated in the element below the text box. Both the text-box and the element that displays the text are bound to the “myData” property of the same object, which has been created by Angular.

Example # 3

In Example # 3, we have added a select element to the page. We have included an Angular ng-model directive and specified a value of “myData”. This means that the select element is bound to the exact same data as the two elements in Example # 2’s code.

If you click the link below, it will take you to the JsFiddle.net link for the fully working demo of Example # 3’s code.

HERE IS THE JS-FIDDLE.NET LINK FOR EXAMPLE # 3: http://jsfiddle.net/L69aq/1/

How to Demo: In addition to typing something in the text box, you can now select one of the options from the drop-down box. Now that SELECT element, the text-box, and the element that displays the text are bound to the “myData” property of the same object, which has been created by Angular.

Summary

In this article, we covered the bare-bones basics of data-binding in Angular.js. The key component here is the ng-model directive. We discussed how the ng-model directive creates a property of an object that is a private variable of a function, and bound to any element whose ng-model directive’s value is the same. We also demonstrated that when more than one element’s ng-model directive values are the same, there is a two-way data binding because when one element changes the value of the data, the rest of the elements bound to that data are updated, and vice versa.

This article merely scratches the surface of data-binding in Angular.js, but the hope is that it has provided a foundation upon which you can start to understand the incredibly powerful and elegant JavaScript library.

Helpful Links for Angular.js Data Binding Basics

http://docs.angularjs.org/guide/databinding

http://docs.angularjs.org/api/ng.directive:ngModel

http://en.wikipedia.org/wiki/AngularJS#Two-way_data_binding

What Are the Top 10 JavaScript Links for AJAX ?

AJAX

AJAX Logo

Over the years I’ve amassed a list of web sites that have strong content about AJAX. Iv’e managed to whittle it down to ten.

This list will change often.


Ajaxian

Ajaxian.com

Other than having a domain that clearly indicates a focus on AJAX, this site offers create content about not only AJAX, but also other web-development technologies.


AJAX | MDN

developer.mozilla.org/en-US/docs/AJAX

Mozilla Developer Network’s introductory page on AJAX is a portal to some of the best content on AJAX out there.


XMLHttpRequest – Web API reference | MDN

developer.mozilla.org

AJAX ain’t nothin’ without the XMLHttpRequest. As usual, Mozilla Developer Network provides a high-quality article on the subject.


Ajax | jQuery Learning Center

learn.jquery.com/ajax

Although I am a believer that any front-end developer should have a strong understanding of AJAX in the context of native JavaScript, this site is a fantastic resource from the folks at jQuery.


Ajax Tutorial for Beginners: Part 1 – CodeProject

codeproject.com

A little old, but a solid article on AJAX from the good folks at The Code Project


The Best Way to Learn JavaScript | Nettuts+

tutsplus.com

Nettuts+ is always a great resource for front-end web development advice. Here they offer guidance on how to get started with AJAX.


Microsoft Ajax Overview

msdn.microsoft.com

It’s from Microsoft, but it’s not a bad article : – )


Ajax : The Official Microsoft ASP.NET Site

asp.net/ajax

If you are a .NET developer, this is a great launch point for .NET specific AJAX content.


A Beginner’s Guide to Using AJAX in Your Website

onextrapixel.com

This article from onextrapixel.com is a good read if you are completely new to the concept of AJAX.


Ajax: A New Approach to Web Applications – Adaptive Path

http://www.adaptivepath.com/ideas/ajax-new-approach-web-applications

This link is not so much a tutorial, but it is the the article that started it all. Jesse James Garrett’s original post that got everyone talking and made the XMLHttpRequest object a rock star.

Who Are the Top JavaScript Developers I Should Know About?

JavaScript

JavaScript LogoThere are a few developers who are particularly knowledgeable about JavaScript. In many cases, their work and their writings are real gems that can provide a deeper perspective on the language.

In this article, I have created a summary of the top JavaScript Developers I’ve come across in the last few years. In each case, I’ve provided a link to the site that I feel best represents their offerings to the JavaScript community. There are likely other links that are applicable for that developer, this is a brief summary.


Brendan Eich

Brendan Eich’s Blog

Although Brendan Eich current efforts are spent as chief technology officer at the Mozilla Corporation, he is the creator of the JavaScript language. If you are the least bit interested in JavaScript, he is in my opinion, someone you’d want to know about.


John Resig

ejohn.org

This is a no-brainer. While not the most actively maintained blog, it is rich with advanced JavaScript information. As the creator of the jQuery JavaScript library, he is someone that every JavaScript developer should pay attention to.


Nicholas C. Zakas

NCZOnline

Nicholas C. Zakas has authored of three of my favorite JavaScript books: Professional JavaScript for Web Developers, High Performance JavaScript (Build Faster Web Application Interfaces) and Maintainable JavaScript. He is an excellent writer and posesses a very advanced knowledge of the language.


Stoyan Stefanov

phpied.com

JavaScript Patterns is one of my favorite JS books. I’ve read it front to back at least four or five times and there is always something new to be learned from it. Currently a software engineer at Facebook, Stoyan is also author of Web Performance Daybook vol 2, JavaScript for PHP Developers, and Object-Oriented JavaScript, Stoyan Stefanov is one of the most prolific JavaScript developers I am aware of. He offers a very advanced perspective on JavaScript that while not always easy reading, is worth the effort. I’ve learned a great deal about JS from reading his books.


Addy Osmani

AddyOsmani.com

Currently working on the Chrome team at Google, Addy Osmani is the author of the book: Developing Backbone.js Applications
Building Better JavaScript Applications, as well as Learning JavaScript Design Patterns. He is a highly respected JavaScript developer whos insights and contributions to the community are invaluable.


Douglas Crockford

javascript.crockford.com

Douglas Crockford is the author of JavaScript: The Good Parts, and the creator of JSON (JavaScript Object Notation). He is someone that clearly thinks and cares about JavaScript a great deal, and has a very deep perspective.


David Walsh

davidwalsh.name

A Web Developer at Mozilla, David is one busy guy. He is a contributor for SitePen, writes great technical articles about Dojo and lectures at some excellent technology conferences.


Kyle Simpson

getify.me

Kyle is the author of You Don’t Know JS JavaScript book series. While his website is pretty bare-bones, it offers a ton of links to his projects and teachings. Kyle has an incredibly deep knowledge of JavaScript and is an excellent speaker / instructor.


Dustin Diaz

github.com/ded

Co-author of JavaScript Design Patterns (an excellent book), Dustin Diaz is a big contributor to the JavaScript community.


Ben Alman

benalman.com

Ben is the creator of some well known jQuery plugins such as: jquery-bbq, jquery-throttle-debounce, and jquery-resize. If I had a dollar for every time I’ve come across some of his JS code pasted into a script, I’d be rich.


Remy Sharp.

remysharp.com

Remy based in the UK, and is one of the curators of HTML5Doctor.com. I have often enjoyed his writings and find him to me one of the more passionate and talented JavaScript developers out there.


Azat Mardanov

azat.co

This is a suggestion from friend and UX Specialist Ken Whaler of Gyroscope Studios in Portland, OR. I’m not familliar with Azat, but after a quick glance, I felt this site is definitely a treasure-trove of solid JavaScript information.

Easy JavaScript Object Context Switching with jQuery.proxy()

jQuery

JavaScript LogoA popular saying in the Real Estate business is: “Location, location, location!” Well, in JavaScript, it’s all about “context”. When you want to leverage the very powerful keyword: “this”, then understanding the current context is critical.

So, those experienced with native JavaScript should be comfortable with the concept of context (If you are not, take a moment to brush up on this subject; it’s important.) When you need to specify context, you would normally use the .call() or .apply() methods. The jQuery folks have also provided a way to accomplish this with their .proxy() method. This method takes two arguments, which are: the function to be executed and the object whose context should be targeted. Any additional arguments are optional and are passed to the function that is executed.

Example # 1

In Example # 1, we have created two simple objects: “foo” and “bar”. Note that each object has one property named “music”. Next, we set up two click event handlers. In each case, we execute the “handler” function. And that function makes reference to “this”. If we were to run that function by itself, the output of the alert would be “undefined”, because when doing that, “this” refers to the window object, which at this time has no property named “music”.

So, by using the jQuery.proxy() method, we specify the context within which the “handler” function should be executed.

Here is the JS Fiddle link for Example # 1: http://jsfiddle.net/Shm47/

Example # 2

In Example # 2, we have taken our cause to the DOM. We first create a function named toggleColor, which when passed a class name, will toggle that class name.

Next, we set up two click event handlers. In each case, we leverage jQuery.proxy(), to call the “toggleColor” function, and specify the context within which it should run. We’re also specifying the class name to be passed to that function.

Here is the JS Fiddle link for Example # 2: http://jsfiddle.net/WzDUj/

Summary

In this article, we learned about the jQuery.proxy() method. In doing so, we discussed how it is used to specify the context within which a function should be executed. First we demonstrated how you can leverage this function using object literals. We then showed how you can do so by using DOM elements.

Helpful Links for the jQuery.proxy() method

http://api.jquery.com/jQuery.proxy/
http://stackoverflow.com/questions/3349380/jquery-proxy-usage
http://stackoverflow.com/questions/4986329/understanding-proxy-in-jquery
http://blog.kevinchisholm.com/javascript/context-http://blog.kevinchisholm.com/javascript/difference-between-scope-and-context/object-literals/
http://blog.kevinchisholm.com/javascript/difference-between-scope-and-context/

JavaScript Concatenation and Minification with the Grunt.js Task Runer

Node.js

Grunt.js LogoCombine multiple JS files into one using JavaScript, Node.js and Grunt.

In the article: “Getting Started with Grunt: The JavaScript Task Runner,” we covered the bare-bones basics of how to set up and use Grunt, to automate and manage your JavaScript build task. In that article, we used a Grunt plugin called “grunt-contrib-uglify” to minify and obfuscate our JS code. But while minification is a common task for any build system, file concatenation is also a technique used to minimize the number of http requests. This helps to improve web page performance. In this article, we will look at the Grunt plugin: grunt-contrib-concat. It exposes a number of very useful methods for simple, to advanced file concatenation.

Example # 1

In Example # 1, we have the contents of “package.json“. Naturally, Grunt is listed as a dependency, but there is a reference to the “grunt-contrib-concat” plugin as well.

The Project File Structure – And Files to be Concatenated


The Empty Distribution Folder


Example # 2

In Example # 2, we have the JavaScript code that will set up and run the Grunt tasks. There are two sections to this code: the call to the grunt.initConfig() method, and the two commands that load the plugin and register the task.

Grunt Init configuration

The method: initConfig belongs to the grunt object. For this article, we are concatenating three JavaScript files. As you can see, the sole property to the object-literal passed to the initConfig method is concat. Its value is another object with two properties: “options” and “dist“. The “dist” property provides an object with critical details for this operation: the location of the source files (“src“). It also provides the location of the file to be created that contains all of the source files (“dist“). Note that the value of the “src” property is an array. This ensures that any number of files can be specified. The path is relative to the Gruntfile. In this example, the “options” property specifies the string that will be used to separate each concatenated file.

Loading the Grunt Plugin and Registering the task

Under the call to the grunt.initConfig() method, we load the “grunt-contrib-concat” plugin by passing it as a string to the grunt.loadNpmTasks method. This makes the plugin available to the rest of our code. Next, we register the “default” task with a call to the grunt.registerTask() method. The first argument is the name of the task (in this case it is “default“). The second argument is an array containing one or more named tasks.

That is all we need to run our tasks. So now, in the terminal, we simply type: “grunt“. After grunt has completed running, you should see a new file in the “dist” folder named: “allScripts.js.

The Built File
The Built File

Summary

In this article, we talked about JavaScript minification using Grunt. We discussed configuring the project dependencies in the file: package.json, which is needed in order for our application to work properly. We also reviewed the file: Gruntfile.js, which is where we did set configuration properties for the build, and then run the tasks. There is plenty to dive into on the subject of minification with Grunt. This article provided the most basic elements of how to set, configure and run a task that combines multiple JavaScript files into one.

Helpful Links for: Grunt.js file concatenation

http://stackoverflow.com/questions/16377674/using-grunt-to-concatenate-all-vendor-javascript-files

https://github.com/gruntjs/grunt-contrib-concat

http://stackoverflow.com/questions/12722855/using-grunt-concat-how-would-i-automate-the-concatenation-of-the-same-file-to-m

Getting Started with Grunt: The JavaScript Task Runner

Node.js

Grunt.js LogoAutomate and manage your JavaScript build tasks with JavaScript, Node.js and Grunt.

Today, even the most straightforward web-based application will involve JavaScript, and chances are that JS code will not be too simple. In-fact, it is often inevitable that your JavaScript could start to grow over time and / or span multiple files. When these dynamics are in-play you’ll find yourself spending more and more time having to organize and test your code. Regardless of the details, this kind of maintenance quickly becomes tedious. I think many will agree that when humans have to perform repetitive / tedious tasks, the chance of error increases. Fortunately, this is the exact kind of work that a computer is thrilled to do, and do well. Using a built tool to manage your JavaScript build tasks is not only efficient, but also a smart way to go.

Grunt is promoted as a “Task Runner.” Semantics aside, it is an aptly named tool that provides a significant level of flexibility and power, when it comes to managing and automating your build tasks.

In this article, I will intentionally “scratch the surface.” While there is a great deal of depth to Grunt, getting started is a critical first step. My focus here is to provide you with information that simply enables you to set the minimum configuration required for your first (albeit simple) automated task with Grunt.

Prerequisites

In order to use Grunt, you’ll need Node.js and the The Grunt CLI (Command-Line Interface). Installing Node is beyond the scope of this article. If you have not installed Node yet, you can start here: http://nodejs.org/

The Grunt Command-Line Interface

The Grunt CLI is used to launch Grunt. While this may sound a bit confusing, installing the Grunt CLI does not actually install the Grunt task runner. The CLI is used to launch whatever version of Grunt is defined in your package.json file (more on that file later). The advantage of this is that your projects can all use different versions of Grunt without concern for conflicts. The CLI does not care, it simply launches whatever version your project uses.

(You might need to use the sudo command when executing npm install, depending on your account priviliges.)

Note that in the example above the “-g” flag is used. This is recommended. It installs the module globally so that it can be executed from any folder on your machine, and need not ever be installed again.

package.json

Once you have installed the grunt-cli globally, you can put your project together. The first step is to create a package.json file. The package.json file is a feature of node.js. You can learn more about it here: https://npmjs.org/doc/json.html

In this example, we have named this project: “Grunt-Test-1”, and given it a version #. Both of these values are arbitrary, and completely up to you. But keep in mind that the “name” property is potentially used by Grunt in some cases, so choose a name that makes sense. The “devDependencies” property is an object that whos whose keys contain node modules that your project depends on. The value for each key is the exact (or minimum) version number required for that module.

The Project File Structure

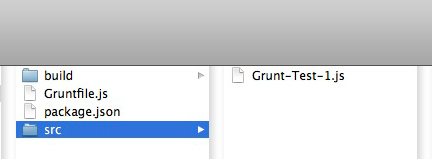
Image # 1: The project’s file structure

Once your package.json file is ready, simply run the following command: “npm install”. Node will refer to your package.json file in order to understand what it needs to install so that your project works correctly. Keep in mind that the “installation” is simply a download that is local to this folder. Its is not “installed” on your computer, like a native / compiled application.

Example # 1

For this example, we have only two dependencies: grunt, and grunt-contrib-uglify. The “grunt” requirement is critical because we want to use Grunt. Everything else is optional. But if grunt is the only dependency, then there won’t be too much we can do. Grunt plugins allow us to define tasks that can be managed by Grunt. The “grunt-contrib-uglify” plugin provides JavaScript minification and obfuscation. For this article, we will simply minify a JavaScript file and save it with a new name.

Once you have created your package.json file, you can install all required modules with two easy words: “npm install”. Entering that command in your terminal will allow you to leverage the Node Package Manager, otherwise known as: “npm” (make sure you are in the root folder of your project). The Node Package Manager will look for a file named package.json in the current folder, and read the devDependencies object. For each property of the “devDependencies” object, npm will download whatever file is specified by the version # you have provided as a value for that property.

One of the ways in which this approach is so helpful is that it negates the need to commit large files to your version control. Node modules are often a combination of text files (e.g. “.js”, “package.json”, “README”, “Rakefile”, etc.) and executables. Sometimes a combination of just a few dependencies can add several megabytes to your project, if not more. Adding this kind of weight to your code repository not only eats up disk space, but it is somewhat unintuitive because version control systems are really meant to store and manage text files that you (or your teammates) will change over time. Node.js modules are managed by the contributors of those modules, and you probably won’t need (or want) to change their source code. So, as long as your project contains the package.json file, whenever you (or anyone on your team) check out that repo, you can run “npm install” to the exact versions of the modules you need.

The Gruntfile

The Gruntfile is the JavaScript code you create to leverage the power of Grunt. Grunt always looks for a file named: “Gruntfile.js” in the root of your project. If this file does not exist, then all bets are off.

Inside of Gruntfile.js, all of your code will be wrapped in one function: module.exports.

Example # 2

In Example # 2, we have defined the “exports” method of the “module” object. Right now it does nothing, but all of your grunt code will go inside of this function.

Example # 3

In Example # 3, we make a call to the grunt.initConfig method. This method takes an object as its sole argument. In this object, we set properties that provide the details Grunt needs in order to work the way we want. Here we set one property: “pkg”. In order to set the value for that property, we tell grunt to read the contents of our “package.json” file. The main reason for this is that we can use the metadata that is stored in package.json, and use it in our tasks. The two delimiters: <% %> can be used to reference any configuration properties. For example: <%= pkg.name %> would display the name that you have given your project. In this case it is: “Grunt-Test-1”, but we could also access the version number of our project in this manner: <%= pkg.version %>.

Since we will be using the “grunt-contrib-uglify” plugin, lets update Gruntfile.js so that it is configured to leverage this plugin.

The Empty Build Folder

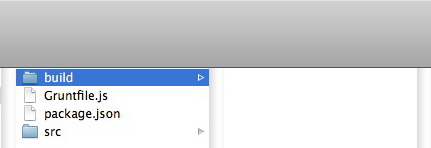
Image # 2: The empty build folder

Example # 4:

In Example # 4, we have added a new property to the config object: “uglify”, which provides the detail that the “grunt-contrib-uglify” plugin needs. This property is an object which, in-turn, has two properties that are objects. As the name suggests, the “options” property contains options for the “grunt-contrib-uglify” plugin. The “build” property is an object that provides two properties that are critical to the “grunt-contrib-uglify” plugin:

  • src: The location of the file to “uglify”
  • dest: The location where the “uglified” file will be placed

While we have provided some important details, running Grunt at this point will produce no results because there are no tasks specified. Let’s take care of that next:

Example # 5:

In Example # 5, we have made two changes: We load the “grunt-contrib-uglify” plugin, and then we register the default task, which in this case is: “uglify”. Notice that the “uglify” task is passed to the registerTask() method, as the sole element of an array. This array can contain as many tasks as you like, always represented as a string. The purpose of the “default” task is to let Grunt know that outside of any other named tasks that are registered, this is the list of tasks that should be executed.

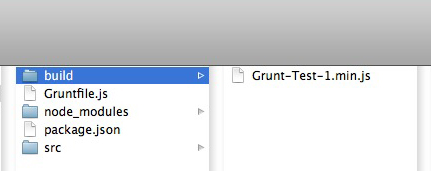
Now that we have provided the minimum details needed, we can run Grunt by simply typing “grunt” in the terminal. Once Grunt completes, you should see a new file in the “build” folder that is in the root of your project. That file should be named as per the details provided in the “uglify” section of the object passed to the grunt.initConfig() method. You’ll see that file has been “uglified,” meaning that it has been minified and obfuscated. The end result should be a significant reduction in file size.

The Built File
The Built File

Image # 3: The  built file

Summary

The example used in this article was very basic (about as basic as you can get!). My goal was to provide the critical base information needed in order to understand, setup and use Grunt for the first time. There is a great deal of power available from Grunt. While it may not fit everyone’s needs, it can, in many cases, provide a robust and actively maintained open-source framework with which to create simple or complex build processes.

Helpful Links for Getting Started with Grunt

http://gruntjs.com/

http://gruntjs.com/getting-started

http://net.tutsplus.com/tutorials/javascript-ajax/meeting-grunt-the-build-tool-for-javascript/

http://blog.mattbailey.co/post/45519082789/a-beginners-guide-to-grunt

Creating a Simple JSONP API with Node.js and MongoDB

Node.js

MongoDB LogoBy leveraging the Node.js middleware “express”, we can create functionality for viewing, adding or deleting JSON data.

In a previous article: “Using Mongoose ODM to Connect to MongoDB In Your Node.js Application,” we learned the basics about connecting to a MongoDB database in a Node.js application. Because that article barely skimmed the surface of what is possible, we’ll take a few more baby steps here with our data. And for the sake of brevity, I’ll skim over the Mongoose.js details. If needed, you can refer to the article mentioned above for more details on that.

The goals for this article are:

  • Allow the user to view all data in the database
  • Allow the user to make a JSONP call to get all data
  • Allow the user to add a new name to the Sales database
  • Allow the user to delete all data in the database

When completed, this will be far from a robust or production-ready application, but we will, at minimum, learn how to view / add / delete data in our MongoDB database, using clean URLs in the browser.

Dependencies

In order to use the code in this article, you’ll need the following installed on your computer:

Node.js
MongoDB

Installation of these components is beyond the scope of this article, but if you follow the provided links, you will be pointed in the right direction.

File Structure

  • app.js
  • package.json

For this article, we will need two files: app.js and package.json. So, in your project folder, create these two empty files. The following sections will explain what to put in them.

Example # 1A

In Example # 1A, we have the contents of package.json. Note that for a more detailed discussion about package.json files you can search this blog for helpful articles. The two dependencies declared are “mongoose” and “express”. When you use node package manager to install dependencies, npm will download and install mongoose and express for us.

Example # 1B

In Example # 1B we see the command needed to install the dependencies for our application. Once you run this command, you will have everything needed to start writing code.

Getting Started

Open app.js in your text editor. From this point on, you can copy / paste the code in each example into the app.js (or you can scroll to the bottom of this page and paste the entire code listing in one step).

Example #2

In Example #2, we declare all of the top-level variables we’ll need in our script. Take note of “app”, which will be used to leverage the express middleware that we listed as a dependency. Also, “initApp”, which is called from the very end of this script. It is used to start the HTTP server.

Example #3

In Example #3, we have our database implementation. The details are identical to those in the previously mentioned article, so we’ll skip over that.

Example #4

In Example #4, we get into something new. If you remember from Example #2, the variable: “app” is an instance of the Express middleware object. We use the .get() method of that object to define what will happen when certain requests are made. When users navigate to the root of our web application, they are presented with a simple message. We accomplish this by passing two arguments to the .get() method: a string representing the requests we want to respond to (i.e. “/”), and an anonymous function. That anonymous function takes two arguments: “req” and “res”, which represent the request that was made, and the response object that we will send back. We use the .end() method of the response object, and pass in the string we want to send to the browser.

The second call to the app.get() method responds to “/json/delete”. It, in turn, calls a function named: utils.deleteAllData(), which will be explained a bit later.

Example #5

In Example #5, we use the app.get() method to respond to the request: “/json”. For this request, we want to show all of the data in the database. We start off by requesting all of the data in the database: salesMember.find({}).exec(). The anonymous function that is passed to the exec() method provides access to an error object (if there is one), and the results of our search. In this case, the result object is JSON, which contains all the data in the database, which we then stringify.

We then use the utils.isJsonCallback() method to determine if the user added a callback function name to the query string. If so, we wrap our database JSON with the named callback. We then deliver the JSON by passing it to the res.end() method.

Example #6

In Example #6, we respond to a request to add a new user to the database (i.e. “/addUser”). If you remember from the top of the script, the variable “url” allows us to leverage the same-named Node.js module, which provides programmatic access to the URL. We then use the “url” object to access the query string for the new user parameters. Once we have that information, we can leverage code that is nearly identical to the previous article, to create a new document in the collection. So just think of this as adding a row to a database table).

Once the new data has been saved, we then end the response with some HTML, informing the user of the successful data addition, and add a link that allows them to view all data or go to the home page.

Example #7

Example #7 contains all of the utility functions used throughout our code:

utils.isJsonCallback : Returns true if a callback name was provided in the query string
utils.getJsonCallbackName : Returns the name of the callback provided in the query string
utils.wrapDataInCallback : Returns the JSON data, wrapped in the callback function
utils.deleteAllData : Deletes all of the data in the database

Note: At the end of Example #7 you will also see a call to initApp(). This simply starts the HTTP server.

Example #8

So finally, in Example #8 we have the complete code for our working example. You can start the application by navigating to the root of the folder that contains app.js and entering the following command in the terminal: node app.js.

NOTE: On line # 97 of Example #8, I escape the double quotes that are part of HTML element attributes. I did this only because the color-coding of the plugin used to make code more readable was being particularly difficult for some reason. You will likely need to surround that entire string in single quotes, and remove the escape characters: “\”.

Summary

In this article we leverage MongoDB, mongoose and express middleware to create a very basic JSONP API. By using the .get() method of the express object instance, we created functions that respond to specific requests. As a result, we were able to provide the user with functionality to view all data, retrieve all data as a JSONP call, add a user to the database, or delete all data.

Using Mongoose ODM to Connect to MongoDB In Your Node.js Application

Node.js

MongoDB LogoMongoose ODM simplifies the process of connecting to your MongoDB database in your Node.js application and working with the data.

If you are a JavaScript developer, using MongoDB as your backend database is a joy. If for no other reason, you get to think of and interact with data as JSON objects. This serves to solidify the case for Node.js: those of us who live and breathe JavaScript on the client side, can now extend our skill set to include server-side development using the language we love.

The quickest way to get up and running with MongoDB in your Node.js application is to leverage Mongoose ODM. The Mongoose website defines it as a : “…straightforward, schema-based solution to modeling your application data…”. That’s a little deep for me. Suffice it to say, it makes interacting with MongoDB incredibly simple.

In this article, our goal is extremely simple: connect to MongoDB, create a record and then show that record in a web page. While we will barely scratch the surface of what is possible, we will, at minimum, accomplish our modest goal. I’m sure that, as a programmer, you’ll get halfway through this code and realize how much more is possible. You can then take this very basic code, copy and paste it into your own application and then build a more robust solution.

Dependencies

In order to use the code in this article, you’ll need the following installed on your computer:

Installation of these components is beyond the scope of this article, but if you follow the provided links, they will point you in the right direction.

File Structure

  • app.js
  • package.json

For this article, we will need two files: app.js and package.json. In your project folder, create these two blank files. The following sections will explain what to put into them.

Example # 1A


In Example # 1A, we have the contents of package.json. I won’t spend too much time on this file. For a more detailed discussion about package.json files you can search this blog for helpful articles. I will point out that the single dependency declared is “mongoose”. When you use node package manager to install dependencies, npm will download version 3.5.7 of mongoose for us.

Example # 1B

In Example # 1B we see the command needed to install the dependencies for our application. In this case, the single dependency declared is “mongoose” version 3.5.7. Once you run this command, you will have everything needed to start writing code.

Getting Started

Open up app.js in your text editor. From this point on, you can copy / paste the code in each example into the app.js (or you can scroll to the bottom of this page and paste the entire code listing in one step).

Example # 2

In Example # 2 we have the variables that we need for our application. Here are the details:

http : a module built into node.js that provides http server methods
mongoose : will be an instance of mongoose, which we listed as a dependency
dbConnString : tells mongoose where the database is running
dbport : tells mongoose which port to use
salesSchema : will be explained a bit later
salesMember : will be explained a bit later

NOTE: I define salesSchema, salesMember and salesMemberDocument at the top of the script because it is a best practice to define all of your variables at the top of your script or function, even if you are not ready to initialize them.

Example # 3

Connecting to the MongoDB Database

In Example # 3, we start out by connecting to the database. The first argument is the connection string, which tells mongoose to find the database. The second argument is a function. Because this connection is an asynchronous event, the anonymous function that we pass as the second argument allows us to safely act upon the completed connection event. Like many Node.js callbacks, this anonymous function takes two arguments: “err” and “res” (which you can of course name anything you want). In the callback, we are interested in the error argument. If the error argument is “falsy”, then we can assume it’s safe to proceed. In this case, we simply log the appropriate console messages.

Defining a Schema

Next up, we define our database schema. Again, just to keep things simple, I won’t go into this in detail. Suffice it to say that we are telling mongoose how the data we will work with will be structured.

Defining a Data Model

Now that we have defined our schema, we call the “model” method of the mongoose object, assigning the resulting value to our variable “salesMember”. When calling mongoose.model, we pass the name of the collection as the first argument (i.e. “Sales”). If the collection does not exist, then it will be created. Simple, simple, simple. The second argument is the schema that will be used, which in this case is the variable “salesSchema”.

Finally, we call the “remove” method of our “salesMember” model, which empties out the collection. This will of course delete the data that we are about to create each time you reload the page. You can safely skip this code block so that each time you run the script and create a new entry in the collection, it persists.

Example # 4

Creating a Document in the MongoDB Collection

In Example # 4, we finally get down to business. Here we overwrite the “salesMemberDocument” variable with a new instance of the “salesMember” model. We pass it an object which represents the data for MongoDB document (you can think of this as a record in a database table and our “Sales” collection as the database table). We then call the “save” method of the salesMemberDocument object. This persists the data.

Example # 5

Starting the Server and Presenting the MongoDB Data

In Example # 5, we create an HTTP server and start it, and then immediately write a “200 ok” header, with the Content-Type of ‘application/json’ (we will present our data as JSON in the browser). Next, we call the find method of the “salesMember” model, passing it an empty object. This tells the “salesMember” model to return everything (i.e. all records in the database table). That method call takes an anonymous function as an argument. We check to see that there were no errors, and if not, we send the result of our find method call to the browser, courtesy of JSON.stringify().

Example # 6

In Example # 6, we have the complete code for our Node.js application. If you paste all of this code into app.js, and be sure that you have successfully executed that file in Node.js, open a browser, and then enter “localhost:5000” in the address bar, you will see the application in action.

Running the Application

In your terminal, navigate to the application folder, and then run the following command:

Example # 7

In Example # 7, we have the JSON data returned in the browser. If you followed the instructions in each step of this article, this is what you should see (although the value of “_id” will differ).

Summary

In this article we learned how to use Mongoose ODM to make a connection to a MongoDB database in a Node.js application. We learned how to define mongoose as a dependency and install it with npm (node package manager). We also covered how to connect to the database, instantiate the schema class, and define a model. In addition, we discussed how to create a new document, save it, and then retrieve it. While this article presented the most bare-bones information on the topic, I hope that it has provided the background you need to get started with MongoDB.

Helpful Links for Mongoose ODM and MogoDB

General

MONGOOSE BASICS: STORING DATA WITH NODE.JS AND MONGODB

Mongoose ODM

http://mongoosejs.com/

http://mongoosejs.com/docs/guide.html

https://devcenter.heroku.com/articles/nodejs-mongoose

MogoDB

http://www.mongodb.org/

http://docs.mongodb.org/manual/

http://en.wikipedia.org/wiki/MongoDB

http://mrbool.com/course/introduction-to-mongodb/323
Getting to Know the JavaScript element.classList Object

Object-Oriented JavaScript

JavaScript LogoNative JavaScript provides a way to access and manipulate all of the CSS classes that are assigned to an HTML element.

The JavaScript element.classList object is an instance of the JavaScript DOMTokenList object. It exposes one property and a number of methods that allow you to work with CSS classes that are assigned to an HTML element.

While it has been supported for some time by all major browsers, Microsoft Internet Explorer has, unfortunately, ignored JavaScript’s element.classList object until very recently (what a big surprise). If you need to support IE9 and below (and of course you do), then all bets are off. Bummer. That said, this object is nonetheless a super-helpful feature that makes CSS class manipulation a snap.

But what about jQuery?

There is no doubt that the jQuery methods hasClass(), addClass(), removeClass() and toggleClass() are all fantastic, but there ain’t nothin’ goin’ on under the hood that you can’t do yourself. And what is under the hood is tedious stuff like this:

This kind of code will soon join the ranks of the eight-track cassette and pagers. While that is the current reality of cross-browser CSS class list manipulation, the fact is that native JavaScript is always evolving, and as soon as Internet Explorer 10 becomes the IE standard, the JavaScript element.classList object will be yet another native JS tool to tuck into your belt.

The length Property

Even though the element.classList object is not an array, it is “array-like” in that it has a “length” property, and each CSS class name is represented by a numerically indexed property whose value is the name of that class (a string). This is super-helpful if you want to enumerate the classes that are members of this object. You could certainly grab an individual member’s value using bracket-notation: element.classList[0], a “for” loop, or the item() method, which is discussed next.

The JsFiddle link below demonstrates the classList object’s length property. The class “bar” is toggled when you click the element specified. On each click, the classList object’s length property is shown. Since a class is toggled, that length value changes with each click, which helps to demonstrate the dynamic nature of this property. Keep in mind that like any JavaScript array, the length property’s value will always be one higher than the index of the last element.

Here is the JsFiddle.net link for the classList object’s “length” property : http://jsfiddle.net/BmFZc/

The item() Method

The item() method allows you to reference a specific class name in the collection of class names. When you pass an integer to this method, it returns a string representation of the class name that matches that index. So keep in mind that this collection is zero-based. In the first JsFiddle link below, we manually reference a number of classes in the class list, using the item() method. In the second JsFiddle link below, we use a “for” loop to accomplish the same task.

Here is the JsFiddle.net link for the item() method: http://jsfiddle.net/N88x9/

Here is a second JsFiddle.net link for the item() method: http://jsfiddle.net/WE7gc/

The add() method

As you might expect, the add() method adds a class to the element’s class list. In the JsFiddle link below, you can see that the class “bar” is added to the element’s class list because the element’s appearance changes dramatically, as per the CSS that is specified.

Here is the JsFiddle.net link for the add() method: http://jsfiddle.net/uzMAx/

The remove() Method

In the manner opposite to the add() method, the remove() method removes the specified class from the element’s class list. Much like the example for the add() method, you can see that the class “bar” is removed from the element’s class list because the element’s appearance changes dramatically, as per the CSS that is specified.

Here is the JsFiddle.net link for the remove() method: http://jsfiddle.net/4h7m4/

The toggle() Method

The toggle() method will check to see if the element already has the specified class. If not, then it adds the class. If it does have the class, then it removes it. Depending on the scenario, this can minimize redundant code.

Here is the JsFiddle.net link for the toggle() method: http://jsfiddle.net/wWfNf/

The contains() Method

You can check to see if an element already has a class by using the contains() method. When you pass it a string name representing the class that you would like to check for, it returns true or false, indicating whether or not the element has the class you provided.

Here is the JsFiddle.net link for the contains() method: http://jsfiddle.net/wWfNf/

The toString() Method

The toString() Method simply returns a space-separated list of the classes that are applied to that element.

Here is the JsFiddle.net link for the toString() method: http://jsfiddle.net/GqzD5/

Summary

In this article we learned about JavaScript’s element.classList object. We demonstrated that while not exactly a JavaScript array, it is an “array-like” object with a length property, and some useful methods that allow you to work with the CSS classes that are assigned to an HTML element.

Helpful Links for the JavaScript element.classList object

https://developer.mozilla.org/en-US/docs/Web/API/element.classList

http://blog.alexanderdickson.com/manipulating-classes-with-javascript

http://tiffanybbrown.com/2011/08/15/class-manipulation-with-classlist/

JavaScript Array Management with Push(), Pop(), Shift() and Unshift()

Arrays

JavaScript LogoWhen you need to work with the first or last elements in a JavaScript array, the push(), pop(), shift() and unshift() methods are usually the best way to go.

Programmers who are new to JavaScript or come to it via languages such as PHP may find arrays a bit limiting. The main issue is usually the fact that in JavaScript, there are no associative arrays. While that may seem frustrating, associative array-like functionality can be achieved by leveraging the power and simplicity of objects. Although JavaScript arrays are restricted to numeric-based property names, they are otherwise quite flexible.

Since JavaScript array elements must have numeric property names, they are essentially anonymous. From a programmatic standpoint, the only array elements that you absolutely know anything about are the first and last elements in the array. And when an array has only one element, the first and last elements are one in the same.

The JavaScript Array object provides four very useful methods: push(), pop(), shift() and unshift(). To be precise, these methods belong to the Array object’s prototype property. We know this because every array you create shares a copy of these four methods (that is because every array you create is an instance of the Array constructor).

These four methods allow us to programmatically work with the only two elements of an array that we can be sure about: the beginning and the end. Every element between the first and last is a mystery to us because, from a purely programmatic standpoint, we have no idea how many there are or what they are. We only know that as long as an array has at least one element, it has a first and last element.

The JavaScript Array.push() Method

The JavaScript Array.push() method adds a new element to the end of the array. When doing so, the array’s length property increases by one. After adding the new element to the end of the array, this method returns the new length of the array.

Example # 1

In Example # 1, our array starts out with three elements. The first console.dir() call allows you to inspect it in your console and see that it contains only: ‘mon‘,’tues‘,’wed‘. We then use the Array object’s push() method to add a new element to the end of the array (“thurs”). Notice that when we do this, we wrap the call in a console.log() call, allowing us to see that the push() method has returned the new length of the array: 4. Then, another console.dir() call allows us to inspect the array, demonstrating that “thurs” was, in fact, added to the end of the array.

Here is the JsFiddle.net link for Example # 1: http://jsfiddle.net/4EHkp/

The JavaScript Array.pop() Method

The JavaScript Array.pop() method removes the last element from the end of the array. When doing so, the array’s length property decreases by one. After removing the last element from the end of the array, this method returns the array element that was removed.

Example # 2

In Example # 2, our array starts out with three elements. We then use the Array object’s pop() method to remove the last element from the end of the array (“wed”). Notice that when we do this, we wrap the call in a console.log() call, allowing us to see that the pop() method has returned the element that was removed from the end, which in this case is “wed”. Then, another console.dir() call allows us to inspect the array, demonstrating that “wed” was in-fact removed from the end of the array.

Here is the JsFiddle.net link for Example # 2: http://jsfiddle.net/VpJmu/

The JavaScript Array.shift() Method

The JavaScript Array.shift() method removes the first element from the beginning of the array. When doing so, the array’s length property decreases by one. After removing the first element from the beginning of the array, this method returns the array element that was removed.

Example # 3

In Example # 3, our array starts out with three elements. We then use the Array object’s shift() method to remove the first element from the beginning of the array (“mon”). Notice that when we do this, we wrap the call in a console.log() call, allowing us to see that the shift() method has returned the element that was removed from the beginning, which in this case is “mon”. Then, another console.dir() call allows us to inspect the array, demonstrating that “mon” was, in fact, removed from the beginning of the array.

The JavaScript Array.unshift() Method

The JavaScript Array.unshift() method adds a new element to the beginning of the array. When doing so, the array’s length property increases by one. After adding the new element to the beginning of the array, this method returns the new length of the array.

Example # 4

In Example # 4, our array starts out with three elements. The first console.dir() call allows you to inspect it in your console and see that it contains only: ‘mon’,’tues’,’wed’. We then use the Array object’s unshift() method to add a new element to the beginning of the array (“sun”). Notice that when we do this, we wrap the call in a console.log() call, allowing us to see that the unshift() method has returned the new length of the array: 4. Then, another console.dir() call allows us to inspect the array, demonstrating that “sun” was, in fact, added to the beginning of the array.

Summary

In this article, we learned about the JavaScript Array’s push(), pop(), shift() and unshift() methods. We also learned that all JavaScript arrays can leverage these methods to work programmatically with the beginning and end of the array, regardless of how many elements are in between. Additionally, we learned that in two cases, the new length of the array is returned, and in the other two cases, the element that was removed is returned.

Helpful Links for the JavaScript Array’s push(), pop(), shift() and unshift() methods

push()

https://developer.mozilla.org/en-US/docs/Web/JavaScript/Reference/Global_Objects/Array/push

http://msdn.microsoft.com/en-us/library/ie/6d0cbb1w(v=vs.94).aspx

pop()

https://developer.mozilla.org/en-US/docs/Web/JavaScript/Reference/Global_Objects/Array/pop

http://msdn.microsoft.com/en-us/library/ie/hx9fbx10(v=vs.94).aspx

shift()

https://developer.mozilla.org/en-US/docs/Web/JavaScript/Reference/Global_Objects/Array/shift

http://msdn.microsoft.com/en-us/library/ie/9e7b4w20(v=vs.94).aspx

unshift()

https://developer.mozilla.org/en-US/docs/Web/JavaScript/Reference/Global_Objects/Array/unshift

http://msdn.microsoft.com/en-us/library/ie/ezk94dwt(v=vs.94).aspx

Organize Your JavaScript Console Logging with a Custom debug() Function

JavaScript

JavaScript LogoEvery console.log() line in your JavaScript code has to be removed before pushing to production. With your own custom debug() method, you can safely leave all of your debug code in-place and just switch them “off” before going live.

The JavaScript console is an invaluable asset in the never-ending quest for sufficiently-tested code. For most JavaScript developers, a day at the office would not be complete without at least a few lines of debug code such as these:

But the problem is that code needs to be removed. That’s fine if it’s just a quick test. But what if there are 20 places in your code where you need to keep track of a value, trace program flow and logic, or test the return value of a function?” Well, that’s a lot of temporary code to keep track of and remember to delete. Even more frustrating is that in a month or two, when business wants more changes, you’ll probably wind up writing the same kinds of debug messages and putting them in the same places, only to have to search your script for “console” once again so that you can remove all of these debug statements before pushing to production.

There is certainly more than one way to skin a cat here, but a simple approach is to write your own custom debug function that shows messages, and knows when it should suppress those messages (i.e. when your code is running in production).

Creating a Custom Debug Function

First, let’s create a couple of functions that do things to objects. We’ll want to debug this code so that along the way, we can check to make sure that the functions are in-fact returning the object that is expected (combineObjects), or making the changes to the object that we pass in (arrayToUpper).

Example # 1

In Example # 1, we have created two simple objects. Let’s imagine that they were created separately somewhere else in our code, and need to be merged in order to create one complete “customer object”. We also have an array that contains the five days of the work week. This array has no functional relation to the two objects. The are all just variables that we can use to test our code.

The combineObjects() function takes two objects as arguments and returns a new object that contains the combined properties of the two original objects. The arrayToUpper() function takes an array as an argument and converts its string elements to upper-case.

For the sake of simplicity, I did not bother doing any kind of verification or type-checking in either method. In the real world, I highly recommend that these kinds of methods contain some kind of verification code at the top so that they fail gracefully.

For example, what if we passed two arrays to combineObjects()? Or what if arrayToUpper() received an array of functions as an argument? This is messy business. I’ve provided a few suggestion on how to create that kind of functionality in an earlier blog post: Validating JavaScript Function Arguments.

So, when you run Example # 1 in your JavaScript console, you will see that we have in-fact created a new object that is the sum of Obj1 and Obj2, and we have changed the array “myArr” so that all of its elements are now uppercase strings. But what I don’t like is that we have written two lines of “test” code that need to be removed at some point (i.e. the two console.dir() statements). I would like to include the testing in our functions so that we can simply call each function, not writing any special code that we need to keep track of and then delete before the production rollout.

Here is the JsFiddle.net link for Exampe # 1: http://jsfiddle.net/UnbVg/

Example # 2

In Example # 2, we have created a variable named “debugMode”. This tells our custom debug function whether or not messages should be output. If “debugMode” is set to “false”, then our custom debug function simply does nothing.

Ok, let’s look at our new “myDebug()” function. This function takes two arguments: a message and a callback. The message should be a string and if so, it will be output in the console. I tend to imagine messages such as “function getAccount started…” or “AJAX success callback fired….” etc. These are messages that your code can send to help “tell a story.”

The purpose of the callback is to allow for more complex messages. For example, you may want to inspect an object at that very moment. So, in addition to the text message, you can pass an anonymous function that contains a line such as “console.dir(myData)”. You could even include your “myDebug()” call inside of a “for” loop, inspecting the state of an object on each iteration of the loop. The sky’s the limit here. In general, I tend to feel that the text message and optional callback are enough for you to provide useful debugging messages for your app.

Example # 3 A

In Example # 3A, we have implemented our custom debug function: “myDebug”. Now we can simply call the functions combineObjects() and arrayToUpper() the way we normally would in our code. The “debugging” code that examines values and outputs informative messages now exists in the actual functions that do the work. When it is time to push this code to production, simply change the value of “debugMode” to “false”, and away we go. One line of code is all it takes to suppress all of our debug messages (see example # 3B below for a demonstration of this).

Here is the JsFiddle.net link for Example # 3A: http://jsfiddle.net/UnbVg/1/

Example # 3B:

In Example # 3B, we have set “debugMode” to “false”, which means that you do not see any debug messages. But to complete our proof-of-concept, we add two console.dir() statements to the end of our code, which demonstrates that the code once again, performed as expected and our custom debug method “myDebug” behaved exactly as designed: no console messages.

Here is the JsFiddle.net link for Example # 3B: http://jsfiddle.net/UnbVg/2/

Summary

In this article, we learned how to create a custom debug function. We discussed the value of minimizing “special” testing code that needs to be tracked and then removed before deploying to production. We also discussed how to design our custom debug function so that it can output text messages as well as execute anonymous functions. We also covered how to implement a very simple “off” switch. This will suppress any debug messages, which is recommended when pushing your code to production.

How Do I Create “if not” logic in my Mustache.js JavaScript Template?

JavaScript-Templating

Mustache.js LogoMustache.js provides a simple, yet powerful way to populate one piece of HTML many times with a data set. In this article, we’ll learn how to specify markup that will be rendered when there is an absence of data.

In an earlier post: “Mustache.js – The Absolute Basics“, we learned how easy it is to leverage Mustache.js for simple, yet powerful client-side templating. In that article, we saw that you can use your template to check and see if a data point has a value, and if so, render some markup.

But what if a “row” of data is missing one or more of its parts? In that case, we might want to render some specific markup that says “no data found”. When using Mustache.js, this is accomplished by using the following set of characters: {{^foo}}no data!{{/foo}}, where “foo” is our data point. Then, when Mustache.js sees that “foo” does not exist, or has a “falsy” value, it will render whatever HTML we put inside of the two specified tags. In this case, it would be the text: “no value!”.

In this way, we can create an “if not” logic, in which we are saying: “if there is no foo, or if foo is ‘falsy’, then render ‘no value!’.

Example # 1

In Example # 1, we have the data object that will be used in our template. Make note that not every user in the array has the same amount of data. Some people are missing either “region”, “phone” or “email”. This is important because we will introduce logic into our template that acts upon the absence of data.

Example # 2

In Example # 2, we have the HTML template that we will use with Mustache.js. You’ll notice that other than “name”, every data point is represented twice. First, there is an “if” condition, which is wrapped with these two tags: {{#foo}}Foo: {{foo}}{{/foo}}. What is being expressed here is: “if there is a value for the “foo” dataPoint, then show it. Then there is an “if not” condition wrapped with these two tags: {{^foo}}No Foo!{{/foo}}. In this case, Mustache.js is being told: If there is no value for “foo”, show this HTML.

Example # 3

In Example # 3, we have code that is virtually identical to that which we used in the Mustache.js basics article. First, we get a reference to our template: div#template, and then we use the Mustache.render method to fill the “output” variable with markup that has been populated with our data. Finally, we simply append this markup to the element with the “.box” class.

Here is a JS Fiddle link for our completed working example: http://jsfiddle.net/pg886/

Getting Started with the Google Maps JavaScript API – Part III: Adding an Event Listener

JavaScript

Google Maps LogoAdding an event listener to your map is much like using the addEventListener() method on a DOM element.

In Part II of this article, we learned how to add a marker to a Google Map. In Part III of this article, we will learn how to add an event listener to the map. The google.maps object has an event object. One of that object’s methods is called “addListener()”. It’s not too different from the .addEventListener() method that is used to add an event handler to a DOM element in a web page. The google.maps.event.addListener() method takes three arguments:

  • A target
  • An event
  • A callback

The callback can be a reference to a function declaration (or function expression), or an anonymous function. Inside of the callback, you respond to the user’s click.

Example # 1

In Example # 1, we used the the google.maps.event.addListener() method to set up an event handler for when the user clicks the marker on our map. Since we are building upon the demo from Parts I & II of this article, we pass-in “marker” as the first argument, which is a variable we created earlier, that represents an instance of the Marker() object.

Example # 2

In Example # 2, we instantiate the InfoWindow() constructor. The InfoWindow object is a pretty cool feature that provides abstraction for creating a great looking message window on the map. It takes care of rendering the message graphic, positioning it, and adds a nice touch with a shadow. We pass-in an object with the property: “content”. The value of that property is what will be shown in an info window when the user clicks the marker. We then call the open() method of the InfoWindow instance, passing-in the map and the marker as arguments. The open() method needs those objects in order to know where and how to display itself.

Example # 3

In Example # 3, we expand our event handler a bit. In addition to showing the info Window, we also switch the map to Satellite view, zoom it in, and make sure it is centered on the user’s location.

Here is the JsFiddle.net link for this article’s working demo: http://jsfiddle.net/uQ35v/2/

Summary

In this article we learned how to add an event listener to a Google Map. We discussed the google.maps.event.addListener() method, how to instantiate the InfoWindow() constructor, and how to show an info window.

Helpful Links for Adding an Event Listener to a Google Map

https://developers.google.com/maps/documentation/javascript/events

Getting Started with the Google Maps JavaScript API – Part II: Adding a Marker

JavaScript

Google Maps LogoMuch as with the map, creating a marker is done by instantiating the Marker() constructor.

In Part I of this article, we learned how to show a Google Map in a web page, using the Google Maps API. Now in this article, we’ll learn how to add a marker to the map. In Part I we created a function named “successHandler” which was passed as a callback to the getCurrentPosition() method of the navigator’s geolocation object. And inside of this function, we instantiated the Map() constructor of the google.maps object.

Example # 1

In Example # 1, we have the code that adds a marker to the map. When instantiating the Marker() constructor, we pass it an object literal, which then provides settings that the marker needs in order to display properly. The “map” property references the “map” variable that was created earlier in the scope of the “successHandler” function. Once again, we instantiate the LatLng() constructor, providing the user’s latitude and longitude values. Now the “title” property is a string and can be anything you like. It is the text that users will see when they mouse over the marker.

Example # 2

In Example # 2, we have the full-page markup for our working demo. This example builds upon the demo from Part I. So the code is virtually identical, except for instantiation of the Marker() constructor.

Here is the JsFiddle.net link for this article’s working demo: http://jsfiddle.net/uQ35v/1/

Summary

In this article we learned how to place a marker on a Google Map. In doing so, we learned that just as in the case with the map, we instantiate the Marker() constructor. We discussed how settings are passed into the constructor by using an object literal, and how to set the text that is displayed in the marker on mouse-over.

Helpful Links for adding a marker to a Google Map

https://developers.google.com/maps/documentation/javascript/examples/marker-simple