 It’s surprisingly easy to create a web-based application that works offline. The key to getting started is understanding the cache manifest File.
While native apps have enjoyed great popularity in recent years, there is still a case to be made for web-based pages that behave like native applications. A critical element to any “app” behavior is the ability to operate offline. The HTML5 Offline Web applications specification is well supported and allows you to implement this “offline” behavior quite easily.
The Cache Manifest File
The critical component here is the cache manifest file, which is specified by the “manifest” attribute. By simply adding a manifest attribute to your page’s HTML element, a browser will recognize that web page as being cacheable. The browser will then download every file specified in the cache manifest file. It is important to note that if any file specified in the cache manifest is not available, the cache is considered invalid and the page will not be available offline. For this reason, it is critical to check each resource and make sure that the path specified in the cache manifest file is correct.
Location of the Cache Manifest File
The Cache Manifest File can be located anywhere on your web site. Entries in the file can be absolute or relative, but relative paths are in relation to the manifest file itself, not the web page. Also, it is not a good idea to specify resources that are in a folder that is a descendant of the folder that the manifest file is in. For example, you don’t want an entry such as this: ../../index.php. Make sure that any resources specified in the manifest file are in the same folder as that file, or a sub-folder.
Every time you change one of your assets, whether it CSS, JavaScript, HTML or even an image file, you need to make some kind of change to the cache manifest file.
Content type of the Cache Manifest File
Your cache manifest file must be served with the mime type: “text/cache-manifest”.
When Is the Cache Updated?
This is an area that can be a bit confusing at first. In a nutshell, the browser will never (ever) download newer versions of your assets unless the cache manifest file changes. This is one of the reasons why comments are so helpful. It’s not enough to simply “touch” the cache manifest file; the actual binary must change. So, if you simply change a comment, the browser will see the cache manifest file as being newer than the one it has previously cached. If you have a comment in your cache manifest file that has a version #, that is a simple way to make sure that the browser will see it as having been updated.
This is where developers might start pulling their hair out. Let’s say you are working on an HTML offline web application. You change a CSS file, and then upload it. But you keep refreshing the page and nothing is changing. So you upload the CSS file again, but still nothing is happening.
What Gives??
The only way that the browser will download the updated CSS file is if the cache manifest file changes. So, every time you change one of your assets, be it CSS, JavaScript, HTML or even an image file, you need to make some kind of change to the cache manifest file. When the browser sees that the cache manifest file has changed, it will download any files specified that have changed.
Example # 1
|
1 |
<html manifest="manifest.appcache"> |
In Example # 1, we see that the HTML element in our page has a new attribute: “manifest”. The value of that attribute is the path to our cache manifest file. This value can be an absolute or relative path.
Example # 2
|
1 2 3 4 5 6 7 8 9 10 11 12 |
CACHE MANIFEST # version 1 # Explicitly cached files CACHE: index.php about.php contact.php style.css images/kevin.jpg images/html5-logo.png |
In Example # 2 we have the contents of our cache manifest file. The very first line: “CACHE MANIFEST” is required. The lines that start with the hash symbol (“#”) are a comment. Comments are completely ignored, but can be useful for reasons which will be discussed in part II.
Cache manifest files have four “sections”. In this example we see the “CACHE:” section. This tells the browser which files to explicitly cache. Although including a “manifest” attribute in your HTML tag tells the browser to cache the page, it is a good idea to specify all of the pages in your application in the “CACHE:” section. The reason for this is simple. If you do not list every page in the website, then users will need to browse directly to each one of those URLs in order for them to be cached locally. You won’t be able to simply visit “index.php” and then click “about.php”, because the browser will not have cached that file yet. If you specify every web page in your application, then they are all cached upon your first visit to any page in your application.
File Structure
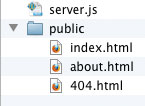
Image # 1
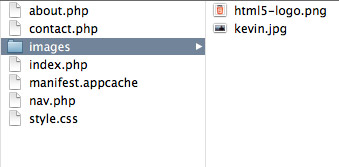
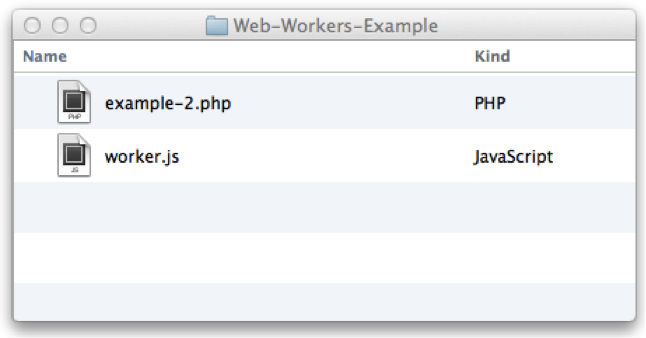
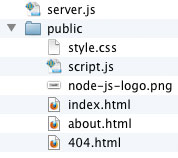
In Image # 1, we have the files that constitute our web application. There is not too much going on here as this is a very simple example. The main point is that the cache manifest file must be in the highest folder. Any resources specified in the cache manifest file must be in the same folder as the cache manifest file or a sub-folder.
Here is a link to the full working example for this article: http://examples.kevinchisholm.com/html5/offline-web-apps/example-1/index.php
The best way to demonstrate the “offline” functionality of our working example is to open the above link in your browser, and then turn your internet connection off. Once you have turned your internet connection off, you can then click “About”, “Contact” or “Home”, and in each case the requested page will be shown. One reason that I specifically used PHP files is that as we know, PHP files will only work when served from a web server that supports PHP (i.e. you cannot copy a PHP file to your desktop and then view it in the browser). Yet once the pages are cached, you will notice that you are able to view each PHP file even with no internet connection. This provides a slightly more dramatic “proof of concept” because we know that you can save an HTML file to your desktop and then view it in a browser. So, when you see XXX.PHP in your browser’s address bar, yet you know you are completely offline, then you know you are working from the offline cache.
Summary
In this article we learned how to get started with HTML5 Offline Web Applications. We learned about the cache manifest file and why it is such a critical component. In this discussion, we also covered important details such as where the cache manifest file must reside, the syntax used, and how to force the browser to download newer versions of your assets.
Helpful Links for HTML5 Offline Web Applications
http://www.w3.org/TR/2011/WD-html5-20110525/offline.html
https://developer.mozilla.org/en-US/docs/HTML/Using_the_application_cache
 Learn to master the tricky nature of asynchronous JavaScript with “Async JavaScript – Recipes for Event-Driven Code“. This short yet thorough book explains many concepts which not only demystify the subject, but also arm you with tools to architect smarter solutions.