
![]()
Let Node.js scrape the page and get the title, description, keywords and image tags for you
I recently built a web-based bookmarking application for myself using React. I was happy with the results and use the app every day. However, I found myself having to go back and forth between the app’s tab and the tab of the page I am bookmarking. First the URL, then the title, then grab an image from the page, and then manually enter keywords that make sense to me. Too much work. So I started to think that this was a perfect opportunity for some web page scraping.
On a high-level the game plan was:
- The user makes a POST request to the route: /scrape, passing a URL in the request body
- Secondly, we make a 2nd HTTP request behind the scenes, to the URL provided by the user
- Next, we take the response of that 2nd HTTP request and parse it out
- Finally, we take various values scraped from the HTML and return it to the user as a JSON response
Example Web Page
So, for demonstration purposes, I decided to create a simple web page that makes it easy to construct the initial HTTP POST request. Consequently, if you clone the Github repo below and follow the instructions, you can run the web page locally, enter a URL and then see the metadata scraped from the 2nd HTTP request presented in the web page.
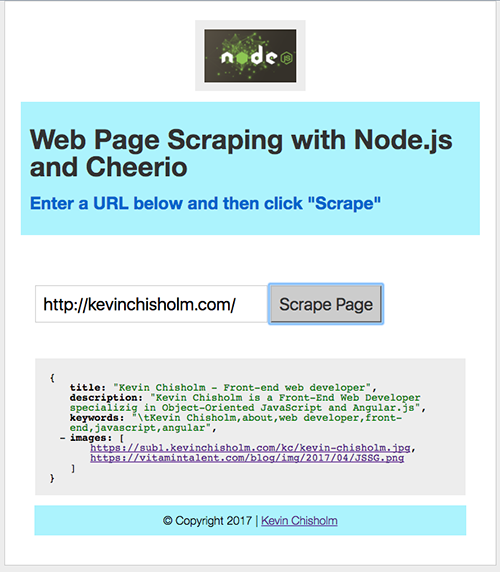
Image # 1 – The web-scraping application
If you look at the screen-shot above, you’ll see the web-scraping application that is available via the Github repo. In this screen-shot, I have entered the URL: http://kevinchisholm.com, and then clicked the button: “Scrape Page“. The result is that the title, description, keywords and a list of images appear in JSON format in the box below. All code examples below are taken from this application so you can see how the code works when you run it locally.
 |
Clone the example code here: https://github.com/kevinchisholm/node-cheerio-web-page-scraper (directions ca be found on the repo page) |
Example # 1 – SETTING UP THE ROUTE HANDLER
|
1 2 3 4 5 6 7 8 9 10 11 12 13 14 15 16 17 |
app.post('/scrape', function(req, res){ res.setHeader('Content-Type', 'application/json'); //make a new request to the URL provided in the HTTP POST request request(req.body.url, function (error, response, responseHtml) { var resObj = {}; //if there was an error if (error) { res.end(JSON.stringify({error: 'There was an error of some kind'})); return; } //much of the work we do will go here.... }) ; }); |
In Example # 1, I set up a route handler for the /scrape route. So when the user makes an HTTP POST request to /scrape, the anonymous function is executed.
Inside the route handler, we use the request object to make another HTTP request. The URL of the request is provided via the user’s HTTP POST request. In other words, we look at the req argument that is passed to the route handler, which is the request object, and grab the body.url property. Next, an anonymous function is passed. In similar fashion, that function takes an error object, a response object, and a responseHtml object as its arguments. We then do a quick test to see if there is an error object, and if so, we therefore exit (just to keep things simple). I’ve chopped out the rest of the implementation code so that it is easier to understand how we got this far.
Example # 2 – INSIDE THE 2ND HTTP REQUEST
|
1 2 3 4 5 6 7 8 9 10 11 12 13 14 15 16 17 18 19 20 21 22 23 24 25 26 27 28 29 30 31 32 33 34 35 36 37 38 39 40 41 42 43 44 45 46 47 |
//create the cheerio object resObj = {}, //set a reference to the document that came back $ = cheerio.load(responseHtml), //create a reference to the meta elements $title = $('head title').text(), $desc = $('meta[name="description"]').attr('content'), $kwd = $('meta[name="keywords"]').attr('content'), $ogTitle = $('meta[property="og:title"]').attr('content'), $ogImage = $('meta[property="og:image"]').attr('content'), $ogkeywords = $('meta[property="og:keywords"]').attr('content'), $images = $('img'); if ($title) { resObj.title = $title; } if ($desc) { resObj.description = $desc; } if ($kwd) { resObj.keywords = $kwd; } if ($ogImage && $ogImage.length){ resObj.ogImage = $ogImage; } if ($ogTitle && $ogTitle.length){ resObj.ogTitle = $ogTitle; } if ($ogkeywords && $ogkeywords.length){ resObj.ogkeywords = $ogkeywords; } if ($images && $images.length){ resObj.images = []; for (var i = 0; i < $images.length; i++) { resObj.images.push($($images[i]).attr('src')); } } //send the response res.end(JSON.stringify(resObj)); |
In Example # 2, we have the rest of the code that goes in the handler for the behind-the-scenes request. First of all, the resObj variable represents the object that will be returned to the user as JSON. Furthermore, the $ variable is an important one. It represents a jQuery-like function that allows us to query the DOM of the HTML returned by the 2nd HTML request.
Creating the metadata for the JSON response
Following the $ variable, we create the variables: $title, $desc, $kwd, $ogTitle, $ogImage, $ogkeywords and $images. The first six variables represent meta data scraped from the HEAD section of the HTML. On the other hand, the $images variable differs a bit in that the values in that HTML collection are scraped from the BODY tag of the page.
View the full code for app.js here: github.com/kevinchisholm/node-cheerio-web-page-scraper/blob/master/app.js
Over the course of the next few dozen lines of code, we just check to see if each variable has a value. If it does, we therefore add it to the resObj object. In other words, we want to avoid any errors as we construct our JSON response. Similarly, for the $images variable, we first make sure that the collection has length. Secondly, we use a for-loop to gather up all of the image href values and add them to the images property of the resObj object, which is an array.
Summary
For this article, I focused on how the /scrape route handler is set up to handle an HTTP POST request and then how the 2nd HTTP request is made and subsequently handled.
To be sure, there is a fair amount of code that I left out for the sake of brevity. Mainly, I did not discuss package.json, the variable declarations at the top of app.js, or the contents of the www folder because that might have made the article quite long. If you clone this repo, follow the instructions and then run the app, it should be very easy to follow the code and understand what is happening .